

Also Includes


StitchArtist is a journey many years in the making, and has been designed for ease-of-use and digitizing education. The process of design creation, commonly called ‘digitizing’, requires a skilled person using a specialized tool. StitchArtist is that tool, but it is designed to take the difficulty out of the software, leaving the user to concentrate on their designs.
In a radical departure from the typical digitizing interface, StitchArtist uses a single mode to draw, set stitches, size, edit, rotate, sequence and set properties of design objects. It is easy and intuitive once you know the very basics
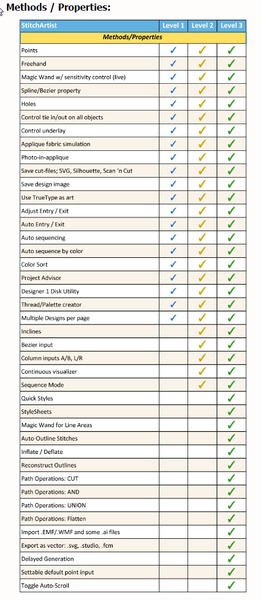
StitchArtist comes in levels which suit different skill levels:
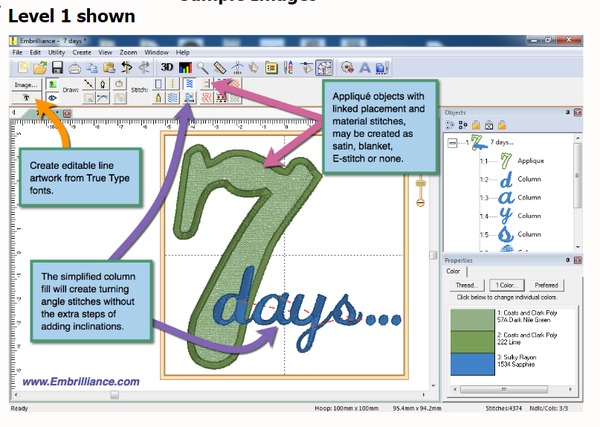
Level 1
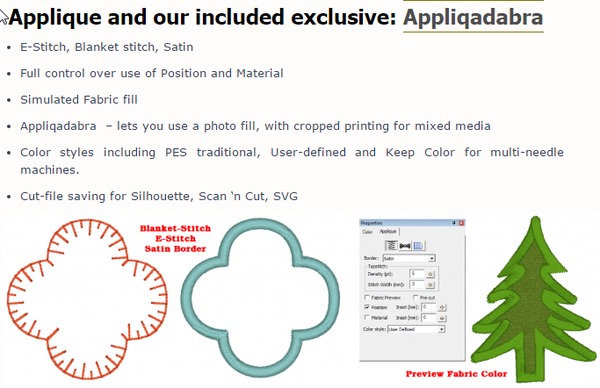
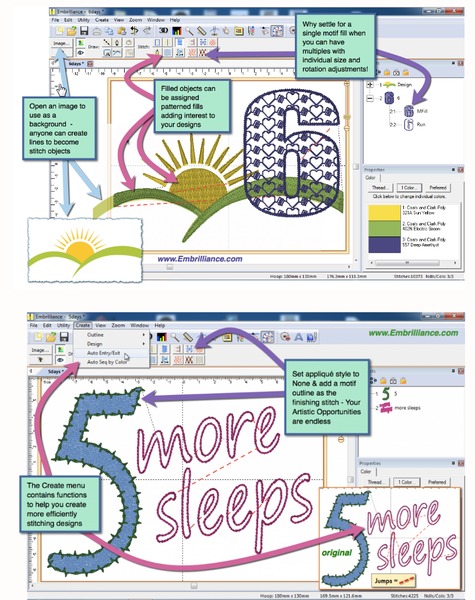
Level 1 is designed for a hobby embroiderer who needs to be able to create stitches without going into debt or spending much computer time. Level 1 offers a limited set of stitch types and, more importantly, properties for those stitches, so that the user can simply ‘create’ without needing to learn many steps. Typical projects for Level 1 are applique designs, running stitch designs and simple filled shapes, backgrounds or unifying elements for design compositions etc.
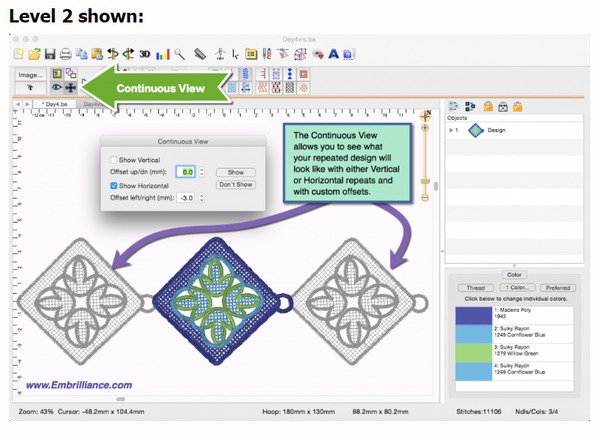
Level 2
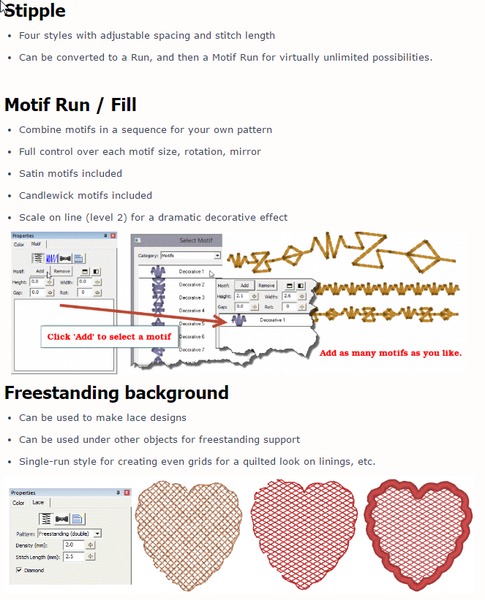
Level 2 includes Level 1 and is designed for production and skills training for those who would like to create more sophisticated designs (logos), as well as a more complete set of tools. It will allow the user to learn a wide cross-section of stitch types and properties, and have enough freedom to create virtually any design. If you are looking to use satins to their fullest extent, this is where you need to look. You can also import .SVG art and some cutting file formats (.FCM and .studio) for cross-purpose use.
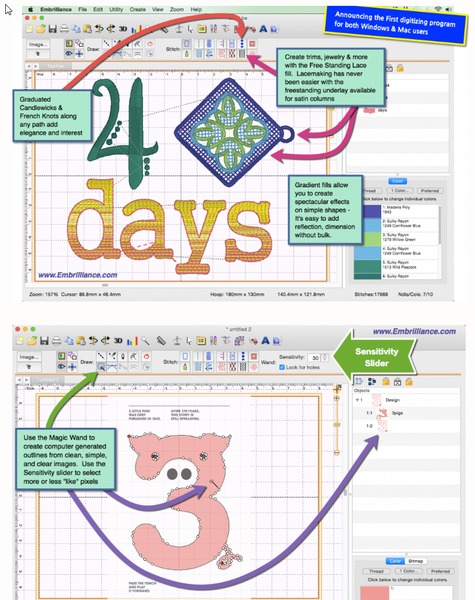
Level 3
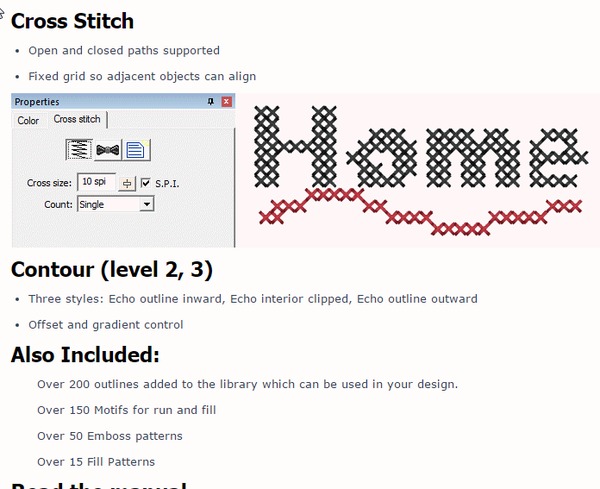
Level 3 includes Level 1 and Level 2 and is designed for someone who either loves to create designs or works commercially in the embroidery field. This level includes advanced items such as Styles, QuickStyles, an Eyelet tool, Carving lines, graphical operators such as Cut, AND, Union, Flatten, Inflate/Deflate, Re-construct and Break. It also allows for the content within the product to be expanded by publishing Motifs and Embossed effects. Additional controls are available to work how you like. The properties for each stitch type are fully revealed, and operations for vector support, including export, are added; now you can draw .svg and cutting machine designs directly. There’s even a tool to automatically outline existing design stitches.
Tell me more…
StitchArtist is not a photo-to-stitch tool, nor is it an autodigitizing program. The results of those are very subjective, and there are plenty of tools to do those in the market. When we find a process that is good enough for us, we’ll produce it. Meantime, straightforward design creation is the focus of this product. If you want to make designs for hobby, cottage industry or professional use, this is for you. If you really want to learn to digitize, this program has been designed for simplicity and instruction from the ground-up.
It is not a customizing tool (used to manipulate existing designs.) It does not contain Essentials or Enthusiast, although it does run within the Embrilliance Platform so the user interface is consistent. You can purchase StitchArtist by itself if desired; it does not rely on any other purchased product, nor is it an upgrade of any other product.
How to use Envelopes in Embrilliance
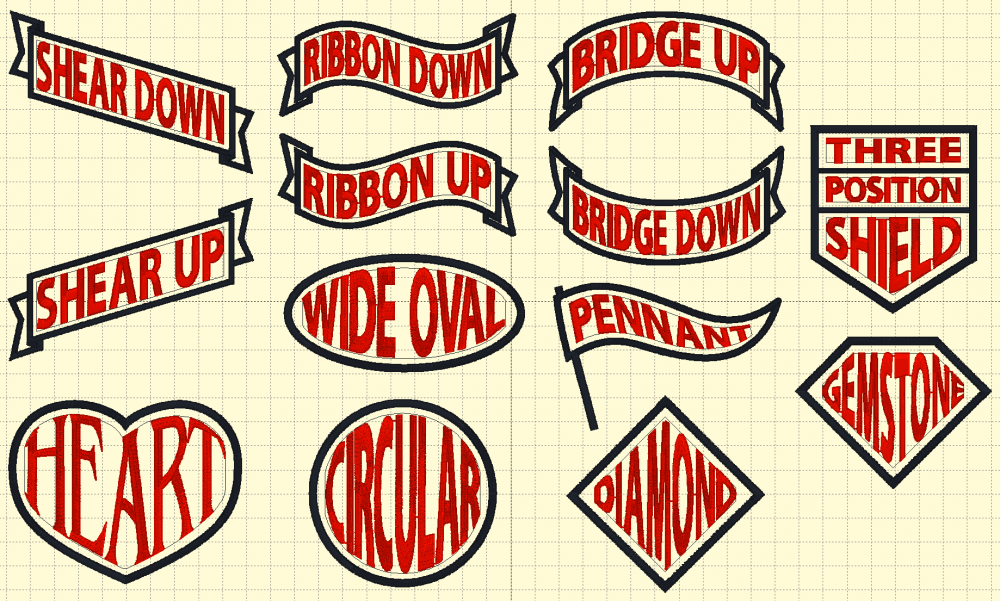
With the recent gold release of the 1.161 update, all Embrilliance Platform programs gained text-formatting superpowers! As part of this incredible update, users of all platform programs who update to version 1.161 now have the ability to use Envelopes. These specially-formatted shapes which can be created in any level of StitchArtist software can warp and arrange text to create incredible decorative effects.
Step 1. Install the Envelopes 1 Library
First, make sure that you are running the latest version (1.161+) by clicking About in the Help menu. Check for the version under the yellow needle icon in the resulting window.
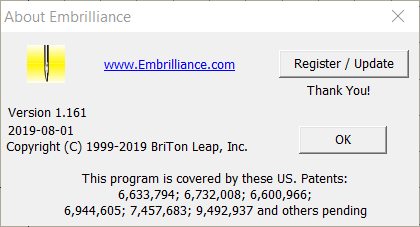
*Note: If you running a version previous to the latest 1.161, Envelopes will not function.
Step 2: Select an Envelope Design
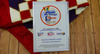
Once you have the library installed, create a new design page in your Embrilliance Platform program by clicking New Page under the File menu. With your new page created, click the Merge Design button on your toolbar to open your libraries. In the Catalog drop down menu at the upper left of the Library window, you will find a category titled Embrilliance: Envelopes. Select this category and the banners, ribbons, and shapes of Envelopes 1 will appear in the main library window as shown.
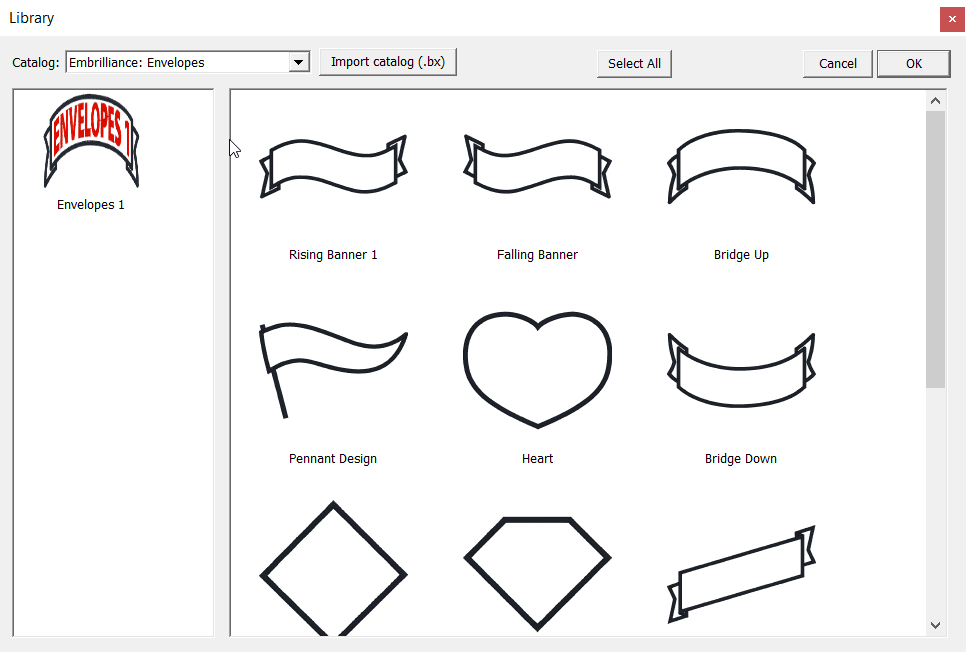
Embrilliance Embroidery Software library showing Text Envelope designs with satin stitch borders
Find and select your preferred envelope design. With the design highlighted, click the OK button at the upper right to merge the design into your new design page as shown.
Embrilliance Essentials with Word Art / Text Warping Envelope Design Merge
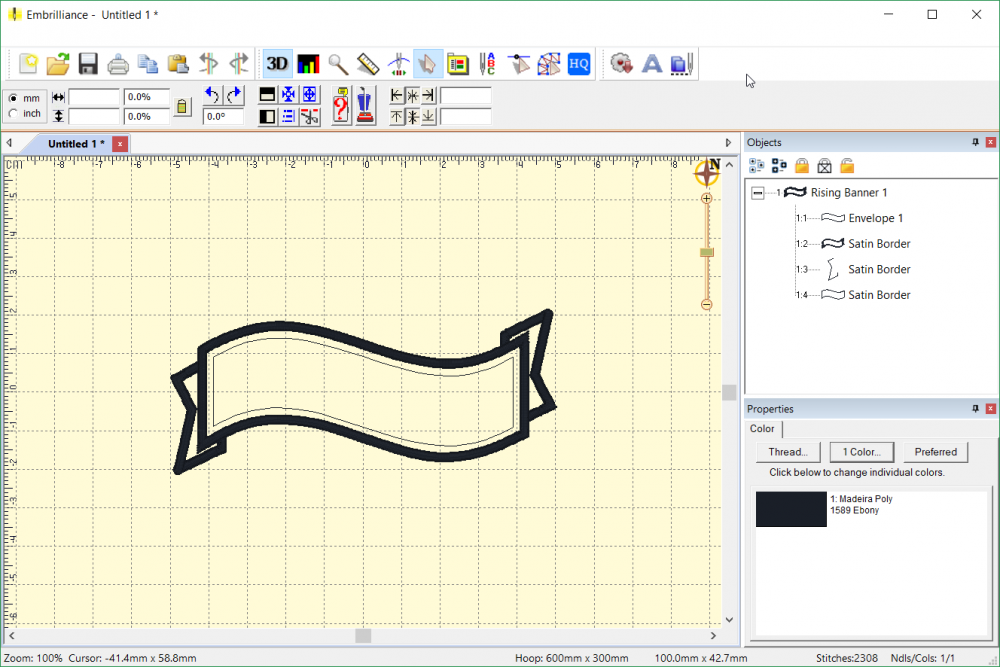
You'll see that there are several new objects in the Objects pane at the right side of the design area. The first in the sequence is our Envelope shape. In this Ribbon Up design, the Envelope shape is named Envelope 1. This is important to remember, as the number after its name is how we'll connect our lettering object to this envelope in the next step. Looking through the rest of the objects reveals the Satin Border elements that make up the banner design. These are not necessary for the Envelope to function, but they do make a lovely frame for the shaped text we are about to create.
Step 3: Add Lettering
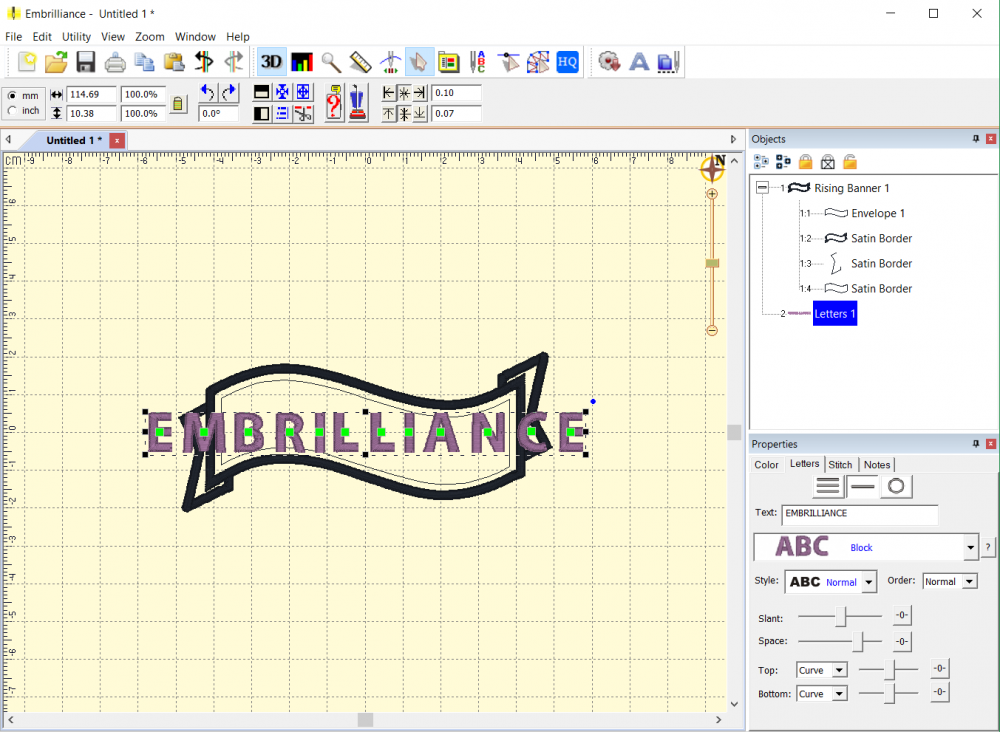
Now that we have our Envelope shape in our design page, we are ready to add our lettering object. Where the lettering object is in the sequence of our design won't matter to the Envelope tool, just as long as it comes after (below) its Envelope in the object tree. Since the Envelope shape is first in our design, we can simply click the Create Letters tool on our toolbar to create a new Lettering object on top of our existing design. At first, nothing will change about our lettering object; for the software to know that we want to use a particular Envelope with a Lettering object, we need to add the number of our Envelope to the name of the Lettering object we want to shape.
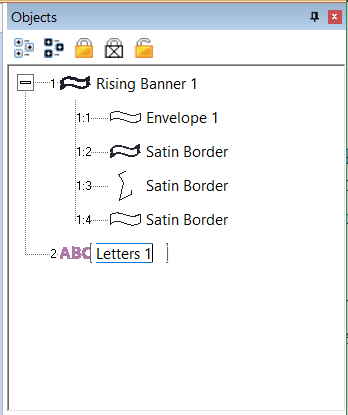
To attach our lettering object to the Envelope, we'll double click on the name of the lettering object, allowing us to edit the object name. Once we can edit the name, we will simply add a number that corresponds to the number of the Envelope we want shape this particular lettering object. The number itself doesn't matter, all that matters is that the number matches that in the name of our Envelope. In this case, we'll change the lettering object's name to "Letters 1" and press the enter key to confirm. At this point, the lettering will not have changed shape.
Lettering Object added atop Envelope Shape in the Embrilliance Platform
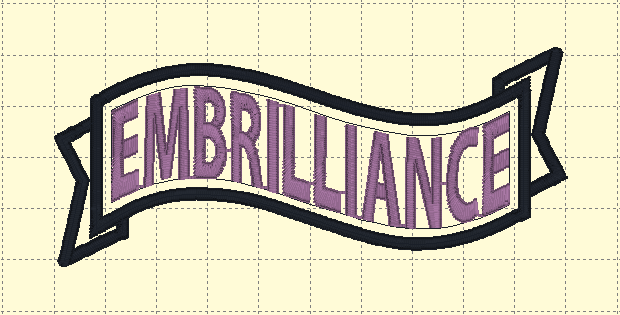
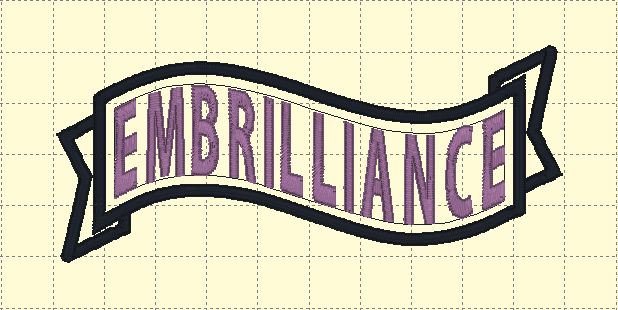
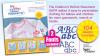
To finish the process, select the Letters 1 object, and change the default "ABC" text to whatever you'd like to appear in your design. Press the enter key when finished, then click the design page away from the lettering object to deselect it. Like magic, your letters will now take the shape of the Envelope to which they are attached.
Embrilliance Embroidery Text in an Envelope Ribbon Design
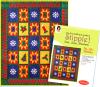
Note: Your design page can contain multiple envelopes to create a template! To use a multi-envelope template like the Three Position Shield from the Envelopes 1 library, follow these same steps for each envelope shape, making sure to name each Lettering object with the number corresponding to the desired envelope.
Editing Lettering
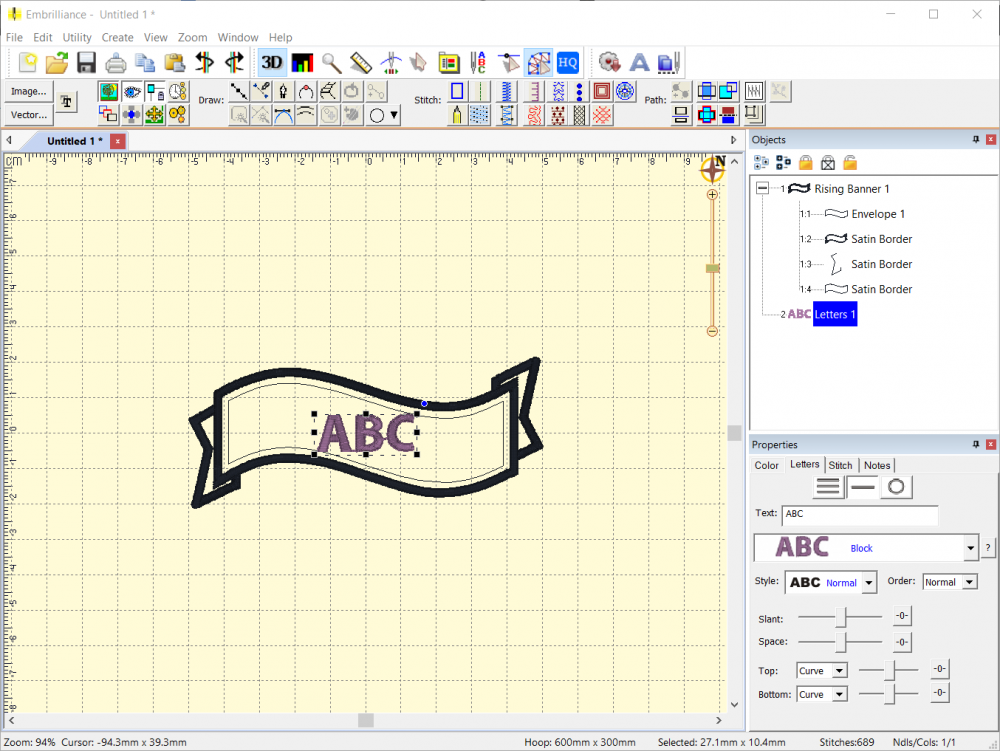
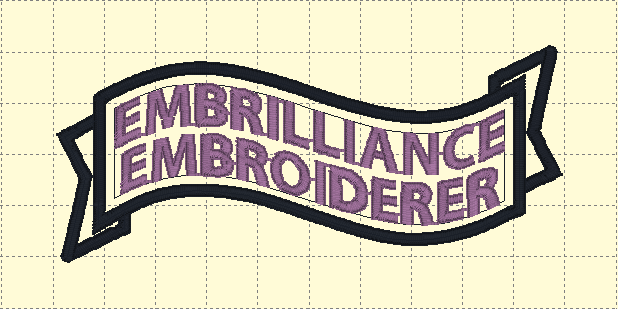
If you want to change anything about your lettering, you can select the lettering object and make changes. This includes operations like changing the position of the letters manually, changing the slant or spacing of the letter, or changing the text itself. When the lettering object is selected, it will revert temporarily to the unshaped form as shown below, making it easy to see your changes.
Editing and Spacing Lettering in Embrilliance Embroidery Software
Once any alterations have been made, simply click the design page away from the lettering object to deselect it and the lettering will snap back into the attached Envelope shape. You'll see that the envelope shape is applied to the changed lettering object. In this example, the spacing between letters was increased dramatically which can be seen in wider spacing present in the final Enveloped lettering shape.
Note: You can also use Envelopes with Multi-Line text! Simply select the Multi-Line text tool in the Letters tab of the Properties pane and customize your text. Remember, however, that no matter what text you place in an envelope, your satin stitches must maintain the minimum size and spacing needed to stitch correctly.
Take time to Play!
Now that you know how to use envelopes, the best way to get results is to let yourself experiment. Take some time to play with these designs, try your favorite fonts to see how well they warp, and see where your muse takes you. The opportunities for creativity are endless!
Click here for FREE His and Hers patch designs!
- US Warranty 30 days replacement if defective.
- Non-US Warranty: 30 days parts and labor
StitchArtist Digitizing Fans is all about digitizing in StitchArtist and with over 101,000 members it is amazing to see the successful projects created by both new and experienced digitizers. Our customers are a fabulous sales force - they can't help but tell everyone how much they love to use their software.
The Brilliant Embrilliance Facebook Group has over 25,000 members and chat about all the Embrilliance programs - what they are doing with the software and creating at the machine! The StitchArtist Digitizing Fans is all about digitizing in StitchArtist and with over 101,000 members it is amazing to see the successful projects created by both new and experienced digitizers. Our customers are a fabulous sales force - they can't help but tell everyone how much they love to use their software.
Embrilliance has a strong presence on social media - our Facebook page has over 101,000 active followers! From projects, inspiration and the all time favorite Tool Tip Tuesday - our fan base actively interacts with our page with likes, comments and shares of our daily posts.
Hours of instruction available on the Embrilliance youtube channel Embrilliance has a strong presence on social media - our Facebook page has over 101,000 active followers! From projects, inspiration and the all time favorite Tool Tip Tuesday - our fan base actively interacts with our page with likes, comments and shares of our daily posts.

Vee Anderson recommends AllBrands.com Metairie: "I took the Stitch Artist 1 class today. It was very informative and much easier than expected. Helen was fantastic and very knowledgeable of the software. Metairie store is great."
Recommended Accessories
Other Items You May Be Interested In
-
Bernina 033881.71.00 Designer Plus 7 Embroidery Digitizing Software for Windows 7
Free Ground Shipping to the Contiguous USA -
Bernina 034275.71.00 DesignWorks Base Embroidery Software with Dongle
Free Ground Shipping to the Contiguous USA -
Bernina 036738.72.01 Embroidery Software Update Designer Plus from Versions V5/V6/V7 to Version V8.2 , Download Reference Manual*
Free Ground Shipping to the Contiguous USA -
Brother PE-Design PLUS2 New Upgraded Version V1.01 Basic Digitizing and Photo Stitch Embroidery Software for up to 12x8in Hoop Machines
$499.99 Free Ground Shipping to the Contiguous USA -
Brother PE-DESIGN10 PE Design Palette Full Version v10 Embroidery Digitizing Software with Patch, Applique, Cutwork Wizard (See Trial Version*)
$999.99 Free Ground Shipping to the Contiguous USA -
Brother PE-Design Next (Babylock Palette) v9 Embroidery Design and Digitizing Software
$499.99 Free Ground Shipping to the Contiguous USA -
Brother SABESLET4 BES4 Dream Embroidery Lettering Monogram PC Software, Includes Wireless Card Upgrade Kit, Simply Applique and Initial Stitch Modules
$599.99 -

Brother SABESSADL Simply Applique Creative Embroidery Lettering Software for PC, Resize, Save, 206 Applique Designs +12Fonts, 131 Embroideries +8Fonts
$199.99 Free Ground Shipping to the Contiguous USA -
Brother SARES Apple Macintosh MacBroidery Lettering Monogram Software *6 Extras $20 Values! Reduced $50 More. Will not be updated for High Sierra.
$399.99 -

Brother SAVRPED10 PEDesign ECS10 Babylock Palette to V10 Embroidery Software Upgrade from v5 to v9 Next w/ Digitizing, Patch, Applique, Cutwork Wizard
Free Ground Shipping to the Contiguous USA -
CIM10 Embrilliance Convert It Mac Macintosh Embroidery Design Software Browse Images, Text, Unzip, Colorize, Thread, Convert, Read, View, Write, Print
$119.00 Free Ground Shipping to the Contiguous USA -

Creative DRAWings Wings My Editor Embroidery Editing Software Trial Download
-
DIME Inspirations Vintage Chic Embroidery Software, 1500+ Designs, 18 Fonts for Mac and Windows
$599.00 -
DIME CD00100 Embroider It Yourself Scrumptious Sweats CD Video
$39.99 Free Ground Shipping to the Contiguous USA -
Designs In Machine Embroidery Adorable Décor for Children Designs Includes 9 celestial designs
$39.99 Free Ground Shipping to the Contiguous USA -
DIME Designs in Machine Embroidery 1 Step Quilting & Applique Stipple! Aqua Flame - 8 Designs, 12 Blocks, 2 Borders, 1 Square cornerstone
$29.99 Free Ground Shipping to the Contiguous USA -
DIME Designs in Machine Embroidery 1 Step Quilting & Applique Stipple! Autumn Leaves - Download
$29.99 -
Digitizing's Sew Easy Version Book, 1015 Pages for Brother PE Design 10 and Babylock Palette V10 Embroidery Software, By Cynthia Cindy Hogan
Free Ground Shipping to the Contiguous USA -

Dime PPK0010 Perfect Placement Kit: 15 Templates, 36 Stickers, Ruler, 20 Page Book, for 4x4 Inch Hoops* It Can't Be This Simple!
$40.99 Free Ground Shipping to the Contiguous USA -
Electric Quilt ASTITCH EQ Stitch Embroidery Quilting Applique Redwork Digitizing Software DVD, Plug-In for EQ7, Video, 6 Lessons, 500 Built In Designs
$249.95 Free Ground Shipping to the Contiguous USA -
Embrilliance AlphaTricks AT10 Alphabet Design Software CD for MAC/Windows
$95.00 Free Ground Shipping to the Contiguous USA -
Embrilliance DRK10 Density Repair Kit Software for MAC/Windows
$128.95 Free Ground Shipping to the Contiguous USA -
Embrilliance Enthusiast EHF10 Editing, Design Splitting, Customizing Embroidery Software CD for MAC/Windows
$179.00 Free Ground Shipping to the Contiguous USA -
Embrilliance Essentials B1510 Basic Embroidery Graphics Software CD for Macintosh and Windows Computers, Splitting Designs for Multi Position Hoops
$139.99 Free Ground Shipping to the Contiguous USA -
Embrilliance FNT01 Fonts Col 1: Summer, Bethany, Elementry, Carnival, BigD,Princess,Fancy, RoundUp, Izzie, Monogram, Mendocina, Penc, Tiberius, Script
$69.00 Free Ground Shipping to the Contiguous USA -

Embrilliance Stitch Artist SA110 Level 1, SA210 Level 2, or SA310 SA Level 3 Complete Embroidery and Digitizing Software CD for Windows or Macintosh
$169.00 Free Ground Shipping to the Contiguous USA -
Embrilliance EMT10 ThumbNailer Embroidery Design Software CD for MAC & Windows, Create & View thumbnail images
$39.99 -

Embroidery Office D50 Design Max Basic Digitizing Software, Complete Group of Tools to Create Embroidery Designs
Free Ground Shipping to the Contiguous USA -
Floriani MDA My Design Album Embroidery Software for Cataloging Designs, Includes Updated Image Maker Software
$299.99 Free Ground Shipping to the Contiguous USA -

Floriani Total Control F-TCU FTC-U Embroidery Digitizing Software
$1,899.00 Free Ground Shipping to the Contiguous USA -
DIME PPKC0010 Designs In Machine Embroidery The Children’s Perfect Placement Kit For Embroidery, 16 Templates +30 Stickers +104 Designs
$39.99 Free Ground Shipping to the Contiguous USA -
DIME STP0040 Stipple! Ho Ho Holiday CD, 8 Designs 2 Sizes, 1 Step Quilting and Applique
$29.99 Free Ground Shipping to the Contiguous USA
