 |
October 31, 2024 |
Alphasew P60876 Universal Cap Hat Hoopster Frame 5.25x4.5" Fits Inside 6.25x5.25" or Larger Embroidery Hoops, Clamp Holds Brim Down, Add Sticky Stab
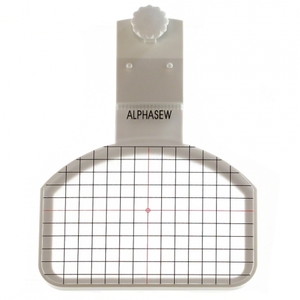 38: Alphasew P60876, ST878 Universal Cap Hat Hoopster Fits Hoops from 5-1/4"x6-1/4" or Larger" |
Our Price: $39.99 Prices are subject to change, and only current prices will be honored. Availability: Usually leaves the warehouse in 2-3 business days. Condition: New In Box |
Features
Create exquisite embroidery designs on baseball-style cap crowns with the universal cap hoopster!
Use Sticky Adhesive Stabilizers listed under Recommended Accessories below.
Easily attaches to your embroidery hoop and firmly clamps the visor into place to embroider your design. Your hoop must be larger than 5-1/4" x 6-1/4" with thickness of hoop 1/4" or less.
The Cap Hoopster comes with a template grid to assist you with proper placement of embroidery designs.
NOTE: Does not work with Simplicity SE3 Embroidery machine or the Baby Lock Ellegante machine.
It also will not work with 4x4 embroidery hoops.
- Cap Hoopster allows you to embroider on a typical baseball style cap
- Clamps to embroidery hoops larger than 5.25" x 4.5"
- Cap bill is held down outside your regular hoop
- Measures: 6-1/4" W x 8-3/4" L
- Requires sticky stabilizer such as those at
Stabilizers
Singer Futuras
Janome 300E and up
Bernina 330,340 by Janome
Brother/Babylock 5x7" Hoops and up
Viking, Pfaff, Singer Quantum
Futura Hoops over 5x6 or 6x5
# P60876
[BABYLOCK] - EM1, EM2, ESI, ESE
[BERNINA] - 180, 185, 190
[BROTHER] - PC7000, PC7500, PE100, PE150, PE200, PE8200, PE8500, ULT2001, ULT2002, ULT2003
[ELNA ] - 9006
[NEW HOME] - MC10000, MC5000, MC9000
[PFAFF] - 7500
[SINGER] - XL1000, XL5000
[VIKING] - #1, #1+, Designer I & II
* Makes the cap embroideryeasy-simply attaches to the machinehoop.
* A special clamp firmly holds the visor, securely keeping the cap in place throughout your projects.
* Including a transparent template with grid marking to ensure proper design placement.
* With the Cap Hoopster, you will be able to embroider beautiful designs on caps.
Extended US Warranty: 30 days replacement if defective.
Non-US Warranty: 30 days parts and labor.
Specifications
It will not fit Janome 8000, etc and Singer XL100 series BABYLOCK - EM1, EM2, ESI, ESE BERNINA - 180, 185, 190 BROTHER - PC7000, PC7500, PE100, PE150, PE200, PE8200, PE8500, ULT2001, ULT2002, ULT2003 ELNA - 9006 NEW HOME - MC10000, MC5000, MC9000 PFAFF - 7500 SINGER - XL1000, XL5000 VIKING - #1, #1+, Designer I & II Makes the cap embroidery easy-simply attaches to the machine hoop. A special clamp firmly holds the visor, securely keeping the cap in place throughout your projects. Including a transparent template with grid marking to ensure proper design placement. With the Cap Hoopster, you will be able to embroider beautiful designs on caps.Babylock Sewing Machine Models:
EM1, EM2, ESE, ESI
Bernina Sewing Machine Models:
180, 185, 190, 500, 600
Brother Sewing Machine Models:
LB6800PRW, PC7000, PC7500, PC8200, PC8500, PE100, PE150, PE200, PE8200, PE8500, ULT2001, ULT2002, ULT2003
Elna Sewing Machine Models:
8006, 9006
Husqvarna Viking Sewing Machine Models:
#1, #1+, Designer I, Designer II, Designer SE, Designer I USB, Designer I ESS, Quilt Designer II, Designer II, Quilt Designer, Designer Diamond, Designer Topaz 30, 20, Designer SE, Sapphire 875Q, Sapphire 870, Sapphire 855, Sapphire 850, Sapphire 835, Sapphire 830
Janome (Newhome) Sewing Machine Models:
10000, 5000, 9000, MC10000, MC5000, MC9000
Pfaff Sewing Machine Models:
7500, 7570
Singer Sewing Machine Models:
XL1000, XL5000
# P60876
- UNIQUE UNIVERSAL
* Makes the cap embroideryeasy-simply attaches to the machinehoop.
* A special clamp firmly holds the visor, securely keeping the cap in place throughout your projects.
* Including a transparent template with grid marking to ensure proper design placement.
* With the Cap Hoopster, you will be able to embroider beautiful designs on caps.
[BABYLOCK] - EM1, EM2, ESI, ESE
[BERNINA] - 180, 185, 190
[BROTHER] - PC7000, PC7500, PE100, PE150, PE200, PE8200, PE8500, ULT2001, ULT2002, ULT2003
[ELNA ] - 9006
[NEW HOME] - MC10000, MC5000, MC9000
[PFAFF] - 7500
[SINGER] - XL1000, XL5000
[VIKING] - #1, #1+, Designer I & II
AllBrands Repair Service Portable Sewing Serger Quilt Embroidery Machines Minimum Charge $199.99 Mech, $299.99 Electronic, $399.99 Ind/Comm+Parts/Ship
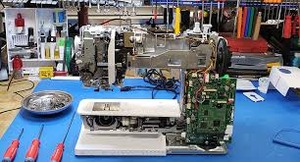 33263: AllBrands.com Repair Service |
Availability: Advance Orders Only. Please review the product description for complete details. Condition: Retail |
Features

Allbrands.com has over 70 years of combined factory-trained mechanics experience in servicing portable sewing, serger, quilting, and embroidery machines. We now have premium professional repair services available on your sewing machines in-store or by mail.
For Portable Mechanical Sewing Machines without any electronics on board Minimum $199.99 Charge +$25 for Return Ship +Parts and Installation Labor. Minimum $299.99 charge for Portable Computer, Embroidery or Serger machines. Minimum $399.99 plus Freight for Multi Needle, Industrial, or Longarm machine heads. (do not send stands)
We are the Sewing Machine Doctors with a motto of Fix it Right The First Time with a warranty of 30 days on mechanical and electronic adjustments, not recleaning.
.
We Service AllBrands of Portable Machines: Brother, Babylock, Bernina, Elna, Juki, Kenmore, Necchi, Riccar, Pfaff, Singer, Viking, White, Simplicity.
Your sewing machine is your baby. We want to help you ensure the best quality stitches on your sewing, quilting, embroidery, or serger machine, that are well adjusted and running smoothly!
Review our simple 3 step process below to get started! Or, Click HERE to Email Attn: [email protected] or general mailbox Attn: [email protected] if you have any questions or want to send pictures, prior to placing your order
Mail-in or Ship in Service Plan for all portable home sewing and embroidery machines. Here is how the program works.
*$199.99 +25.00 Return Shipping Cost if mail order: on Basic Mechanical Portable Sewing Machines.
*$299.99 +25.00 Return Shipping Cost if mail order: Computerized Sewing, Embroidery Machines,Sergers, Portable Blind Hem Machines.
*$399.99 +Pallatized Freight Return Shipping Cost if mail order: on Multi Needle Embroidery, Industrial Sewing Machine Heads, and Long Arm Quilting Machine heads.
Step 1. Purchase the 149.99 dollars minimum charge repair service above plus 25 dollars added for our prepaid and insured return shipping costs in USA 48 States. $100 Upcharge for Electronic, Embroidery or Serger. $200 upcharge for Mulit Needle, Industrial, or Longarm Quilting Machines. We will email you an Authorization Number to put on the outside of the box for easy identification.
Step 2. Ship your machine insured to Allbrands.com, Attn: Service Department, 20415 Highland Road, Baton Rouge, La. 70817. Pack in original carton with all styrofoam and double boxed, or wrap in 5" of heavy bubble wrap and double boxed. Include your foot control, bobbin case, bobbin, power cord, thread, needles and fabric samples, hooped fabric with stabilizer, copies of any prior repair tickets, printouts of our email communication, order confirmation, and any written documents regarding the sewing problems you are having with your machine.
Step 3. We will service and ship your repaired machine back pre-paid and insured. If mechanical adjustments or parts are needed, our mechanics will email or call you for approval of estimates above our minimum service charges. Our charges includes removing covers, cleaning, oiling, replacing covers, and balancing thread tension in sew off. Our average repair bill includes and average of 2 mechanical or electronic adjustments
If your machine cannot be repaired or you do not want to pay for any additional parts or installation required,
the 25 dollar prepaid shipping charge will be used to return your portable machine to you un-repaired.
Why do I need to have my sewing machine serviced?
There are many moving parts in a sewing machine and if it moves, it needs lubrication. These days many of the moving parts are housed with computer circuit boards and wires around them. Our Sewing machine technicians are factory trained to maintain and service computerized sewing machines.
For best performance and years of sewing, our technicians suggest you have your machine serviced annually. Below is our 24-Point Tune-Up Checklist and a list of Sewing Machine Performance Tips that our technicians suggest between services.
Sewing Machine Performance Tips:
Keep your machine covered when not using it. Household dust, lint and pet hair can enter your machine in one of it's many openings causing all types of problems.
Keep your machine away from direct sunlight, high/low temperatures and humidity.
Use the right needle for your project and change your needle every 3 to 4 hours of sewing or after every other project. The needle is the major culprit for most sewing problems.
Use good quality thread.
Use bobbins made specifically for your machine and make sure your bobbin thread is wound tight and no loose threads are hanging.
DO NOT SEW OVER PINS! Your needle may break, you could damage the hook or pieces of the needle could fly up into your face.
Do not use canned air on your machine or blow into your machine. The lint is just being pushed further into the machine and you are spraying moisture into your machine which can cause corrosion or damage your circuit boards
Clean the bobbin area frequently. Refer to manual for instructions.
Have a 24 Point Inspection completed, at a qualified repair center, on your sewing machine once a year to keep it performing like new for years to come.
Extended US Warranty: 30 Days labor on defects in materials and workmanship.
Non-US Warranty: 30 days parts and labor.
Specifications
24-Point Tune-Up:Below is a checklist all technicians complete, if applicable, with every 24-Point Sewing Machine Tune-up performed.
Check Bobbin Winder Mechanism
Inspect Cam Followers & Spacers
Clean Take-Up Lever
Clean & Lube - Pendulum Swing Mechanism
Check Spool Pins, Felts & Caps
Adjust Needle Bar Height
Check Light Bulb
Acuate All Levers & Knobs
Deburr Needle Plate
Polish Hook
Check Timing (Hook & Feed)
Inspect Feed Dogs & Adjust
Clean Bobbin Case
Adjust Bobbin Case Positioner Bracket
Inspect Gears
Check Linkage Bearings & Sleeves
Test Motor Blocks and Pivot Connections
Adjust Motor Belt & Inspect
Check Timing Belt for Wear
Test Tension Knobs & Springs For Torque
Electrical Cords Inspection
Inspect Foot Control Wear
Clean Exterior & Polish
Test Sew On Demo Fabric
Below is what we are taught by sewing machine manufacturers
Completely disassemble sewing machine
Clean out all lint and debris
Degumm and remove old oil and grease
Apply new oil and grease
Check and adjust/reset over 30 settings
Polish all areas in thread path, hook, bobbin case, needle plate, presser foot etc..
Check for any updates update as needed
Reset service programs and calibrations
Balance tensions
Sew it out and fine tune as needed
Then clean exterior of machine
See Videos on maintenance below!
Pinterest.com Maintenance for Sewing Machines
Nancy Zieman Video on 6 Techniques for Sewing Machine Maintenance
Click HERE for Sewing Machine Maintenance Tips from Cooperative Extension Service, New Mexico State University
Click HERE to Email Attn: [email protected] or Attn: [email protected] if you have any questions prior to placing your order
Click HERE for You Tube videos on Home Sewing Machine Maintenance, so if it something simple that you can do at home, it doesn't need to go to the shop
Click HERE for You Tube videos on Home Sewing Machine Repair, so if it something simple that you can do at home, it doesn't need to go to the shop
Click HERE for Zen and the Art of Sewing Machine Maintenance7 Steps To Peak Performance For Your Sewing Machine from Fix Sewing Machine Institute
7 Steps To Peak Performance
For Your Sewing Machine from Fix Sewing Machine Institute
See You Tube Videos on Sewing Machine Repair
Although using a Bernina 1008, most of the information applies to most sewing machines. All sewing machines do better with a little bit of ‘TLC’. Just a bit of a clean up and a drop of oil every now and then does wonders. Keeping your sewing machine clean and lubricated will reduce the wear and tear and keep everything running smoothly.
mizsparrow: How a sewing machine hooks threads into your fabric, on underneath oscillating shuttle sewing machines
Quick Guide for Sewing Machine Top Tension pdf by Cindy Needham
DIY: Cleaning Your Vintage Sewing Machine
Sewing Machne Maintenance Tips | National Sewing Circle. Jessica Giardino provides extremely beneficial tips on how to perform maintenance on your own sewing machine. Learn how to make repairs to your machine at home to save money and stitch happily. Find out how often you should perform maintenance on your machine as well as what tools you may need to help clean your sewing machine.
Singer Blog on Troubleshooting Tips
Sewing Machine Lubricants
How to Clean and Oil Your Bernina Sewing Machine.Did you know you need to oil your Bernina sewing machine every 3 - 5 bobbins? You do! To many people neglect oiling their Bernina sewing machine or even worse have been told NOT to oil their sewing machine.
Bernina We All Sew Blog on How to Clean and Maintain Your Sewing Machine
Bernina ACHINE MAINTENANCE FREQUENTLY ASKED QUESTIONS: CLEANING AND OILING
Bernina Users - THIS IS NOT LINT! ***DO NOT REMOVE***
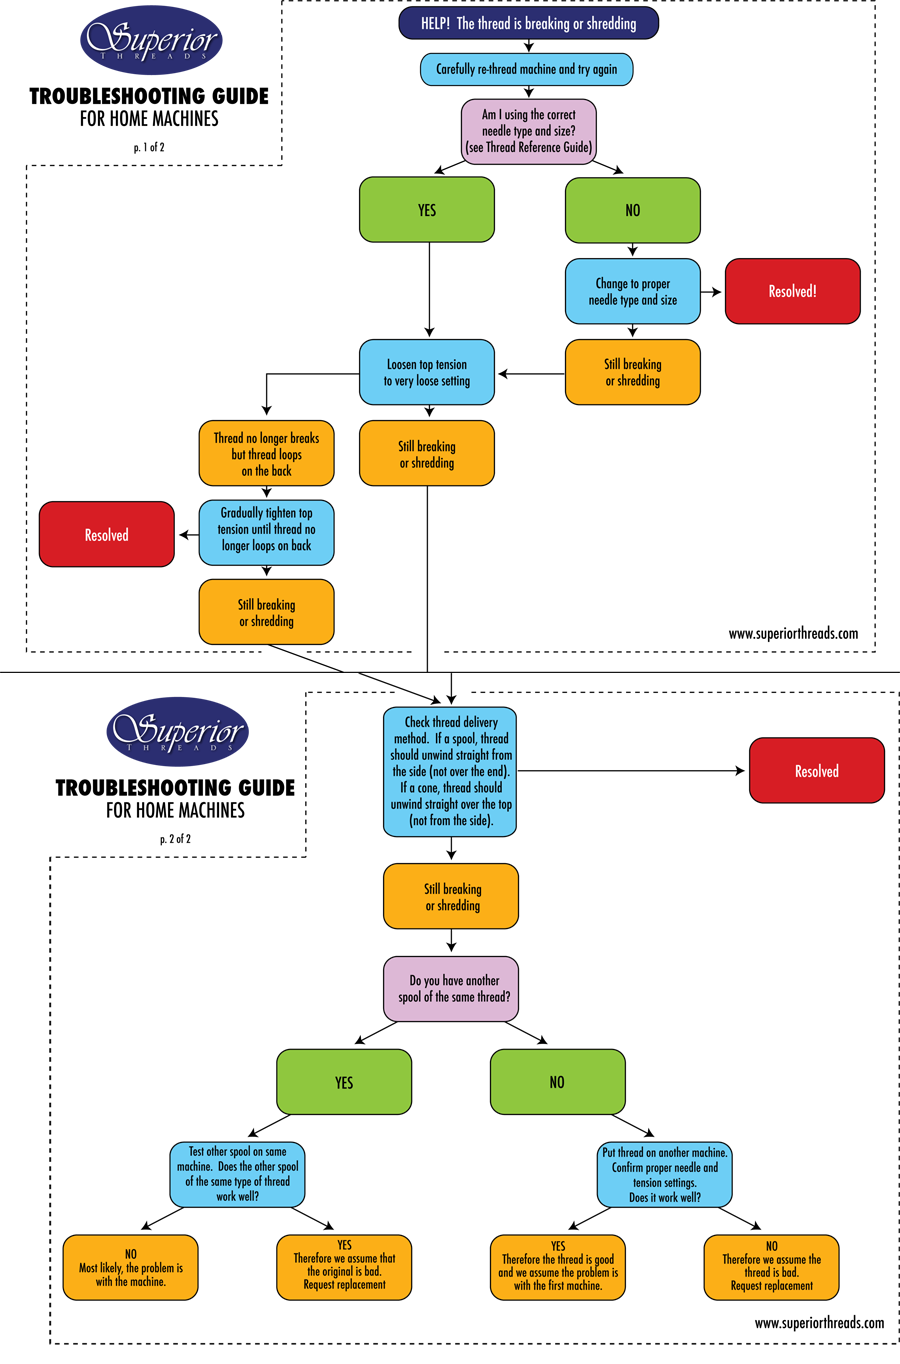
Video Tip: Avoid Thread Bird Nesting from Top Thread balling up underneath the fabric
15 Reasons Why a Sewing Machine Needle Breaks by Sewing Mastery, Heirloom CreationsA sewing machine needle can break for a variety of reasons. Sometimes it is operator error and sometimes it can be the wrong needle for the fabric. If you have experienced a rash of broken needles within a short amount of time, see if one of the following situations relates to you and learn how to overcome the problem.
Thread Catches on the Spool
Some thread brands have these lovely thread holders notched in the edge of the spool. Handy, yes, but if the thread spool is laying on its side it can catch in the groove, pull the thread tight and SNAP the sewing machine needle. To avoid this, be sure to stand this type of thread up using a vertical thread pin.
Thread Wraps Around the Spool Cap:
For threads that need a horizontal spool pin and a spool cap to hold them in place, the thread can get caught between the thread spool and the cap. Though a spool cap is necessary to keep the thread in place, it must be pushed into place so there is no gap for the thread to catch between the two. This is one of the reasons I prefer using a thread stand.
Whitening Your Yellowed Vintage Sewing, Serger, Embroidery, Quilting and Knitting Machine Plastic ABS Parts! (RetroBrite) This is a video demonstrating how I have whitened some ABS plastic pieces of a vintage knitting machine that had become yellow with age and exposure to UV light. This is the RetroBrite procedure, which you may have seen being used on old video game consoles, sneakers, computers, and other older ABS plastic products. Works very well, is inexpensive, and really helps restore these old beauties to their former glory.
Machine Maintenance with Gary | Echidna Sewing
How to oil your sewing machine needle bar, prevent costly repairs DIY simple fix drop in bobbin case. Jeff shows on Brother made Babylock Destiny
How to Remove Thread from the Take-Up Lever & Remove Fabric Stuck in the Needle PlateHave you ever started sewing and the thread pulled out of the needle? Doug shares how to fix this common issue so you can return back to stitching. Plus, learn how to remove fabric that gets stuck on the machine after you have completed sewing.
Singer Sewing Tips 101: Maintenance and TLC
ArtBin 5004AB Sewing Machine Presser Foot Feet Accessories Storage Case Box 14x9x2in for Bernina Brother Babylock Janome Juki Elna Pfaff Viking Singer
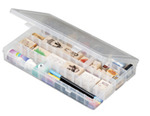 42521: ArtBin 5004AB Sewing Machine Presser Foot Feet Storage Case Box 14x9x2" |
Our Price: $14.99 Prices are subject to change, and only current prices will be honored. Availability: Usually leaves the warehouse in 2-3 business days. Condition: New In Box |
Features
Locate presser feet easily. The clear storage boxes have adjustable compartments to fit your presser feet collection. Keeping each foot in a separate compartment makes it easy to find the one you are looking for.
- Features include no-spill latches sturdy hinges and dividers for additional compartment capabilities
- Great for scrapbooking crafts art supplies home office and more
- Ideal for use in organizer totes
- Translucent storage box.
- Hinged lid with locking no spill latch tabs
- Made of sturdy plastic
Non-US Warranty: 30 days parts and labor.
Specifications
14.125 X 9 X 2, 4 FIXED COMPARTMENTS 20 REMOVABLE DIVIDERSHusqvarna Viking No. 4 Holidays Disk Not an Embroidery Card for #1 Plus
 |
Our Price: $5.00 Prices are subject to change, and only current prices will be honored. Availability: Usually leaves the warehouse on the next business day. Condition: New In Box |
Features
Husqvarna Viking No. 4 Holidays Disk Not an Embroidery Card for #1 Plus
Non-US Warranty: 30 days parts and labor.
AlphaSew 27449 Single Cone Vertical Thread Stand, Metal Spool Pin, Metal Rod, Heavy Duty Cast Iron Base, Must Put the 3 Pieces Together
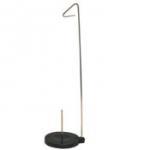 23376: Single Cone Vertical Thread Stand, Metal Spool Pin/Rod, Cast Iron Base |
Our Price: $19.99 Prices are subject to change, and only current prices will be honored. Shipping: Free Ground Shipping to the Contiguous USA Availability: Usually leaves the warehouse on the same business day. Condition: New In Box |
Features
For all portable embroidery machines when using any cone threads that do not work on horizontal or vertical spool pins mounted on the machine, causing snags and thread breaks.
Prevents thread from catching and breaking on conventional spools, spool pins, spool holders, and thread guides, especially when using cone threads for single needle embroidery machines, which should not be used directly on machine vertical or horizontal spool holders, unless they are designed to, such as Juki TL98, Brother PQ1500S, Janome 1600P, MC6500, MC6600, and multi-needle embroidery machines.
# 27449
- 1 SPOOL
- 4-3/4" Diameter.
- CAST IRON BASE
- Metal base.
- Holds any size from mini cone to industrial size thread cones.
Whenever you use any kind of cone shaped thread spools on home embroidery machines, you should put them on a separate vertical spool thread stand* set up on your table to the right of the hand wheel for smooth thread delivery. Putting cone thread on the machine's horizontal or vertical spool pin can cause thread to get caught on the spool, spool pin, thread cap, under the spool, or on the next thread guide.
Extended US Warranty: 30 days replacement if defective.
Non-US Warranty: 30 days parts and labor.
Specifications
- 4-3/4" Diameter.- Metal base.
- Holds any size from mini cone to industrial size thread cones.
AlphaSew 27449-ADJ Superior METALSTAND-ADJ Adjustable Height Single Cone Vertical Thread Stand, Metal Spool Pin, Rod, Weighted Base
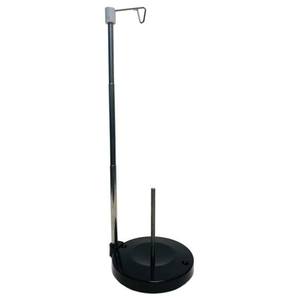 93650: AlphaSew 27449-ADJ Adjustable Height Single Cone Vertical Thread Stand, Metal Spool Pin Rod, Weighted Base |
Our Price: $19.99 Prices are subject to change, and only current prices will be honored. Availability: Usually leaves the warehouse on the next business day. Condition: New In Box |
Features
The telescopic stand can be lowered down to 6" or raised all the way up to 15".
Alphasew's Adjustable Spool Stand is ideal for both sewing and serger machines. The weighted base will keep your thread from sliding and moving around. From base to tip the spool stand measures 15" and the foundation piece weighs 6.9 oz.
For all portable embroidery machines when using any cone threads that do not work on horizontal or vertical spool pins mounted on the machine, causing snags and thread breaks.
Prevents thread from catching and breaking on conventional spools, spool pins, spool holders, and thread guides, especially when using cone threads for single needle embroidery machines, which should not be used directly on machine vertical or horizontal spool holders, unless they are designed to, such as Juki TL98, Brother PQ1500S, Janome 1600P, MC6500, MC6600, and multi-needle embroidery machines.
Whenever you use any kind of cone shaped thread spools on home embroidery machines, you should put them on a separate vertical spool thread stand* set up on your table to the right of the hand wheel for smooth thread delivery. Putting cone thread on the machine's horizontal or vertical spool pin can cause thread to get caught on the spool, spool pin, thread cap, under the spool, or on the next thread guide.
Extended US Warranty: 30 days replacement if defective.
Non-US Warranty: 30 days parts and labor.
Specifications
- 4-3/4" Diameter.- Weighted base.
- Holds any size from mini cone to industrial size thread cones.
Husqvarna Viking No. 24 Romance by Martha Pullen Embroidery Disk
 |
Our Price: $149.99 Prices are subject to change, and only current prices will be honored. Availability: Usually leaves the warehouse on the next business day. Condition: New In Box |
Features
Non-US Warranty: 30 days parts and labor.
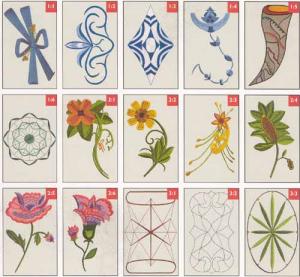
Husqvarna Viking 111 Embroidery Disk
 |
Our Price: $99.99 Prices are subject to change, and only current prices will be honored. Availability: Usually leaves the warehouse on the next business day. Condition: New In Box |
Features
Non-US Warranty: 30 days parts and labor.
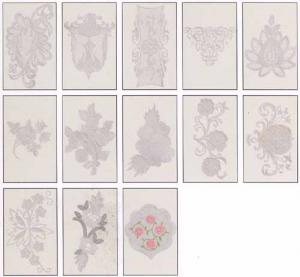
Husqvarna Viking 112 Lace by Jeanne Harrison Embroidery Disk
 |
Our Price: $99.99 Prices are subject to change, and only current prices will be honored. Availability: Usually leaves the warehouse on the next business day. Condition: New In Box |
Features
Non-US Warranty: 30 days parts and labor.
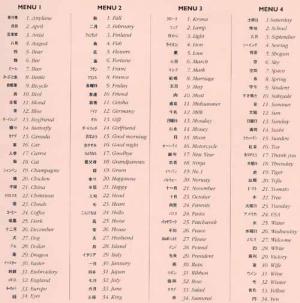
Husqvarna Viking 120 Words from Japan Embroidery Disk
 |
Our Price: $99.99 Prices are subject to change, and only current prices will be honored. Availability: Usually leaves the warehouse on the next business day. Condition: New In Box |
Features
Non-US Warranty: 30 days parts and labor.
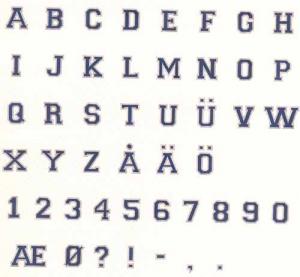
Husqvarna Viking 123 Baseball Alphabet Embroidery Disk
 |
Our Price: $99.99 Prices are subject to change, and only current prices will be honored. Availability: Usually leaves the warehouse on the next business day. Condition: New In Box |
Features
For Designer 1, not #1+
Non-US Warranty: 30 days parts and labor.
Copyright © 1995-2024 AllBrands.com.
SewingMachineStore and SewingMachineStore.com are property and trademarks of AllBrands, LLC, dba AllBrands.com. All Rights Reserved.
SewingMachineStore and SewingMachineStore.com are property and trademarks of AllBrands, LLC, dba AllBrands.com. All Rights Reserved.