

Follow these easy steps for success!
-
Step 1: Hoop a 4” x 4” hoop with DIME’s Heavy Duty Water Soluble Stabilizer and stitch a patch.
-
Step 2: Remove the Heavy Duty Water Soluble stabilizer from the patch.
-
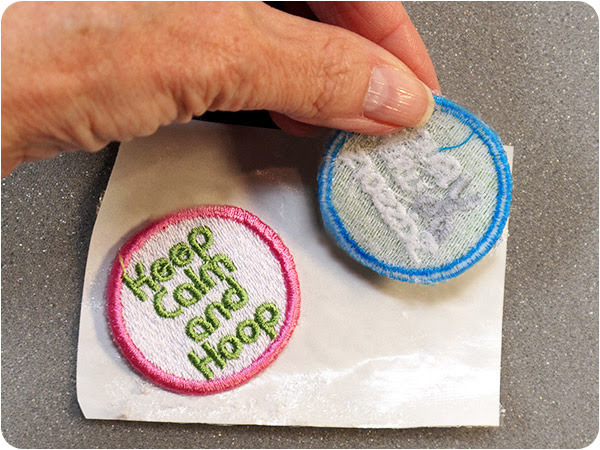
Step 3: Place the Patch, Attach white side up on the wrong side of the patch.
-
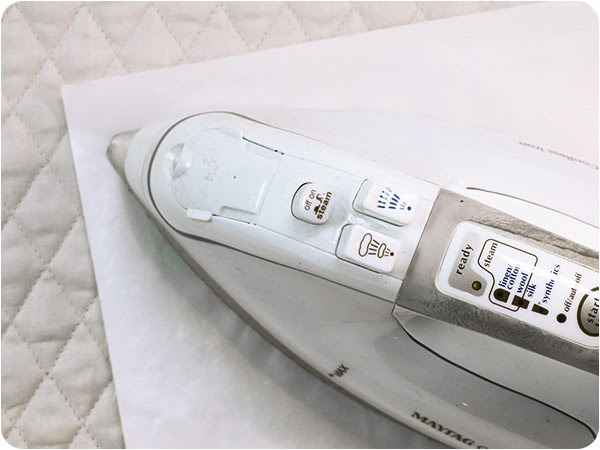
Step 4: Press with a hot iron (wool setting) for 8-12 seconds.
-
Step 5: Allow to cool. Cut the Patch Attach around the patch. Remove the white liner.
-
Step 6: Place the patch, wrong side down, on the fabric. Cover with the Teflon pressing sheet and press for 8-12 seconds.
Product Includes:
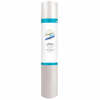
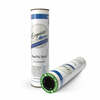
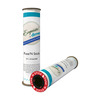
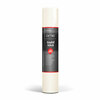
- 1 roll of 9” x 10 yards of Heavy Duty Water Soluble Stabilizer
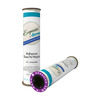
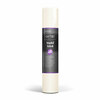
- 1 roll of 9” x 3 yards of Patch Attach Fusible Permanent Adhesive
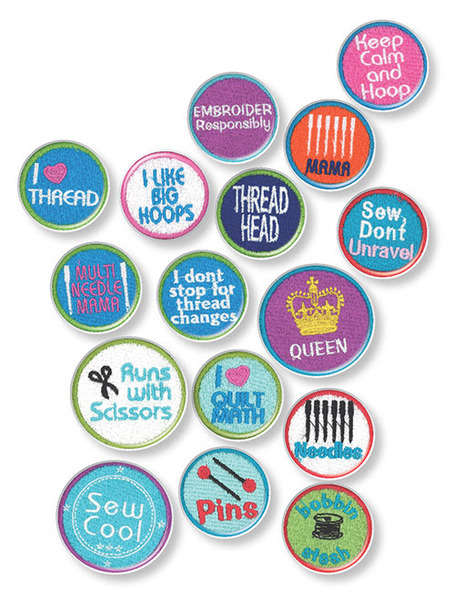
- 20 embroidery designs that fit a 4” x 4” hoop*
*Embroidery Design Formats: ART, C2S, DST, EXP, HUS, JEF, PES, VIP, VP3
1 roll of 9" x 10 yards of Heavy Duty Water Soluble
1 roll of 9" x 3 yards of Patch Attach Fusible Permanent Adhesive
20 embroidery designs that fit a 4" x 4" hoop*
 DIME PMK0010 Patch Maker Kit Stabilizer Bundle, 20 Patch Designs download
 DIME PMK0010 Patch Maker Kit Stabilizer Bundle, 20 Patch Designs download
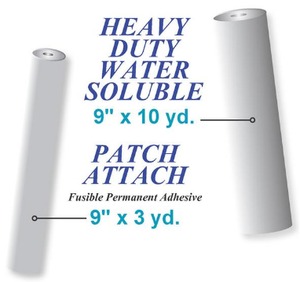 Stabilizer bundle: 1 roll of 9" x 10 yards of Heavy Duty Water Soluble.
1 roll of 9" x 3 yards of Patch Attach Fusible Permanent Adhesive.
20 embroidery designs that fit a 4" x 4" hoop*
Stabilizer bundle: 1 roll of 9" x 10 yards of Heavy Duty Water Soluble.
1 roll of 9" x 3 yards of Patch Attach Fusible Permanent Adhesive.
20 embroidery designs that fit a 4" x 4" hoop*
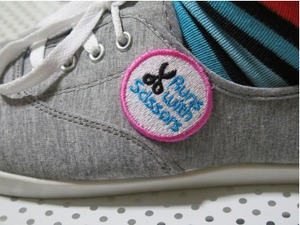
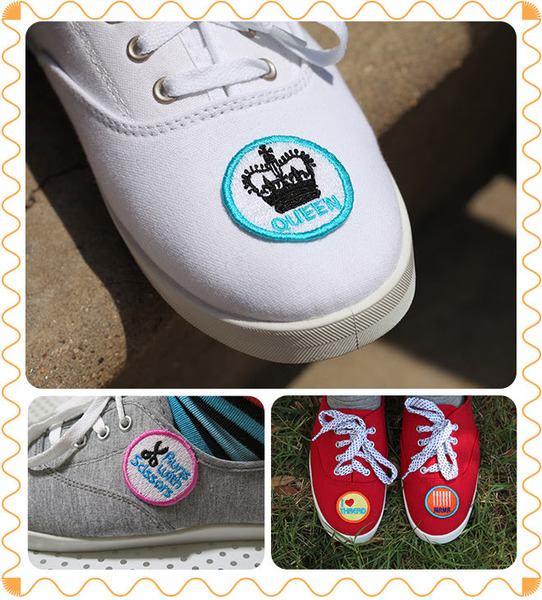
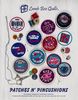
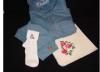
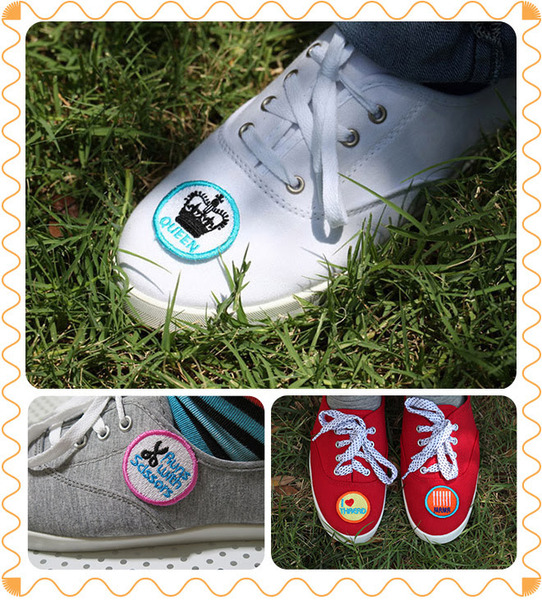 Make you own embroidered iron on patches for clothing and accessories, including shoes.
 Follow easy steps for success!
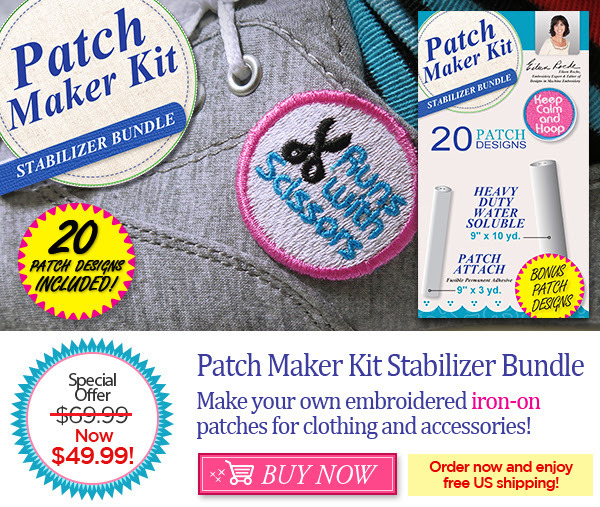
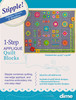
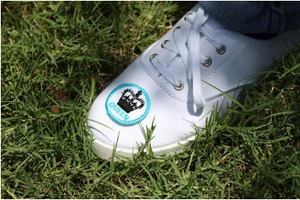 Make your own embroidered iron-on patches with the Patch Maker Kit Stabilizer Bundle! 20 patch designs are included with the Kit!
 Make your own embroidered iron-on patches with the Patch Maker Kit Stabilizer Bundle!
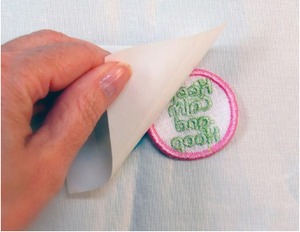 Place the Patch Attach white side up on the wrong side of the patch. Press with a hot iron (wool setting) for 8-12 seconds.
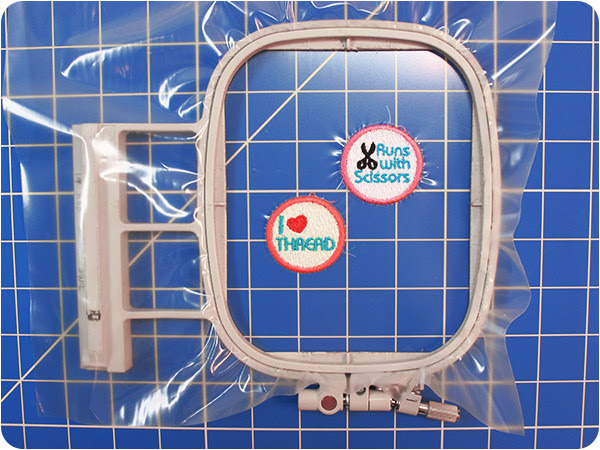 Step 1: Hoop a 4" x 4" hoop with DIME’s Heavy Duty Water Soluble Stabilizer and stitch any of the 20 patch designs included with the Kit.
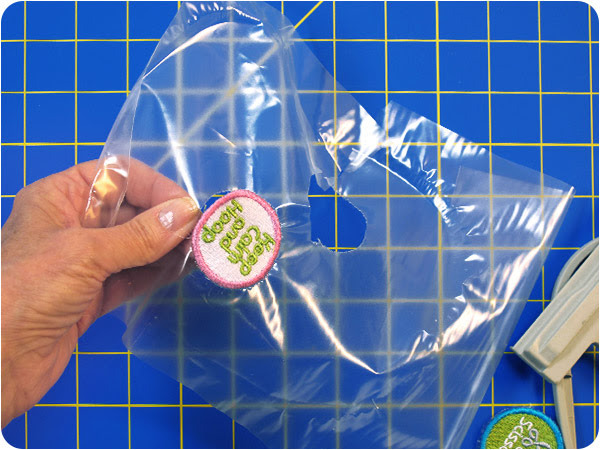 Step 2: Remove the Heavy Duty Water Soluble stabilizer from the patch.
 Step 3: Place the Patch Attach white side up on the wrong side of the patch. Press with a hot iron (wool setting) for 8-12 seconds.
 Step 4: Allow to cool. Cut the Patch Attach around the patch. Remove the white liner.
 Step 5: Place the patch, wrong side down, on the fabric. Cover with the Teflon pressing sheet and press for 8-12 seconds.
Recommended Accessories

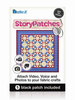
Stkr.it STKRIO Story Patches Iron-On (+$4.99)
Other Items You May Be Interested In
-
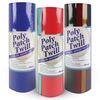
DIME Poly Patch Twill with Non Woven Stabilizer Backing for Making Patches, 8 Pieces of 9x24" Choose One Color Group, Brights, Athletics, Uniforms
$29.99 -
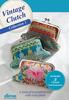
DIME VPURSES1 Vintage Clutch Bag Collection 1 Bundle CD, 3 Clutch Designs +12 Spools of Thread +1 Pack of 5 Needles
$39.99 Free Ground Shipping to the Contiguous USA -
DIME PMK0020 Patch Maker Heavy Duty Water Soluble Stabilizer 9 Inch x 10 Yards
$29.99 Free Ground Shipping to the Contiguous USA -
Brother SA5906 Lightweight Adhesive Water Soluble Washaway Embroidery Stabilizer Backing 15"x 6 Yard Roll
$69.99 Free Ground Shipping to the Contiguous USA -
Designs In Machine Embroidery BK00111 Posh Pincushions Book by Katherine Artines, 35 Designs CD, 15 Projects
$15.00 -

DIME BK00104 Embroidered Monograms Book 50Pg CD, 3x3 Fonts, 28 Frames
$29.99 Free Ground Shipping to the Contiguous USA -

DIME CD00100 Embroider It Yourself Scrumptious Sweats CD Video
$39.99 Free Ground Shipping to the Contiguous USA -

DIME CD00703-D Necklines to Hemlines T-shirt Remakes I Download by Nancy Zieman & Eileen Roche
$39.99 -
DIME HC00100 Magnetic Hoop Hat Brim Cap Clip for Sticky Hoop for use with Sticky Stabilizers, Includes Ready to Embroider Hat
$29.99 -
DIME SHQCC001 Ohio Star Cheater Quilt 51x72" Five 6x6 Designs CD, Use 100% Cotton
$49.99 Free Ground Shipping to the Contiguous USA -
DIME SHQWR1 Wedding Ring Applique Quilts Collection 10 Designs, Instructions CD
$39.99 Free Ground Shipping to the Contiguous USA -
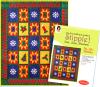
Designs in Machine Embroidery STP0090 Stipple! Sea Life 5X7 and 6X10 Multi Format Embroidery Design CD, 14 Designs with Instructions
$29.99 Free Ground Shipping to the Contiguous USA -
DIME STP0113 Nine Sassy Cats Stipple Quilt Block Embroidery Designs by Katherine Artines on CD
$29.99 Free Ground Shipping to the Contiguous USA -
Designs in Machine Embroidery STP0112 Stipple Fabulous Flowers & Medallions CD, Learn to Stich in 3D Appliqué & Machine Embroidery in 1 Stipple! step
$29.99 Free Ground Shipping to the Contiguous USA -
Every Stitch Counts - Quilted Dimensions Embroidery Design CD
$64.99 -

DIME Exquisite EXLR35 B6002025 Adhesive SewNWash Water Soluble Stabilizer 20"x25Yds
$169.99 Free Ground Shipping to the Contiguous USA -

DIME Exquisite EXLR31 B6102025 Peel N Stick Adhesive Stabilizer Backing 19.5"x25Yds
$84.99 Free Ground Shipping to the Contiguous USA -
DIME Exquisite H2006 Med Tearaway/Hvy Cutaway/Peel’ n Stic/Water Soluble Stabilizers it
$57.99 Free Ground Shipping to the Contiguous USA -
DIME Exquisite H2015 No Show/PeelNStick/Medium Tearaway/Water Soluble Stabilizers Kit
$66.99 Free Ground Shipping to the Contiguous USA -
DIME Exquisite H2030 Med Tearaway/Cutaway/PeelNStickk/Fusible No Show Stabilizers it
$58.99 Free Ground Shipping to the Contiguous USA -

DIME Exquisite H2040 Med Tearaway, Med Cutaway, PeelNStick, Water Soluble Stabilizers it, 4 Rolls of 12" x 5 Yards
$65.99 Free Ground Shipping to the Contiguous USA -

DIME Exquisite H6001210 Adhesive Sew N Wash Washaway Stabilizer 12"x10Yds
$59.99 Free Ground Shipping to the Contiguous USA -
DIME Exquisite H6002010 Adhesive Sew N Wash Washaway Stabilizer 20"x10Yds
$79.99 Free Ground Shipping to the Contiguous USA -
DIME Exquisite H600910 Sew N Wash Adhesive Washaway Stabilizer 9"x10Yards
$39.99 Free Ground Shipping to the Contiguous USA -
DIME Exquisite H6101210 Peel N Stick Adhesive Tearaway Stabilizer 2.5oz 12"x10Yd Shrink Wrapped Roll
$49.99 Free Ground Shipping to the Contiguous USA -
DIME Exquisite H610910 Peel' N Stick Adhesive Tearaway Stabilizer 2.5oz 9"x10Yd Roll
$34.99 -

DIME Exquisite H6401210 Fuse' N Stick Iron on Sticker Stabilizer 12"x10Yds
$42.00 Free Ground Shipping to the Contiguous USA -

DIME Exquisite H6402010 Fuse' N Stick Iron on Fusible Stabilizer 20" x10Yds in a Shrinkwrapped roll
$53.99 Free Ground Shipping to the Contiguous USA -
DIME Exquisite H640910 Fuse' N Stick Iron on Sticky Stabilizer 9"x10Yards
$36.99 -
DIME Exquisite H6102010K Peel N Stick Adhesive Tearaway Stabilizer 2.5oz 20"x10Yds
$75.99 Free Ground Shipping to the Contiguous USA -
Floriani FAW1X9 AppliKay Wonder Repositional Pressure Sensitive Adhesive Fusible Web Stabilizer 1"x9Yds
$9.99 Free Ground Shipping to the Contiguous USA -

Floriani FPS1210 Perfect Stick Pressure Senstive Adhesive Tearaway Embroidery Stabilizer 12in x 10 Yard Roll
$39.99 -
Floriani FPS1510 Perfect Stick Adhesive Pressure Senstive Embroidery Stabilizer 15" Inch x 10 Yards Roll
$41.99 Free Ground Shipping to the Contiguous USA -
Creative Feet Stick & Tear Adhesive Stabilizer SIA Stick It All Backing 8.5" x 20' Roll, Attach to Backside of Hoop Original Sticky Backed StickItAll
$24.99 -
June Tailor ORMD-8 Quilt Basting Adhesive Stabilizer 10oz Spray Can for Quilting, Embroidery
$19.99 -

OESD HBHT15-10 Hydro-Stick Tear-Away Embroidery Stabilizer 10in X 5 Yards White
$19.99 -
OESD HBHT15-15 HydroStick Tear Away 1.5oz Stabilizer Backing 15"x5Yards
$26.95 -

OESD HBSSC39-10 Stabil Stick Adhesive Cut Away Embroidery Stabilizer 2oz 10 Inch x 10 Yard Roll
$42.95 -

OESD HBSSC39-15 Stabil Stick Adhesive CutAway Embroidery Stabilizer 2.5oz 15" x 10 Yard Roll
$59.99 -
OESD HBSSC39-20 Stabil Stick Adhesive CutAway Embroidery Stabilizer 2.5oz, 20 Inch x 5 Yard Roll
$39.99 -
OESD HBSST10 Stabil Stick Adhesive Tear Away Embroidery Stabilizer Backing, 10 Inch x 10 Yard Roll White
$39.99 -

OESD HBSST-15 Stabil Stick Tear Away Light Adhesive Stabilizer Backing 15" Wide x 10 Yards Long for Non Stretch Fabrics
$49.99 -

OESD HBSST-20 Stabil Stick Adhesive Tear Away Stabilizer Backing 20"x5Yds
$41.99 -
Odif ORMD-13A 505 Spray and Fix Temporary Fabric Adhesive Stabilizer 14.7 oz Can
$19.99 -
OESD STAB-TSS Stabil Stick Adhesive TearAway Stabilizer 10"x2Yds for Classrooms
$13.99 -
Sprayway SW089 Fast Tack Specialty Temporary Adhesive Spray A089, 20oz Can, Case of 24 Cans
$295.99 Free Ground Shipping to the Contiguous USA -

Sulky 551-01 Sticky Self Adhesive Tear Away Stabilizer 21-1/2" x 36" or 1 Yard
$9.99 -
Sulky 551-20 Sticky Self Adhesive Tear Away Embroidery Stabilizer Backing 21 Inch x 5 Yards
$39.99 -
Sulky 551-25 Sticky+ Plus Self Adhesive Tear Away Embroidery Stabilizer Backing White, 22.5in x 25 Yards Bolt, Leaves No Hoop Marks
$99.99 Free Ground Shipping to the Contiguous USA -
Sulky Sticky 457-01 Fabri-Solvy 20x36" Printable Water Soluble Stabilizer
$7.99 -
Sulky 457-08 Sticky Fabri-Solvy 8" x 6yd Roll Printable Water Soluble Stabilizer - White
$24.99 -
Sulky 457-02 Sticky Fabri-Solvy 12pk 8.5x11in Sheets Printable Water Soluble Stabilizer
$14.49 -
Sulky Sticky Plus 551-08 Adhesive Embroidery Stabilizer 8.25" x 6 Yard Roll
$19.99 -
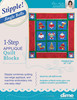
DIME STP0040 Stipple! Ho Ho Holiday CD, 8 Designs 2 Sizes, 1 Step Quilting and Applique
$29.99 Free Ground Shipping to the Contiguous USA -

DIME STP0050 Designs in Machine Embroidery 1 Step Quilting & Applique Stipple! 7 Butterflies & 2 Flower Pattern Quilt Blocks -Download
$29.99 -
DIME STP0111 Designs in Machine Embroidery Stipple Jingle Bells CD
$29.99 Free Ground Shipping to the Contiguous USA -
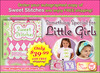
DIME BK00116 Sweet Stitches by JoAnn Connolly 64Pg Book+Designs Project CD, Special for Little Girls, 8 Projects: Banner Pillow Headband PJ's
$15.00 -
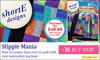
DIME Stipple Mania 159 Quilting Designs CD to Piece, Sandwich & Embroider using ShortE Frame
$49.99 Free Ground Shipping to the Contiguous USA -
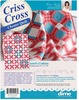
DIME SHQCC003 Criss Cross Cheater Quilt Pattern & CD for 51-1/2x70" 100% Cotton
$49.99 Free Ground Shipping to the Contiguous USA -

DIME CD00704 Necklines to Hemlines T-shirt Remakes II CD by Nancy Zieman & Eileen Roche
$39.99 Free Ground Shipping to the Contiguous USA
