

- Up To 2500 Stitches Per Minute
- 1 To 1 Or 2 To 1 Skip Stitch Options
- Knee Lever to insert and remove fabric
- Needle Depth Dial for truly blind hems
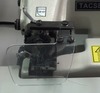
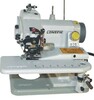
- Narrow Cylinder Arm
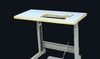
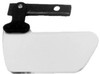
- Swing Plate Work Table with access to Cylinder Arm
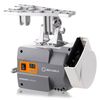
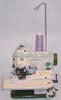
- Full Size Industrial Blind Hemmer for Apparel and Drapery
- Uses all 6 sizes of 251LG Organ blind stitch needles.
Please specify T718-2 as the model number for English instruction book which will be sent separatly from the machine head
For Reference Only: Installation and Operating Instructions for US Blindstitch Machines
- US Warranty 90 Days labor on defects in materials and workmanship.
- Non-US Warranty: 30 days parts and labor
- Rugged, dependable blindstitch machine has a number of unique features for quality 1 to 1 non-skip and 2 to 1 skip stitch hemming
- Re-engineered for greater quality
- Upgraded by master technicians, this machine builds upon the technology that made the original a world leader
- New presser foot, feed, and looper is re-designed for improved material handling and stitching, this machine feeds and lays out curtain and drapery panels, sides and bottoms evenly
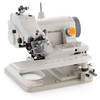
- New foot and looper assure positive stitching control with all threads and fabrics
- New bronze needle connection assembly is an investment-cast eccentric, fitted to a bronze strap, ground, and lapped in to form a hard, smooth bearing surface, withstands years of abrasive wear
- Hardened shafts are designed to reduce wear for a long life with minimal maintenance
- Wide fabric range will handle light to medium weight fiberglass and rayons, as well as sheers
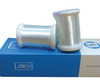
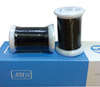
- Works with a variety of threads including monofilament
Video Only Shows US Blind Stitch 718 running, no sound
Blind Hemmer Ending Stitch Techniques I show how I now end my blind hemmer stitches. In the past I always used the old technique of raising the needle to its' highest position and releasing the pressure foot and jerking the fabric back quickly to break the thread. This led to size 10 needles skipping stitches sooner than I thought they should. I contacted the mfg of my machine and they told me to use the technique I show in this video. Since I've gone to it my #10 needles are lasting much longer. :) The machine shown is an Industrial Consew made in Japan back in the 1970s. Kevin Sews Published on Jul 2, 2014
Please review our Freight LTL shipping Policies
- 3 needles 251LG
- Regular wrench and allen wrench, clamp bracket
- 718 Instruction book
- Foot control
- Tweezers to thread needle
- Thread stand in box, needs installation
- Kneelifter is in box
- Instruction Manual and Parts List
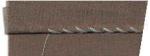 Very professional hand look hemming stitch, which cannot be duplicated on any regular sewing machine or serger.
 Stitch and Seam Type
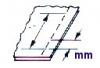 Stitch Length 3-8 stitches per inch
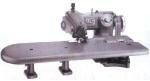 *The new SL718-2 has a smaller Swing Plate instead of the larger Fixed Plate extension shown in the picture. The old SL718-2D with fixed extension has been discontinued. Thenew swing plate exposes the machine's cylinder arm which allows multi-use of the SL718-2 as a garment or as a drapery hemming machine.
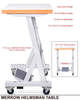
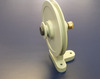
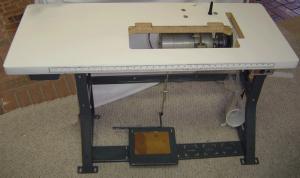 Optional Power Stand for BlindStitch machines has no cutout for machine head as shown. Machine should be bolted to flat table top.
When I pull the stitching out, several stitches unravel along with it. Is there a way to tack the stitches to prevent unraveling?
Jenna, there are several ways of securing a blind hem stitch at the end of a seam. The easiest way is to sew over and beyond the end of a seam, especially if hemming a tubular item like pants. When you sew over previous stitching it helps to lock the stitches in.
Before you remove fabric from the end of the machine feeder, turn the hand wheel clockwise to swing the needle all the way to the left position in the needle channel which will help secure the thread and stitch in place. Then quickly pull or jerk the fabric hem from behind the feeder which will break the thread and tie off the chain stitch so that it will not continue to unravel. It takes some practice because you may have to use the knee lever or hand wheel to position or release the fabric if it is not already at the end of the feeder.
You can also turn the hand wheel counterclockwise at the end of the seam (like reverse stitching but no formation) just to hide the end stitches, or you can manually weave the unraveled thread back into the chainstitch with a seaming needle.
Recommended Accessories


Other Items You May Be Interested In
-

U S Stitch Line SL718-2 BlindStitch Hemmer Machine Made in Taiwan with Power Stand 2500RPM Servo Motor, Uses LWx5T same as 251LG Needles
$1,929.99 -

Consew 1118-4 Full Size Blind Hem Stitch Sewing Machine (like US Blindstitch 1118) 1/2HP Servo Motor Power Stand, Specify Assembled or KD Knocked Down
$3,999.99 -
Chandler CM101 Blind Hemmer Chain Stitch Sewing Machine, Knocked Down Unassembled Power Stand
$999.99 -
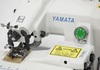
Gemsy Jiasew G2000-8 Full Size Industrial Blindstitch Machine, Knee Lift, Swing Plate, Cylinder Arm, Skip Stitch, KD Power Stand* 3000SPM, 110V & 220V
$999.00 -
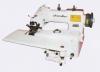
Rex Artek RX-518 Portable Blind Stitch Hemmer Metal Sewing Machine, 110V Motor, Foot Control,
$299.99 Free Ground Shipping to the Contiguous USA -
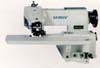
Yamata CM500 Portable Blind Hem Stitch Hemmer Invisible Seam Sewing Machine (Replaces Tacsew BLST N.L.A.)
$399.99 -
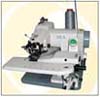
Jiasew CS2000-7 All Metal Portable Blind Hem Stitch Hemmer Sewing Machine, Cylinder Arm, Swing Plate, Curved Needle, 2:1 Skip Stitch, Knee Lever
$269.99 -
Consew 75T Blindstitch Hem Chain Stitch Hemmer Machine, Most Popular Portable Professional Model for Garment Hems, Replaces Tacsew T500 and BLST NLA
$299.99 -
Reliable Maestro 600SB Blindstitch Hemmer Machine, Knee Lever, Cylinder Arm, Swing Plate, Curve Needle, Eye Guard, 2:1 Skip Stitch, 24Lb(700SB/MSK-588
$379.99
