

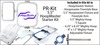
Includes
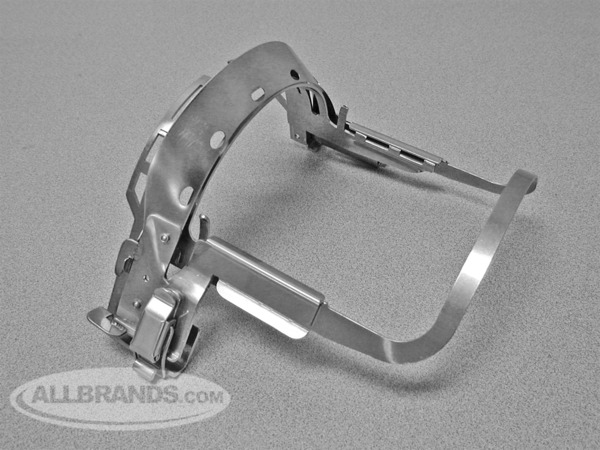
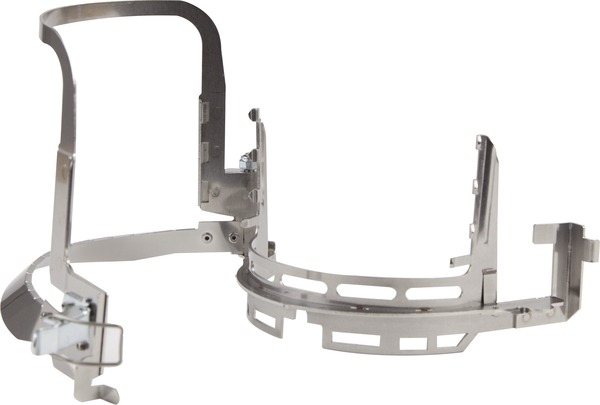
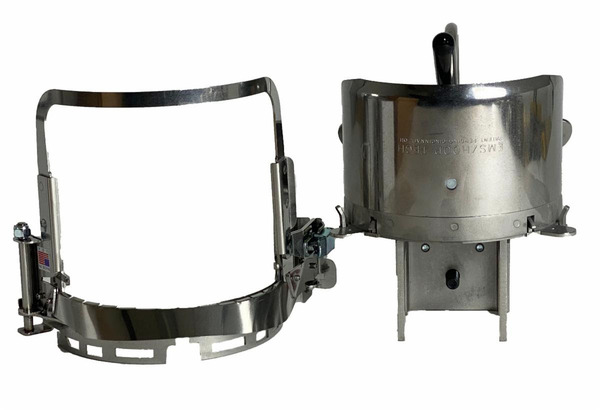
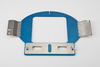
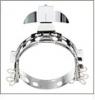
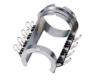
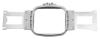
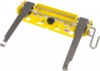
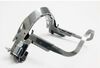
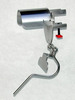
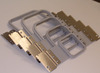
The Gen 2 from Hoop Tech is the next generation HTProfessional-style cap hat frame which is designed for sewing closer to the bill than ever before.
"The hat hoops are GREAT! So much better to use than the ones that come with the machine, very fast and easy to hoop and put on the machine, I should have bought them sooner" Joann P, Holliday RL.
Requires EMS Hoop Tech Dream T-Bar Gauge Clamp for the Dream Cap Frame Made in USA, Also requires an optional Brother Driver from the original PRPCF1 Cap Equipment Box*
*Also Requires EMS Hoop Tech Dream T-Bar Gauge Clamp for the Dream Cap Frame Made in USA, Larger Height and Less Width Sewing Area than PR Cap Equipment, for Brother PR655, PR1000, PR1000E, and Babylock ENT10 BNT10 10 Needle Embroidery Machines.
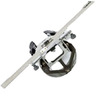
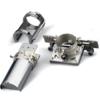
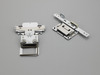
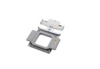
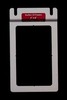
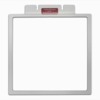
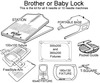
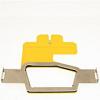
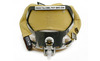
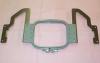
Note: The hoop sensor override bracket is not sold separately. It comes with any Hoop Tech Gen2 Dream Frame (599733 & 599734) that is sold for the Brother PR & BabyLock machines.The Override Bracket is stapled to the Gen 2 in a set of instructions. Hoop Tech
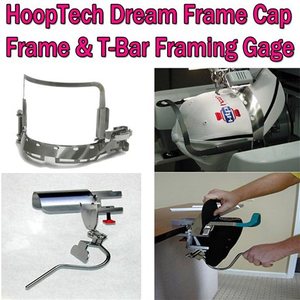
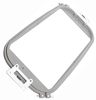
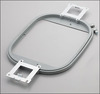
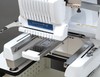
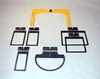
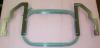
Introducing the Hoop Tech "Dream Frame" Cap/Hat Hooping Frame
This is the next generation of EMS style cap frames. It was specially designed with the larger field embroidery machines in mind like Brother and Babylock.
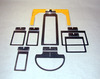
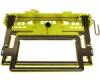
New “DREAM FRAME” features include:
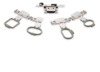
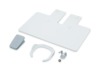
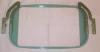
• Backing clips to hold your stabilizer in place during framing.
• Internal retaining fingers for proper bill alignment.
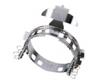
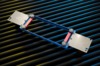
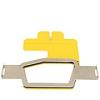
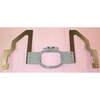
• A spring steel bill retainer that sets and holds the bill angle.
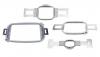
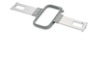
• View ports to use as alignment guides during framing.
• Lighter frame design (20% less weight) than the original.
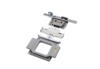
• Extended saddle for easier installation on driver.
• Open design Top Clamp.
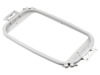
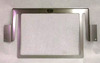
• Large sewing field
The stitch quality of the Dream Frame is even better than the original EMS style cap frame and it’s easier to frame using the redesigned T-Bar Framing Gage Seen in Recommended accessories below:
DREAM FRAME demonstration by Hoop Tech Products:
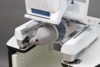
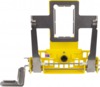
Setting up the Gen2 on your Brother PR/Babylock machine
Important Notes:
- The Dream T-Bar Gauge clamp is required to use this Cap Frame.
- Can be used with existing Brother/Babylock Driver. but it is recommended that you use the Dream T-Bar Gauge for optimum results.
- There is a metal cap that covers the machine's hoop sensor which tells the machine a Cap Frame is attached. For each sew out press the layout icon for trial run to ensure the needle will not hit the hoop while sewing.
NOTE: When using hoops on your Brother machine that are non-Brother hoops you may have to do a trial layout. Make sure the needle or foot will not hit the frame when it is sewing.
Click To Download PR Drive Modification Instructions
ATTENTION BROTHER PR & BABY LOCK OWNERS
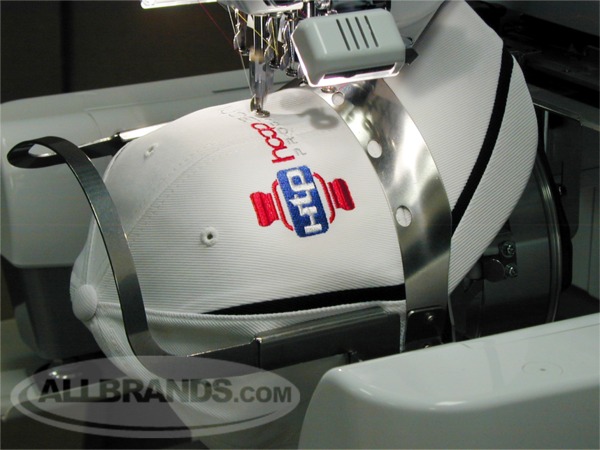
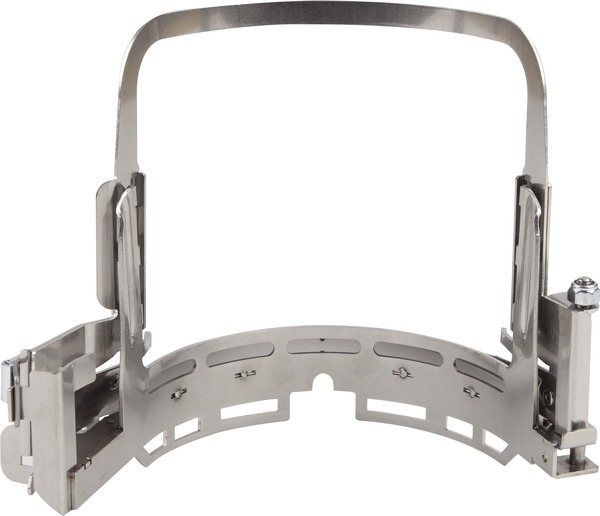
The new “GEN 2” will turn your (6) & (10) needle machine into a REAL cap sewing machine. The new bill holding strap holds down the bill so you can get closer to the needles than ever before, for a much larger sewing field.
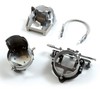
For PR & Baby Lock owners, the “GEN 2” comes with a specially designed override bracket that attaches to your cap frame drive bar with one of the 2 thumb screws, and allows you to sew a larger sewing field and also increases the stitching speed. (Just click here to see how easy it is to set up your machine for the dream frame)
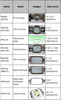
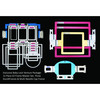
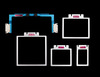
The maximum height you can stitch is approximately up to 4" and 5.5"- 6" left to right and as close to 1/2"-5/8" from the bill. However, we do not recommend trying to embroider to the maximum sewing areas depending on the capabilities of your machine. Sewing too close to the top of the cap or too close to the bill could compromise the quality of your stitch. A more realistic measurement would be somewhere between 2" to 2.5" high and 5" to 5.5" across without losing registration.
Stitch Area
Maximum height: Approximately up to 3.5 to 4" and closer to the brimMaximum width Approximately 5.5"- 6"
Note:Manufacturer does not recommend embroidering to the maximum sewing areas depending on the capabilities of your machine. Sewing too close to the top of the cap or too close to the bill could compromise the quality of your stitch. A realistic measurement of the stitch area would be somewhere between 3" to 3.5" tall and 5" to 5.5" wide without losing registration.
As a reminder we do not guaranty a sew field of the Gen 2 because the sew field depends on the machine type and the style of hat. Hoop Tech.
HOW TO USE THE Hoop Tech GEN2 CAP FRAME on Your Brother PR Machine Video:In this Hooptech How To we show you how to use the Gen2 Capframe. Formerly known as the "Dream frame," this revolutionary frame helps embroidery businesses small
How to Hoop a Richardson/outdoor Cap Video:
How to hoop Bucket hats and Visors using the Gen 2 System:
Override Installation Clip on PR Machines
Hoop Tech Dream Frame Cap Frame part numbers for Brother PR Series compatible with models:
Brother PR600/600II/620/650/655 - 599733
Brother PR1000 Series - 599734
Baby Lock 6 Needle - 599733
Baby Lock 10 Needle - 599734
ATTENTION BROTHER PR & BABY LOCK OWNERS:
The new GEN 2 hat hoop will turn your (6) & (10) needle machine into a REAL cap sewing machine.
The new bill holding strap holds down the bill so you can get closer to the needles than ever before, for a much larger sewing field.
For PR & Baby Lock owners, the GEN 2 comes with a specially designed "override bracket" that attaches to your cap frame drive bar with one of the 2 thumb screws, and allows you to sew a larger sewing field and also increases the stitching speed.
The maximum height you can stitch is approximately up to 4" and 5.5"- 6" left to right and as close to 1/2"-5/8" from the bill. However, we do not recommend trying to embroider to the maximum sewing areas depending on the capabilities of your machine. Sewing too close to the top of the cap or too close to the bill could compromise the quality of your stitch. A more realistic measurement would be somewhere between 2" to 2.5" high and 5" to 5.5" across without losing registration. Note: You need to already own the Brother hat jig and driver for this item to work.
 HoopTech 599734 GEN2 Solution Hat Hoop Dream Frame +599775 Tbar Gauge. Add Required Brother Cap
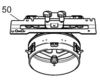
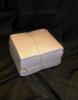
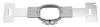
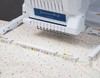
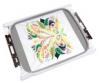
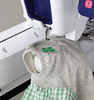
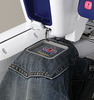
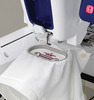
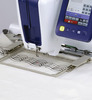
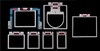
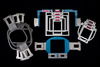
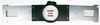
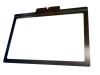
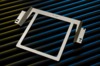
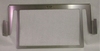
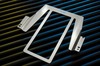
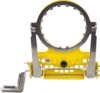
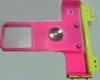
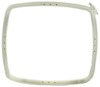
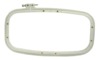
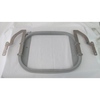
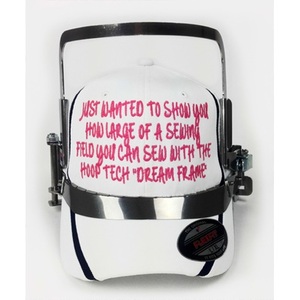 Just wanted to show you how large of a sewing field you can sew with the Hoop Tech Dream Frame
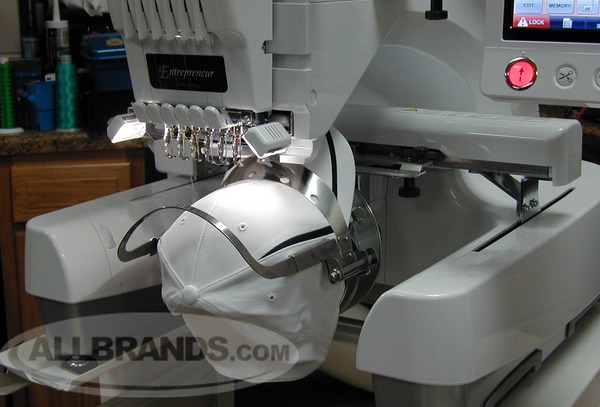
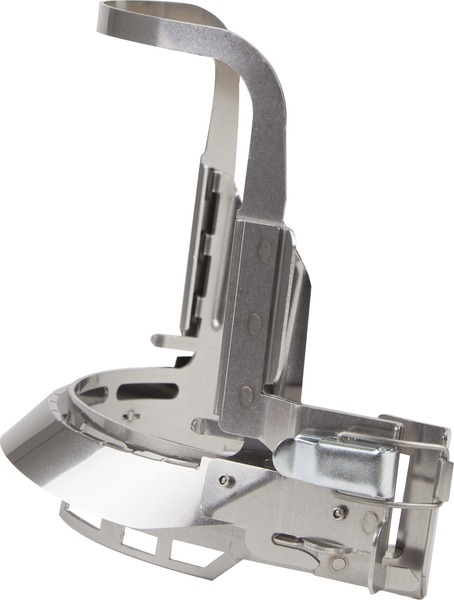
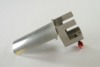
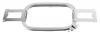
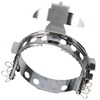
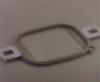
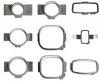
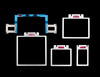
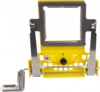
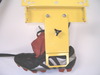
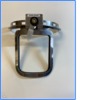
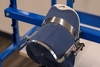
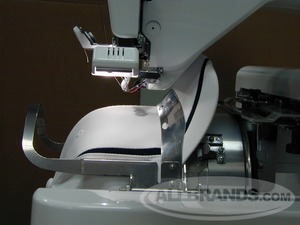 The innovative spring steel bill retainer holds the lower front of the cap and helps to eliminate flagging.
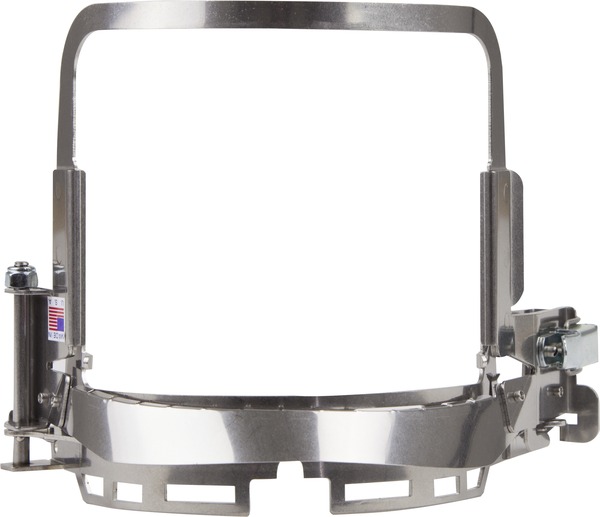
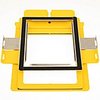
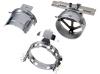
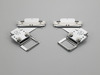
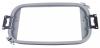
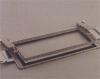
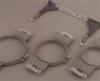
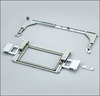
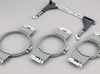
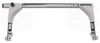
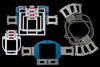
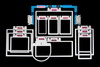
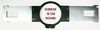
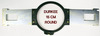
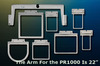
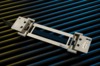
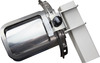
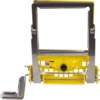
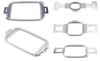
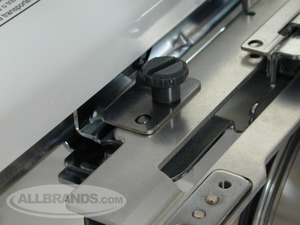 The existing Sewing Field Override bracket lets the PR owner take advantage of the larger sewing field available on the dream frame. Hoop Tech includes this override Bracket for Brother PR1000 and Babylock ENT BNT 10 Machines. Please be sure to do a trial layout before sewing to make sure the needle never hits the hoop
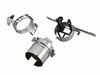
 Overide installation on PR1000 machines
 The Gen2 Starter. HoopTech 599734 GEN2 Solution Hat Hoop Dream Frame +599775 Tbar Gauge. Add Required Brother Babylock Cap Driver for PR1000 PR1050x If You Don't Have
I was told the design had to stitch from the center out. Is that true? Debbie
When hat specific designs are digitized, they are designed to embroider center out.
Other digitized designs can work, but best results are with designs that move center out. Hoop Tech.
The hat hoops are GREAT! So much better to use than the ones that come with the machine, very fast and easy to hoop and put on the machine, I should have bought them sooner


Recommended Accessories


Other Items You May Be Interested In
-
Brother PEDESIGN11 Full Version Software +Durkee STURDYPED12x14" SturdiFrame Split Design Hoop for PR600 PR620 PR650 PR655 PR670 PR1000 PR1050 PR1055
$1,599.99 Free Ground Shipping to the Contiguous USA Retail -
Brother PR 4in1 Embroidery Hoops 2.3x1.5" PRH60mm, 4x4" PRH100mm, 5x7" PRH180mm, 8x12" PRH300mm PR600 PR620 PR650E PR1000E Babylock EMP BMP8 ENT BNT10
-
Brother PR10 8in1 Embroidery Hoops PRH60mm PRH100mm PRH130 PRH180mm PRH300mm PRF300 PRPH360 PRPJF360
Free Ground Shipping to the Contiguous USA -
Brother PRCF3 Cap Equipment 2.5x5* Hat Hoop Frame, Mounting Gauge, Driver &Tools for PRS100 PR600II PR620 PR650 PR655 PR670 PR680 PR1000 PR1050 PR1055
$999.99 Free Ground Shipping to the Contiguous USA -
Brother PRCF5 4pc Flat Brim Hat Hoop 2.5x5" Mounting Bracket, Cap Driver, Universal PR1055 PR1050 PR1000 PR680 PR670 PR655 PR650 PR620 PRS100 Babylock
$1,249.99 Free Ground Shipping to the Contiguous USA -
Brother PRCFH2 Extra Narrow Cap Holding Hat Hoop Frame for Driver1 2x5" Embroidery Above Brim for Original PR600 PR620 +Babylock 6 Needle Machines
$299.99 -
Brother PRCFH3 Cap Holding Hoop Frame Only for PRCF3 2.5x5in on PRS100 PR1X PPR600II PR620 PR650 PR655 PR670 PR680 PR1000 PR1050 PR1055, Babylock
$299.99 Free Ground Shipping to the Contiguous USA -
Brother PRCFH5 Flat Brim Cap Frame Hoop Only for PRCF5 3pc Cap Equipment PR1055X PR1050 PR1000, PR675 PR655 PR650 PR620, PRS100 Babylock Models
$269.99 Free Ground Shipping to the Contiguous USA -
Brother PRCL1 Demo 3 Piece Tubular Hoop Cylinder Frame (Not a Hat Cap Frame). Driver, and Gauge for PRS100 PR600's PR670, PR1000, PR1050X PR1055, BL
Free Ground Shipping to the Contiguous USA Floor Model -
Brother PRCL1 3pc Tubular Hoop Equipment (Not a Hat Cap Frame) Includes Driver, Gauge, Cylinder Frame PRS100 PR620 PR670 PR680 PR1000 PR1050 PR1055 BL
$999.99 Free Ground Shipping to the Contiguous USA -
Brother PRCLH1 Cylinder Frame Hoop for PRCL1 on PR1055X PR1050X PR1000 PR680 PR670 PR650 PR620 PR600 PRS100 Babylock Multi Needle Embroidery Machines
Free Ground Shipping to the Contiguous USA -
Brother PRCLP45B Arm D Driver, Tubular Center Clamp Hoop, Shoe Sides, Dog Collars, Name Tapes on PR655 PR670 PR1000 PR1050X PR1055X
$599.99 Free Ground Shipping to the Contiguous USA -
Brother PRCLP45LR Left & Right Clamp Hoops w/o Arm D Driver for .8x1.8" Designs on Larger Shoe Sizes for PR6 670E PR1000 1050 1055 Embroidery Machines
$599.99 Free Ground Shipping to the Contiguous USA -

Brother PRCLPM1 Tubular Clamp Frame 4x4" Patch Hoop M +Arm Connector Frame Holder D for PR1055X, PR1050X, PR1000, PR670E, PR680W, PR1X, Babylocks
$399.99 Free Ground Shipping to the Contiguous USA -
Brother PRF300 12x8" Flat Frame Hoop for Bulky Items for PR600 PR600II PR620 PR650 PR1000, Babylock BMP-FF for EMP6 BMP8 BMP9 ENT10 Embroidery Machine
$129.99 Free Ground Shipping to the Contiguous USA -
Brother PRH100, Babylock EPF100, 100x100mm, 4x4" Embroidery Hoop XC5964051 for PRS100, PR600, PR620, PR650, PR655, PR670, PR1000, PR1050. PR1050X & BL
$69.99 Free Ground Shipping to the Contiguous USA -
Brother PRH180 Babylock EPF180 180x130mm 5x7 XC5959051 Embroidery Hoop Frame PRS100 PR600 620 650 670 680,1000,1050,1055,BL EMP6 BMP8 BMP9 ENT10 BMP10
$89.99 -
Brother PRH300 Babylock EFP300 8x12 Embroidery Hoop XC5954051 for PR600 PR620 PR650 655 PR670 680 PR1000 PR1050PR1055, Bl EMP6 BMP8 BMP9 ENT10 BNT10
$89.99 Free Ground Shipping to the Contiguous USA -
Brother PRH60 Babylock EPF60 60x40mm Embroidery Hoop Frame XC5969051 for PRS100 PR600 620 650 655 670 680 1000 1050 1055, BABYLOCK
$69.99 Free Ground Shipping to the Contiguous USA -
Brother PRHCK1 Compact 4Hoop Tubular Freearm Frames 1.25x1.75 Round, 2x2 Square, 1x3 Oblong, 1.3x1.3 Portrait +Embroidery Arm E for PR6 PR10 Babylock*
$399.99 Free Ground Shipping to the Contiguous USA -
Brother PRHSL200 3x8" Sleeve Frame Tubular Hoop for PR1X 650 655 670 680 PR1000 1050 1055 Babylock Multi Needle Embroidery Machines w/Hoop Recognition
$149.99 Free Ground Shipping to the Contiguous USA -
Brother PRMH50 2x2" Tubular Magnetic Clamp Hoop Only for Arm, on Entrepreneur 6-Plus PR670E, PR680W to PR1055X
$119.99 Free Ground Shipping to the Contiguous USA -
Brother PRMHA50 2x2" Tubular Magnetic Hoop Clamp Frame and Arm Set for PR1X, PR670E, PR680W, PR1055X
$179.99 Free Ground Shipping to the Contiguous USA -
Brother PRMS360 Hoopnetic Magnetic Sash, Border and Quilting Frame 7.87 x 14" for PR1050X PR1055X, PR1000 PR1000E, PR670E, PR680W, PR1X
$449.99 Free Ground Shipping to the Contiguous USA -
Brother PRPBF1 4x12" Continuous Border Frame Clamp Hoop for PR1000 PR1050X PR1055X, Requires PRPUGK1 Upgrade w/ Pattern Connect to use Camera, Snowman
$399.99 -
Brother PRPCF1 3pc Wide Cap Hat Equipment: Driver, Hooping Gauge, Hat Hoop Frame 270° 2.5x14 Wide for PR1000 PR1050 PR1055 +Babylock 10Needle Machines
$1,189.00 Free Ground Shipping to the Contiguous USA -
Brother PRPCFH4 Wide Cap Frame Only, 2-3/8X14" 360mmX60mm Hat Hoop for PRPCF1 on PR1000, PR1000E, PR1050X, PR1055X, Babylock 10 Needle Emb. Machines
$329.99 Free Ground Shipping to the Contiguous USA -
Brother PRPH360 Large Hoop Frame 8x14 360X200mm PR1000 PR1050 PR1055, Use Embroidery Arm A and 30x15" Extension Table Support for Flat Hoops
$99.99 Free Ground Shipping to the Contiguous USA Retail -
Brother PRPJF360 14x14" Sq 360x360mm Reversible Jumbo Frame Hoop for Split Designs on PR1000, PR1050X, PR1055X, Babylock
$299.99 Free Ground Shipping to the Contiguous USA -
Brother PRPQF200 8x8" 200mmX200mm Square Hoop Quilting Frame for PR1-6-10 Using Embroidery Arm B 30x14" Extension Table for Traditional Quilt Blocks
$199.99 Free Ground Shipping to the Contiguous USA -
Brother PRPRFK1 Babylock ENRFS 3in1 Round Circular Hoops 4, 5 and 6" Frame Kit with Arm C for PR1000, PR1050X, PR1055X, PR655 PR670E PR680W, Babylocks
$399.99 -
Brother PRS100 Persona 8x8 Sew Field, 6Flat &FreeArm Tubular Hoops, Disney Embroidery Machine +Pick1 0% APR, Or Trade In
$4,499.99 Free Ground Shipping to the Contiguous USA -
Brother PRSBH1 4x7” 100x180mm Border Frame Hoop +50 Designs on USB Stick, for Persona PRS100, Babylock Alliance BNAL Embroidery Machines, Use Arm "A"
$399.99 Free Ground Shipping to the Contiguous USA -
Brother PRSCLPM1 Tubular Clamping Frame & Arm Set M, 4x4" Hoop for PRS100 Persona, Babylock BNAL, Janome MB4, MB7
$299.99 Free Ground Shipping to the Contiguous USA -
Brother PRSFLH200 8x8” Flat Quilt Hoop Frame Persona PRS100, Babylock Alliance BNAL Embroidery Machines
$149.99 Free Ground Shipping to the Contiguous USA -
Brother PRSFMK1 Free Motion Kit for PRS100 Persona/BL Alliance BNAL: Foot Control, 21x25 Ext Table, Grip Hoop, ModeAuto Activator, Fabric Guard, Video
$599.99 -
Brother PRSH44 PRS100 Compact Hoop Frame 1.25x1.75" for Persona PRS100, Babylock Alliance BNAL Embroidery Machines
$69.99 Free Ground Shipping to the Contiguous USA -
Brother PRSH50 Compact Hoop Frame 2x2" for Persona PRS100, Babylock Alliance BNAL Embroidery Machines
$69.99 Free Ground Shipping to the Contiguous USA -
Brother PRSH70 Compact Hoop Frame 1.3x3" for Persona PRS100, Babylock Alliance BNAL Embroidery Machines
$69.99 Free Ground Shipping to the Contiguous USA -

Brother PRSHV PRS100 Compact Hoop Frame 3x1.3" for Persona PRS100, Babylock Alliance BNAL Embroidery Machines
$69.99 Free Ground Shipping to the Contiguous USA -
Brother PRSRHK1 4” 5” 6” Round Frame Hoop Set for Persona PRS100, Babylock Alliance BNAL Embroidery Machines
$399.99 Free Ground Shipping to the Contiguous USA -
Brother PRSTH200 8x8" Tubular Hoop Frame, Persona PRS100, Babylock Alliance BNAL Embroidery Machines
$169.99 Free Ground Shipping to the Contiguous USA -
Brother PRTTI PRTT1 Expandable Sliding Support Extension Table for Tubular Hoop Frames: PR1055 PR1050 PR1000 PR680 PR670 PR655 PR650 PR620 PRS100 PR1X
$399.99 -

Brother SASTURDY12 X14" DURKEE Sturdi Split Design Hoop Frame for 6 & 10 Needle PR600 PR620 PR650 PR655 PR670 PR1000 PR1050 PR1050X needs PE Design 11
$249.95 -
Brother XD0637051 XD0637052 Hoop Holder Tubular Round Hoop Arm Supply Assembly For PR600 PR620 PR650 PR655 PR670 PR680D Babylock
$99.99 Free Ground Shipping to the Contiguous USA -
Durkee 1.5"x4" EZ Tubular Hoop 3/16" Aluminum Frame - For use with existing Multineedle EZ Frames
$49.95 -
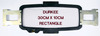
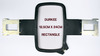
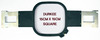
Durkee PR3010 30x10cm (11 7/8 x 4) Rectangle Embroidery Frame Single Hoop with Brackets for Brother PR6-10 Needle, Babylocks
$69.99 Free Ground Shipping to the Contiguous USA -
Durkee 12.5CM x 24CM (5"x9" I.D.) Rectangular Hoop - for Brother PRS 100 Persona and Babylock Alliance BNAL
$66.00 Free Ground Shipping to the Contiguous USA -
Durkee 12in1 Embroidery Hoop Package for the Brother PR1055X and Babylock Venture, 12 piece EZ Frame Master Set, 3 SizesSturdiFrames, Multi-Needle Cap
$999.99 -

Durkee 12x4" Optional Hoop for use with 7in1 Tubular EZ Frames, Heavy Duty 3/16" Aluminum for Brother Babyloci PR6 to PR10 Needle Embroidery Machines*
$54.95 -
Durkee 15cmx15cm (6"x6" I.D.) Square Hoop-for Brother PRS100 Persona and BL Alliance
$42.00 -
Durkee 2"x4"" EZ Tubular Hoop 3/16" Aluminum Frame - For use with existing Multineedle EZ Frames
$49.95 -
Durkee 2.5"x4" EZ Tubular Hoop 3/16" Aluminum Frame - For use with existing Multineedle EZ Frames
$49.95 -
Durkee 24x24cm 9x9" Square Hoop for Brother PRS100 Persona and Babylock Alliance BNAL
$66.00 Free Ground Shipping to the Contiguous USA -
Durkee 3"x4"" EZ Tubular Hoop 3/16" Aluminum Frame - For use with existing Multineedle EZ Frames
$49.95 -
Durkee 3"x8"" EZ Tubular Hoop 3/16" Aluminum Frame - For use with existing Multineedle EZ Frames
$59.99 -
Durkee 4"x12" EZ Tubular Hoop 3/16" Aluminum Frame - For use with existing Multineedle EZ Frames
$59.95 -
Durkee 4"x4" EZ Tubular Hoop 3/16" Aluminum Frame - For use with existing Multineedle EZ Frames
$49.95 -
Durkee 5"x4"" EZ Tubular Hoop 3/16" Aluminum Frame - For use with existing Multineedle EZ Frames
$49.95 -
Durkee 5"x5" EZ Tubular Hoop 3/16" Aluminum Frame - For use with existing Multineedle EZ Frames
$59.95 -
Durkee 5"x8" EZ Tubular Hoop 3/16" Aluminum Frame - For use with existing Multineedle EZ Frames
$54.95 -

Durkee 6"x6" EZ Tubular Hoop 3/16" Aluminum Frame - For use with existing Multineedle EZ Frames
$59.95 -
Durkee 7"x5"" EZ Tubular Hoop 3/16" Aluminum Frame - For use with existing Multineedle EZ Frames
$54.95 -

Durkee 7"x7" EZ Tubular Hoop 3/16" Aluminum Frame - For use with existing Multineedle EZ Frames
$54.95 -
Durkee 8"x8" EZ Tubular Hoop 3/16" Aluminum Frame - For use with existing Multi needle EZ Frames
$54.95 -

Durkee 8x12in x 3/16in Thick Aluminum Hoop Frame one of many Tubular EZ Flat Frames for Brother and Babylock PR6 to PR10 Needle Embroidery Machines
$59.95 -
Durkee 9 Hoops Round: 3.5, 4.5, 5.5, 7, Squares: 6x6, 5x9, 9x9, Large: 12x4, 12x6" for Brother PR6-1000 and Babylock
$399.99 -
Durkee A.S.K. Embroidery Hoop Starter Kit, 11in1 Tubular Frames for Brother Persona PRS100, Babylock Alliance BNAL
$664.00 Free Ground Shipping to the Contiguous USA -
Durkee CF-PR-MN 5.5x6 Flat Cap Frame Front, Hat Back Hoop, Insert for Brother SACFPRS for Persona PRS100, Babylock Alliance BNAL Embroidery Machines
$195.99 Free Ground Shipping to the Contiguous USA -
Durkee EZ-4 PC PR 6 & 10 Needle Kickstart 4in1 EZ Frames Tubular Hoops 3/16" Aluminum for Brother PR6 PR1000 PR1050 PR1055 2x4 5x4 7x5 8x8 for A Arms
$249.95 -
Durkee 8in1 EZ Frames +Arm for Brother PR1X-1055X & BL, Heavy Duty 3/16" Aluminum Tubular Hoops 2x4 2.5x5 3x4 5x4 7x5 8x8 8x12"+Cap Back/Radius Frame
$349.95 Free Ground Shipping to the Contiguous USA -
Durkee EZ Frames 12in1 Master Set 8pc: Adaptor arm + 1-1/2"x 4", 3"x 8", 5"x 8" & 12"x 4" for Brother PR, Babylock 6-10 Needle Machines Only
$529.00 Free Ground Shipping to the Contiguous USA -
Durkee Kickstart 4in1 EZ-4 Frames Tubular Hoops 3/16" Aluminum for Brother PRS100 Persona, Babylock Alliance BNAL
$249.99 -
Durkee M.S.K Embroidery Hoop Deluxe Multi Needle Starter Kit, 11in1 Frames for Brother PR6 PR1000, Baby Lock 6 & 10 Needle Machines
$664.00 Free Ground Shipping to the Contiguous USA -
Durkee PR09RD 3-3/16" Round Hoop Brackets Brother PR600 PR1000 Babylock
$49.99 -
Durkee PR12.5x24cm 5x9" Hoop Frame & Brackets for Arm A on Brother PR600's, PR1000, PR1050X, PR1055 Babylock 6-10 Needle Embroidery Machines
$66.00 Free Ground Shipping to the Contiguous USA -
Durkee PR12RD 4.5" Round Hoop, Brackets, Brother PR600 PR1000 PR1050X, Babylock
$49.99 -
Durkee PR1515cmSQ 6x6 Hoop Frame +Brackets for Brother PR600 PR620 PR650 PR655 PR670 PR680 PR1000 PR1050X PR1055 +Babylock Freearm Embroidery Machines
$42.00 -
Durkee PR15RD 5.5" Round Hoop, Brackets, Brother PR600 PR1000 PR1050 Babylock
$49.99 -
Durkee PR18RD 7" Round Hoop & Brackets, Brother PR600 PR1000 Babylock
$49.99 -
Durkee PR2424SQ Square 9x9" Hoop & Brackets for Brother PR600 PR620 PR650 PR655 PR670, PR1000, PR1050, Babylock* Sews 8x8" or Split Designs up to 4x8"
$66.00 Free Ground Shipping to the Contiguous USA -
Durkee PR3015 12x6" Hoop & Brackets for Brother PR6, PR1000, PR1050X, PR1055X, Babylock
$69.99 Free Ground Shipping to the Contiguous USA -
Durkee 7in1 EZ Single Frames & Arm: Brother PR600-PR1055, Heavy Duty 3/16" Aluminum Tubular Hoops 2x4 2.5x5 3x4 5x4 7x5 8x8"+Cap Back Ø(Fast Frames+)*
$349.99 Free Ground Shipping to the Contiguous USA -
Durkee SAEZ7PRS 7in1 EZ Frames for Brother PRS100 & Babylock, Heavy Duty 3/16" Thick Aluminum Tubular Hoops 2x4 2.5x5 3x4 5x4 7x5 8x8+Cap Back/Radius
$395.00 -

Fast Frames 080 5.5x6" Area, Single Frame Hat Hoop with Side Brackets, Brother PR and Multi Needle Embroidery Machine Brands and Models
$219.99 -
Fast Frames 101-012 12x14" Jumbo Hoop w/12x7" Sewing Field, SAFF012 Brother PR600 PR620 PR650 PR655 PR670 PR680, Babylock 6 Needle Embroidery Machines
$199.99 -

Fast Frames 101-014 Military Name Tag Tape Embroidery Hoop for Brother PR600 PR620 PR650 PR655 PR670 PR680 PR1000 PR1050 PR1055 +Babylock Multi Needle
$349.99 -
Fast Frames 101-015 Karate & Belt Hoop Frame 3x9" for Brother PR6 to PR1000, PR1050X PR1055X, Babylock Multi Needle Machines
$339.99 -
Fast Frames 101-020-013 Lg 11x7" Hoop Frame, Add on For 7in1 on Brother PR6, PR1000, PR1050X, PR1055X and Babylock Multi Needle Embroidery Machines
$49.99 -
Fast Frames 101-022 SAFF022 7 in 1 Arm +7 Tubular Hoops for Brother PR600 PR620 PR650 PR655 PR670 PR680 Babylock BMP EMP 6 Needle Embroidery Machines
$379.99 -

Fast Frames 101-025 8in1 Hoops +12x7" for Brother PR600, PR620, PR650, PR655, PR670E, Babylock 6 Needle Embroidery Machines, 21 Stabilizer Samples
$379.99 -
Fast Frames 101-032 Deep Bag Hoop Frame 12x8" Brother PR6, PR1000, Babylock
$199.99 -
Fast Frames 101-033 Largest Square Bag Hoop Frame 8x8in for Brother PR600 PR620 PR650 PR655 PR655X, PR670E, PR1000 PR1050X and BL Embroidery Machines
$199.99 -
Fast Frames 102-012 14x14" Jumbo Hoop Brother PR1000 PR1050X PR1055x, Babylock Multi Needle Embroidery Machines
$199.99 -
Fast Frames 102-022 (Brother SAFF022) 7in1 Arm & 7 Tubular Hoops for Brother Freearm PR1000 PR1050X, PR1055X Babylock ENT BNT
$379.99 -
Fast Frames 102-032 Largest Deep Bag Hoop 14x7" for Brother PR1000, PR1050X, Babylock BNT10L, BMV10 Embroidery Machines
$199.99 -
Fast Frames 103-014 Military Nametape Hoop Frame for Brother PRS100 Persona, Babylock BNAL Alliance
$299.99 -
Fast Frames 103-022 X-Change 7in1 Arm & 7 Tubular Hoops for Brother Persona PRS100, Babylock Alliance BNAL Embroidery Machines
$379.99 -
Fast Frames 103-033 Deep Bag Hoop 8x8" for Brother Persona PRS100, Babylock Alliance BNAL Embroidery Machines
$199.99 -
Fast Frames 103-034 Sleeve Leg Bag Hoop 4.5x8" for Brother PRS100 Persona, Babylock Alliance BNAL Single Needle Embroidery Machines
$199.99 -
Hoop Tech 599919 3.0x3.75in Pocket Clamp+ 599555 Framing Gauge. Clamp Attaches to your existing Brother Babylock PR1000 PR1000E PR1050X Cap Driver
$299.99 -
HoopMaster Hooping Station for Brother PR600, PR650, PR655, PR670, PR680, PR1000, PR1050 PR1055 Hoops, Babylock Multi Needle Embroidery Machine Hoops
$799.99 -
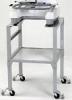
HoopTech 599374 Metal Roller PR6STAND w/Cap Post, Shelf, 4Casters 4Feet, Brother PRS100 PR6 PR10 Babylock Multi Needle Embroidery Machines, Heat Press
$669.99 -
HoopTech 599399 7in1 Quick Change Tubular Hoops, Brother PR6 & Babylock
$299.99 Free Ground Shipping to the Contiguous USA -
HoopTech 599399-6in1 Quick Change Tubular Hoops, Brother PR & Babylock
$244.99 -

HoopTech 599429 Brother SAPR34 3x5" Slimline 3pc Window Clamp for PR and Babylock
$149.99 Free Ground Shipping to the Contiguous USA -
HoopTech 599432 Brother SAPR4x4" Slimline Badges 3 Pc. Window Clamp Set for PR & Babylock, Requires Hoop Tech 599441 SAPRB Chassis Base Unit
$128.99 Free Ground Shipping to the Contiguous USA -
HoopTech 599435 Brother SAPR6x5 SlimLine 3pc Window Clamp for Brother PR & Babylock, Requires Hoop Tech SAPRB6 Chassis Attachment Window Frame Holder*
$129.99 -
HoopTech 599438 Slimline SAPR5RD, 5" Round 2 Piece Window Clamp for Brother PR6 PR10, Babylock Multi Needle Embroidery Machines
$139.99 -
HoopTech 599441 Chassis Base Unit Clamp For 3pc Slimline Window Frames on Brother PR600-1055 and BabyLock Multi Needle Embroidery Machines
$329.99 -

HoopTech 599458 Brother SAPR5x3" Slimline 2 pc Window Clamp for PR & Babylock
$128.99 -

HoopTech 599462 APR2RD 2" Round Slimline 3 Pc. Window Clamp for Brother PR6 PR10 and Babylock Multi Needle Embroidery Machines
$128.99 Free Ground Shipping to the Contiguous USA -
HoopTech 599466 Brother SAPR2x4" SlimLine 3 pc Window Clamp for PR6-1000 and Babylock
$129.99 Free Ground Shipping to the Contiguous USA -
HoopTech 599493 Brother SA599 PR2 Larger Chassis Base Unit, Rail Mounted Clamp, 11x5" and 8x5" Window Frames Set for PR6 PR10 Babylocks
$699.99 -

Hoop Tech 599530 Pocket Clamp Choose 2.5-3.5x3.75in for PRCF3 Cap Driver on Brother PRS1 PR600 PR620 PR650 PR655 PR670 Babylock 6 Needles
$149.99 Free Ground Shipping to the Contiguous USA -
HoopTech 599548 Brother SAPRHSR Slimline Hat Side Right 2pc Window Clamp PR Babylock
$97.99 Free Ground Shipping to the Contiguous USA -
HoopTech 599551 Brother SAPRHSL Slimline Hat Side Left 2pc Window Clamp PR6, PR10 and Babylock Multi Needle Embroidery Machines
$129.99 Free Ground Shipping to the Contiguous USA -
HoopTech 599567 Small 2.75x1.5" Shoe Clamp Hoop Frame and Bracket for PR Multi Needle Embroidery Machines PR600 PR650 PR670 PR1000 PR1050, Babylock
$469.99 Free Ground Shipping to the Contiguous USA -

HoopTech 599717 Large 3.5x1.75" Shoe Clamp Hoop Frame Bracket Brother PR
$499.99 Free Ground Shipping to the Contiguous USA -
HoopTech 599725 Koozie Clamp Frame, Adapter Bracket, for Brother PR and Babylock
$499.99 Free Ground Shipping to the Contiguous USA -
HoopTech 599733 GEN2 Generation II Solution Dream Cap Hat Frame Hoop Only, for Brother Babylock PRS1-6 Needle , Requires T-bar Gauge and PRCH3 Driver
$399.99 Free Ground Shipping to the Contiguous USA -
HoopTech 599775 T-Bar Framing Gauge 270° for Dream Cap Hat Hoop on Brother PR, Babylock Other Multi Needle Embroidery Machines*
$449.99 -
HoopTech 5.5”x2.5” Small Compact Back of Hat Clamp Frame, Rear Cap Embroidery, Brother PRS1 PR6 PR10 Babylock, Tajima Multi Needle Embroidery Machines
$369.99 -
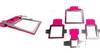
Hoop Tech 599869 SlimLine Hoop Chassis +4 Window Clamping Frames Set PINK: 7x6" 4.5x4.5" 3.5x5.5" 2x2" Brother PRS100 Persona Babylock BNAL, MB4 MB7
$659.99 Free Ground Shipping to the Contiguous USA -
Hoop Tech 599919 3.0x3.75in Pocket Clamp for Cap Drivers on Brother PR1000, PR1050X, Babylock 10 Needle Embroidery Machines (Requires driver)
$199.99 Free Ground Shipping to the Contiguous USA -
HoopTech PR-SQ Square Hoop Frames: 3.5" 4.5" 5.5" 6.5" or 7.5" for Brother PR600-655 PR670, PR1000 PR1050X, Babylock Multi Needle Embroidery Machines
$59.95 -
HoopTech GEN2 Solution Cap Hat Hoop Dream Frame, HoopTech 599734 for Brother or Babylock 10 Needle PR1000 PR1050x, Requires Tbar Gauge and Driver*
$399.99 -
HoopTech PR12X14" Split Design Hoop for Brother PR6 Needle & Babylock
$109.99 Free Ground Shipping to the Contiguous USA -
HoopTech PR6X11.5" Split Design Square Hoop for PR6 Needle and Babylock
$99.99 Free Ground Shipping to the Contiguous USA -
Mighty Hoop Brother PR Kit 2 Includes HoopMaster Starter PRKit1 +6.25x8.25 +8x13 +Adjust Fixture,Station,Free Style Base,5.5"Fixture,5.5"Frame,Tsquare
$1,199.99 -
Multi Task 12x8" Purse Bag Hoop Frame #4 Brother PR600-PR1000 Babylock
$279.99 Free Ground Shipping to the Contiguous USA -
Multi Task 2.4x1.6" Purse Bag Hoop Frame #1 Brother PR600-PR670E, PR1000-PR1055X, Babylock
$219.99 Free Ground Shipping to the Contiguous USA -
Multi Task 4x4" Purse Bag Hoop Frame #2, Brother PR600-PR1000 Babylock
$219.99 -
Multi Task 5x7" Purse Bag Hoop Frame #3 for Brother PR600-PR1000 Babylock
$219.99 -
Multi Task 8x8" Purse Bag Hoop Frame #5 for Brother PR1000, PR1050X and Babylock 10 Needle Embroidery Machine
$328.99 Free Ground Shipping to the Contiguous USA -
Sew Tech 5in1A Hoops 2.3x1.6/PRH60 4x4/PRH100 5x7/PRH180 8x12PRF&PRH300 for Brother PR6-680 PR1000 PR1050X, Babylock 6-10Needle Embroidery Machines
$199.99 Free Ground Shipping to the Contiguous USA -
SewTech Brother PR10 Needle, 8in1A Embroidery Hoops: PRH60mm PRH100mm PRH130 PRH180mm PRH300mm PRF300 PRPH360 PRPJF360
$299.99 Free Ground Shipping to the Contiguous USA
