


Setting the camera needle position is essential when you use camera or projector function. It is not necessary to perform this operation each time, but we recommend performing it when the needle is changed. Use the white stickers (solid) included with the machine.
image
Press image .
>> The settings screen appears.
Press image .
>> The General settings screen appears.
Display page 6 of the General settings screen.
Press image .
image
>> Camera needle position setting screen appears.
Follow the on-screen instructions to complete the procedure.
1. Press the needle position button to raise the needle.
2. After removing the needle and the presser foot, affix white sticker on needle dropping point area.
image (1) White sticker
3. Insert the needle (standard size 75/11 or 90/14).
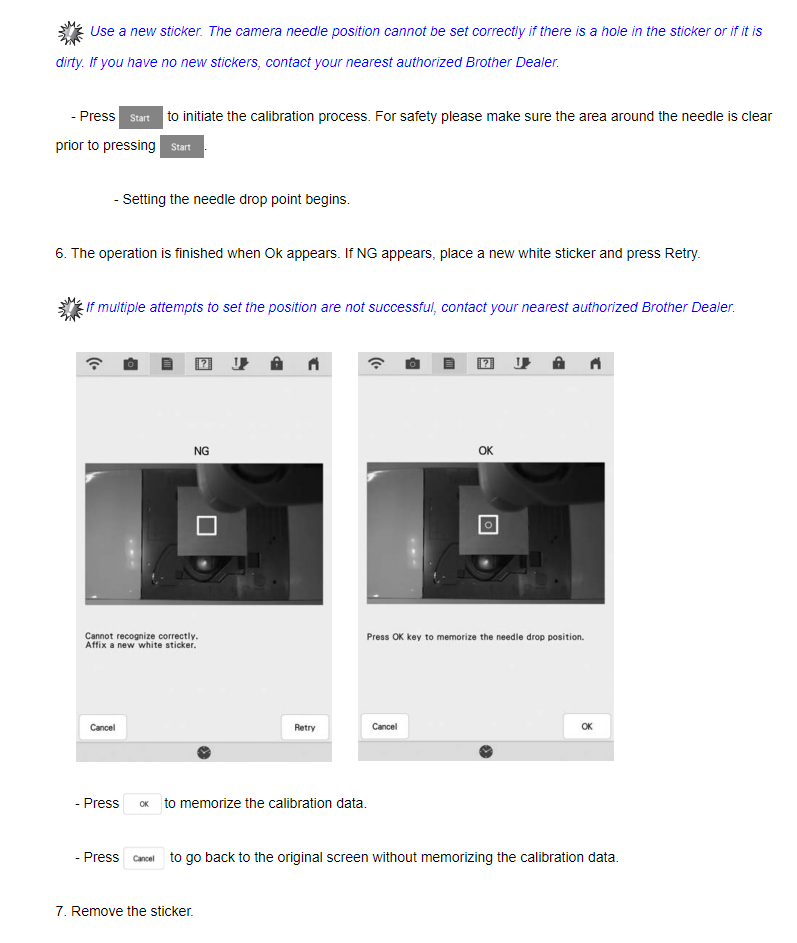
Use a new sticker. The camera needle position cannot be set correctly if there is a hole in sticker or if it is dirty. If you have no new stickers, contact your nearest authorized Brother dealer.
4. Press image to initiate the calibration process.
For safety please make sure area around needle is clear prior to pressing image .
>> Setting the needle drop point begins.
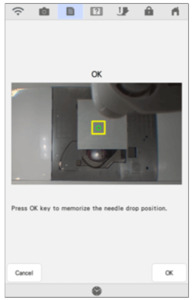
The operation is finished when OK appears. If NG appears, affix a new white sticker, and then press . If multiple attempts to set the position are not successful, contact your nearest authorized Brother dealer.
OK NG
image image
* Press OK to memorize the calibration data.
* Press image to back to original screen without memorizing the calibration data.
Recommended Accessories
Other Items You May Be Interested In
-
Brother XP3 Luminaire Sewing Embroidery Quilting Machine with Playbook, Masterclass, and 60mo 0% Financing Option April 5-29, 2024
Retail -
Brother Trade In XP1 Luminaire Sew Quilt Broidery Machine +XP3 Upgrade Software Installed +Artspira +Design Database +USB & WiFi
Free Ground Shipping to the Contiguous USA RB Refurbished -
Brother PR1055X Side Hustle Superstar Bundle 10 Needle Embroidery Machine +PR Stand +PRPCF1 Wide Cap Frame, Jig, & Driver + Flash, + 8in1 EZ Frames
-
Brother PR1055X 10Needle Embroidery Machine with 5x7 Flash Frame Plus Pick1 Bundle Options: Financing, Stnd Cap 7in1, or Trifecta Printmoda ScannCut
Retail -
Brother DEMO Entrepreneur Pro X PR1055X 10-Needle Embroidery Machine, 8x14" Embroidery Area, , 10"LCD, Scan,
Floor Model
