

{A} To replace the needles, remove the top front roller by removing the pins on each side. Lay the needles in the grooves with the tips going DOWN between the two back rollers and the curve laying over the lower front roller. It is helpful to lean the pleater back and prop it up by putting something under the front of the pleater to help keep the needles in place until the upper front roller is replaced and the pins are re-inserted into each end.
Princess Pleaters are Back In Stock! CNC machining of the brass bars, which is phenomenally accurate, Aluminum End Plates, Solid Base, Made in England, 0% Financing Available OAC for 6 Months.
Pleater Know-how Solid British craftsmanship and engineering for professional results, Pleating and smocking made easy, with a pleater you can really trust.
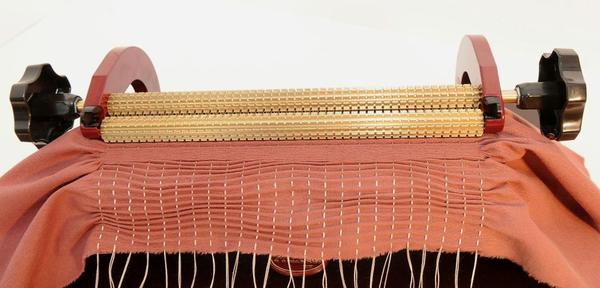
The Princess Pleater is the only pleater manufactured in the whole of Europe, or the USA. England is the home of smocking. For over 30 years we have produced this machine. Produced by craftsmen with traditional materials, it’s designed to be strong and long-lasting. The Princess Pleater has 24 rows with 47 half-spaced needle grooves along the 23.7cm wide brass rollers. Standard spacing per needle is 1.0cm, or for finer smocking using half-spaced needles, 0.5cm. The machine includes 24 needles fitted.
The process is simple, thread the needles, roll and feed in the fabric and off you go! Most fabrics pleat with ease, even needlecords and wools. The sides are open, so any width of fabric can be used. And handles at each end give complete control. Pleat depth is about 8mm, depending on fabric thickness.
Who uses the Princess Pleater?
- Amateurs and professionals in workrooms, dressmaking and artistic environments.
- Shibori artists enhance creativity, increase productivity.
- Schools, colleges, universities – for teaching.
- In fact, many students buy their own Princess because they are so impressed.
The Princess all-British Pleater enables you to gather fabrics for smocking, shibori, etc. It will save you time and trouble with those tedious tasks, and let you get on with more enjoyable work.
High-quality materials throughout. The base is varnished dense wooden fibre board. The side plates are solid aluminium, solid brass is used for the rollers. No adjustment should be needed, but it is important not to overtighten the screws holding the side plates to the baseboard.
OPERATION:
Thread as many needles as you need with the lengths of thread you require. You can remove any unwanted needles to save making needle holes in fabric where you want to avoid holes. See the section on changing or moving needles. Try a test piece first in case your first attempt would damage some valuable fabric. There might be some oil or transit grime left on the rollers – practice makes perfect.
Best way is to roll your fabric around a wooden dowel stick about 10 to 20mm. thick, of suitable length. We do not supply the stick with the machine as your requirements will vary according to the size of the fabric pieces you want to use. It helps to attach the end of the fabric to the stick with adhesive tape for stability.
Then slide the rolled fabric (on the stick) through the side loops of the upright coloured plates through which the rollers run, with the fabric coming off the bottom of the roll. Feed the leading straight edge of the fabric into the teeth of the top and bottom front rollers while turning the knobs gently, carefully ensuring that the fabric is taken up straight and evenly, as the start will determine the quality of the gathering across the whole piece.
Keeping the tension even all the way across the fabric is important, this can take a few attempts to get right. You can use either or both turning knobs plus an extra dowel stick laid over the fabric as it comes off the bottom of the first dowel stick. This second stick will need to be about 28cm. in length.
This second stick can be quite thick if you wish. What it does is to keep the tension even across the width of the fabric, while you have two hands free to turn the knobs. As you turn the knobs the fabric will pass through the rollers, emerging onto the needles and you will need to pull it onto the threads to keep the needles clear.
If you meet strong resistance as you turn the knobs it may mean the fabric is becoming folded. If this happens you can reverse up to a quarter turn of the knobs to release jammed fabric, but it is best avoided by making sure the fabric is taken up straight and not folded as it passes through.
FABRIC TENSION AND FINE SMOCKING:
Probably the most important detail which affects the quality of the gathering you will achieve is the tension of the fabric. If there is too much ‘pull’ against the direction of movement of the fabric, you will put stress on the needles and possibly tear a fine fabric. Conversely if there is no tension (or different tensions across the fabric width) you are more likely to have ‘off line’ or unevenly gathered fabric, or even missed gathers. Again practise makes perfect and lots of users use no dowel quite effectively. It all depends on your individual style.
By now you should have some gathered fabric – and that is all there is to it. Occasionally needles may break and these are easily changed.
There are half-spaced grooves the full width of the rollers to be used if you wish to do very fine smocking. Simply move the needles or use extra ones to fill as many of these positions as you need.
CHANGING, MOVING, REPLACING NEEDLES:
Using a small screwdriver inserted in the slot in the black circular roller holders. These are recessed into the coloured side plates and they hold the removable roller in position. Push the slots to the vertical position and the roller can be lifted out or levered gently using your screwdriver.
Now the needles will lift out easily and go back positioned just between the top and bottom front rollers where the fabric feeds in. The shoulder of the needle rests on the bottom back roller, the top back roller keeps the needles in place while gathering.
SPARE NEEDLES
Spare needles are available in packs of 16
REPAIR AND TOOLS
We do not supply any specific tools because all you are likely to need is a small screwdriver. To dismantle the machine (and it is very simple) for major cleaning or repairs you will need a cross-headed stubby screwdriver to loosen the screws under the bottom of the baseboard.
Alignment is important, so is light lubrication. PRINCESS PLEATERS is owned by Geoffrey Magnay, and he will do all he can to ensure you have years of trouble-free use from your Princess.
- US Warranty 1 year parts, 90 days labor on defects in materials and workmanship.
- Non-US Warranty: 30 days parts and labor
Dyer, embroiderer, author, teacher and passionate about cloth, vivienprideaux.co.uk
Princess Pleater Instructions PDF
CARE AND GUARANTEE:
Keep the machine away from dampness and water as this would damage it permanently. An occasional wipe of the rollers with a cloth dampened in methylated spirit will remove any accumulated dirt. Light machine oil could be applied to the roller axle pivots very sparingly after a great deal of use, but remember to run scrap cloth through repeatedly after oiling to avoid damaging valuable fabrics.
The machine will be best kept in its original box, when not in use to keep dust and accidental damage away. Dropping the machine is likely to cause permanent damage and misalignment. It will be best to keep the box and packing material anyway, in case you ever need to return the machine to us.
The machine is guaranteed against faulty workmanship and materials. Needles are only guaranteed against manufacturing faults as misuse will break them prematurely and they are regarded as expendable spares. This does not affect your statutory rights.
How to use your Princess Smocking Pleater. This Video shows you how to roll your fabric and pleat up your fabric for a dress front
5 Pleater Training Videos: Know Your Pleater, Preparing the Pleater, Preparing the Fabric, Pleating the Fabric, Specialized Pleating
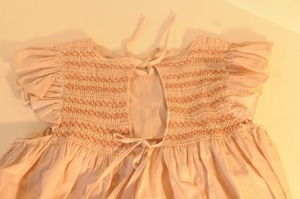
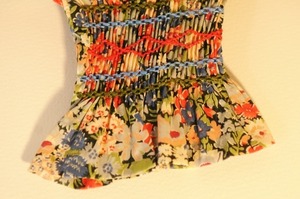 PLEATING EXAMPLES
 PLEATING EXAMPLES
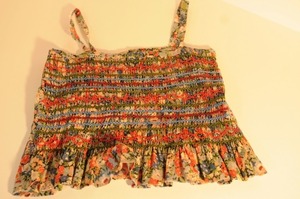
 PLEATING EXAMPLE
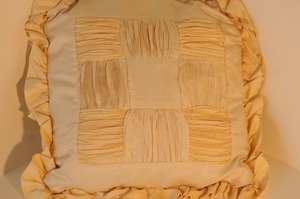 Sample
 Sample
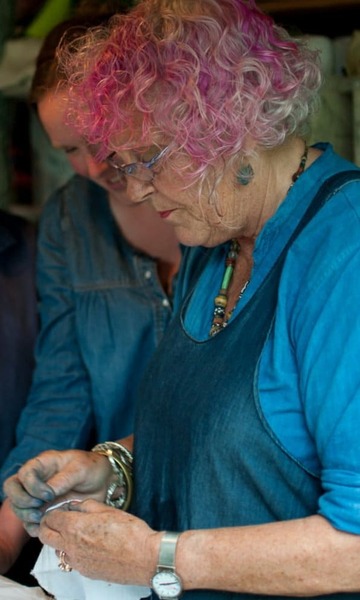 This is the world-leading Shibori exponent, Vivien Prideaux. Vivien has used the Princess Pleater for over 30 years.
 The pictures below show Vivien working with her Princess Pleater.
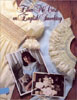
Vivien has written A Handbook of Indigo Dyeing about Shibori technique, folding, pleating, clamping, stitching and pole-wrapping, utilising the Princess Pleater. She illustrates the different stages, with step-by-step photographs and easy-to-follow text. More pictures of her work at vivienprideaux.co.uk. Book not included with pleater
The pictures below show Vivien working with her Princess Pleater.
Vivien has written A Handbook of Indigo Dyeing about Shibori technique, folding, pleating, clamping, stitching and pole-wrapping, utilising the Princess Pleater. She illustrates the different stages, with step-by-step photographs and easy-to-follow text. More pictures of her work at vivienprideaux.co.uk. Book not included with pleater
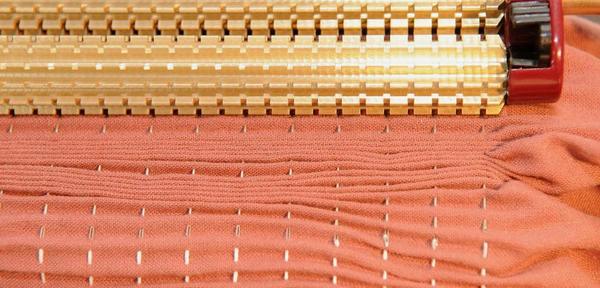
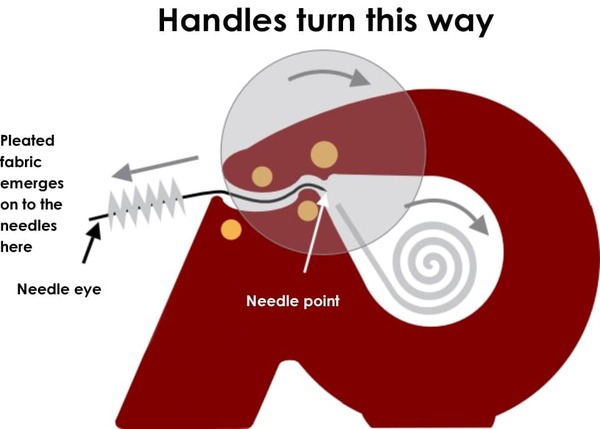 Here is the basic layout of the Princess, showing the direction of fabric in pleating
 Never operate the machine fast. Never allow children to touch it or components. Careless use could trap fingers between the rollers, ouch!
Remove packing tape and the machine is ready for use, but read these instructions first. The front of the machine is where the fabric is fed in. The back is where the fabric emerges. The right-hand axle from the front has left-hand thread. The left axle has right-hand thread. Use the machine either way round with one or both handles, whichever suits.
Never operate the machine fast. Never allow children to touch it or components. Careless use could trap fingers between the rollers, ouch!
Remove packing tape and the machine is ready for use, but read these instructions first. The front of the machine is where the fabric is fed in. The back is where the fabric emerges. The right-hand axle from the front has left-hand thread. The left axle has right-hand thread. Use the machine either way round with one or both handles, whichever suits.
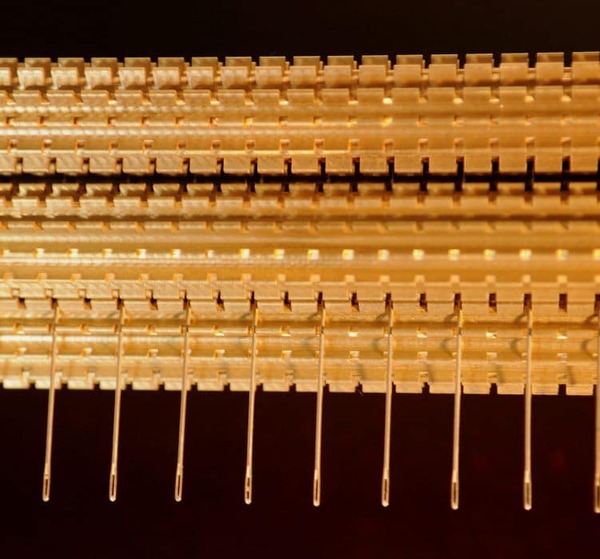 Needles
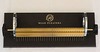
 Brass rolls
To replace the needles, remove the top front roller by removing the pins on each side. Lay the needles in the grooves with the tips going DOWN between the two back rollers and the curve laying over the lower front roller. It is helpful to lean the pleater back and prop it up by putting something under the front of the pleater to help keep the needles in place until the upper front roller is replaced and the pins are re-inserted into each end.
Which fabrics can I pleat?
Pre-washed Batiste is prefered. Other fabrics will have to be tested. The more needles and the heavier the fabric, the greater the chance of breaking needles.
I was told you are the expert regarding Read pleaters at your company. I have an old Read 24 needle pleater and I understand the replacement needles are not the same size as the original needles. Will the replacement needles work if I change all 24 as long as they are made by Read? Please advise and if you think they will work I will order them from you. Sylvia
John, the current 24/32-row Read needles will fit all the 24 & 32-Row pleaters, with one exception – there are some very old 24 & 32-Row pleaters still in use that have a different needle. This all happened over 30 years ago and I have not been able to establish exactly how many of these old pleaters were made at the time. These old pleaters used a +/- 1cm longer needle and the curvature varied slightly from our current needles. I must stress that there are very few of those pleaters still around. It is very difficult to distinguish these old pleaters from the later ones. Al at Read
Sylvia, unless your Read 24 Row Pleater is over 30 years old, the current needles should work at Pack of 12 Needles for Read 24 and 32 Row Pleaters, are larger than the Read 16 Row Pleater Needles. John
What do I do if my needles are snagging?
Remove all the needles and make sure that it doesn’t snag without the needles. If it does not, then the rollers are damaged. If the rollers run freely without needle, compare the needles side by side laying on the table to see if any are bent. Discard bent needles and start putting the needles back a few at a time and try to identify where the snagging starts.
How should I lubricate the pleater?
Periodically (depending on how much you use it), remove the needles and the rollers by taking off the handles and taking out two screws on one side of the bottom. Clean holes and end pieces of the rollers with a soft cloth. Lubricate sparingly with Sewer's Aid, Silicone lubricant (or sewing machine oil). The silicone will be less likely to stain your fabric. Put the pleater back together and run some paper towels or cotton fabric through to remove any excess lubricant before pleating your garment.
Our customer is pleating on corduroy, and they were wondering if you might make a needle that works on heavier weight fabrics. She buys many read pleaters from us. If not, do you have any suggestions for material with that texture, and weight to prevent breaking needles?
We have found that light weight corduroys are not really a problem to pleat, but there is obviously a limit somewhere along the line, which can only really be established by trial and error. As usual, it is always important to prepare any difficult fabrics by removing any starch beforehand. It also helps with difficult fabric to pleat a piece of kitchen wax paper through the pleater which leaves a thin film of wax on the needles and this helps with the pleating process. Regarding the needles, we only have our standard thickness of needles available. We are sometimes asked if we have thicker needles available, but we believe that as these would be more difficult to push through the fabric, they would probably be of no help.


Recommended Accessories

Other Items You May Be Interested In
-

Princess 24/47 Row Smocking Pleater Machine 9"Wide 5-10mm Needle Spacing Like Read Maxi, 5 Training Videos, Amanda Jane Super
$499.99 -
Read 24/47 Row Super Maxi Smocking Pleater Machine, 9" Wide Pleating Width, 5 Tutorial Videos, 24 Needles w/ 24 Full +23 Half Spaces=47 Total
$469.99 Free Ground Shipping to the Contiguous USA -

Terri Wood Tomorrows Treasures Heirloom Smocking DVD Video, Easy Techniques for English Smocking, Pleating Geometrics, Pictures, Flowers, Bishop Dress
$39.99 -
Ellen McCarn 0961806605 Heirloom Sewing Book on English Smocking, Full Color, 32 Pages, 150 Illustrations, 7 Designs
$19.99 -

Ellen McCarn 60011 Picture Smocking 48 Page Color Booklet, 100 Illustrations, Circa 1990
$19.99 -
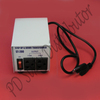
AlphaSew ST200 Step Up, Step Down Motor Voltage Converter Transformer ST-200 Watts for International Use of Small Electrical Appliances of <180 Watts
$69.99 -

Terri Wood Tomorrows Treasures Smocking Pleater Pleating DVD Video, Comparisons, Care, Preparations, Bishop Dress, Power Pleater Motor Drive Unit
$39.99 -
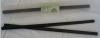
Pleater Magnetic Feed Bars, 2 Split Metal Rods, 12" Wide to Roll & Feed Fabric on 16 or 24 Row Read, Amanda Jane, Pullen, Dr Joe, Stanley, Princess
$49.99 Free Ground Shipping to the Contiguous USA -

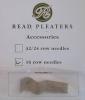
12 GP General Purpose Pleater Needles for Amanda Jane 16-24 Row, Sally Stanley 24 Row, Marys 16 Row, Dr. Joe's 24 Row, But Not any Read Pleaters
$29.99 -
Read 12Pk of Needles 1.5in 35mm Long for Read 16 Row Smocking Pleaters Only, Not for Other Brands, Not Interchangeable with 24/32 Row Pleater Needles
$29.99 -
Read 12 Pack Needles for Read 24 Reg & Maxi or 32 Row Pleater Machines Manufactured After 1998 including the Current Model, 2-1/8 Inch or 55mm Long
$29.99 -

Ellen McCarn 990024 24 Row English Pleater Needles Made in England UK 24 Pack x 1-7/8" for Amanda Jane, Stanley, Marys, Durand, Dr Joe Pullen Pleaters
$29.99 -

Ellen McCarn 990016 English Pleater Needles Pack of 16 x 1.5"L Made in UK England for Pullen, Newell, and Read 16 Row Pleaters Machines
$29.99 Free Ground Shipping to the Contiguous USA
