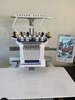
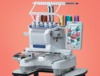
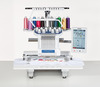
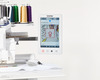
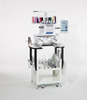
Brother PR1055X 10Needle Embroidery Machine with 5x7 Flash Frame Plus Pick1 Bundle Options: Financing, Stnd Cap 7in1, or Trifecta Printmoda ScannCut


|
||||
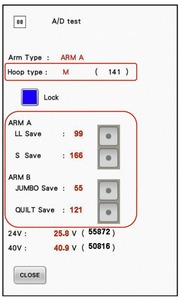
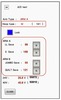
How to calibrate the hoop sensor 1. Enter the AD test mode. - Hold the Start-Stop button and the Needle Threader button while turning on the power. 2. Attach the tubular round arm set A to the carriage. 3. Start the test mode and select #08: A/D test under "Main Board Test Mode". 4. Press the Lock (blue button) to unlock the A/D value of the hoop sensor. When the lock of the A/D value of the hoop sensor is unlocked, "Unlock" is displayed. 5. Press the LL Save after attaching the left arm of the tubular round arm set A to the position 2 and tightening the 2 thumb screws certainty. 6. Press the S Save after attaching the left arm of the tubular round arm set A to the position 5 and tightening the 2 thumb screws certainty. 7. Attach the tubular round arm set B to the carriage. 8. Press the JUMBO Save after attaching the left arm of the tubular round arm set B to the position 1 and tightening the 2 thumb screws certainty. 9. Press the QUILT Save after attaching the left arm of the tubular round arm set B to the position 4 and tightening the 2 thumb screws certainty. 10. If "Unlock" is on the screen, press Unlock to lock the A/D value of the hoop sensor again. Limited Customer Access to A/D Test Mode 08 Do you have customers that you feel could perform the A/D test mode on their PR1050X without having to make a trip to your store? Save them a trip of bringing the machine! Just follow these 4 simple steps: 1) Power off the machine. 2) Push and hold the start/stop and needle threader buttons while powering the machine on. 3) This will place them directly into A/D Test Mode 08. 4) Then you can walk them through the procedure remotely. Once completed, restart the machine to return back to normal user mode. Entering A/D test mode 08 in this fashion allows the customer limited access to this specific test mode and nothing more. |
||||
|
|
||||
|
|
|
|
|
|

|
|
|
|
|
|
|
|
|
|
|
|

|

|

|
|

|
|
|

|

|
|
|
|

|
|

|
|
|
|
|
|
|
|

|
|
|
||