

In 2008 when we began making templates for Longarm quilting, it quickly became obvious that quilters had difficulty stitching around the outside of circles and other shapes. I have always believed that it is much easier to draw inside a shape than around the outer edge. So we designed our templates to be stitched around the inside.
This left another problem, longarm machines could not enter the inside of the template. The answer to this problem was the invention of the unique Westalee Design Key System, a key that when removed allows the ruler foot to be placed inside the template, when the key is replaced the opening is closed and the quilting line can be sewn without any unsightly flat spots.
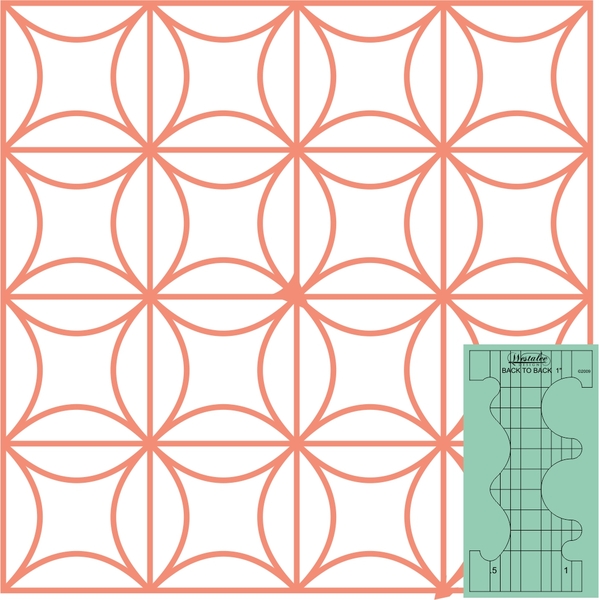
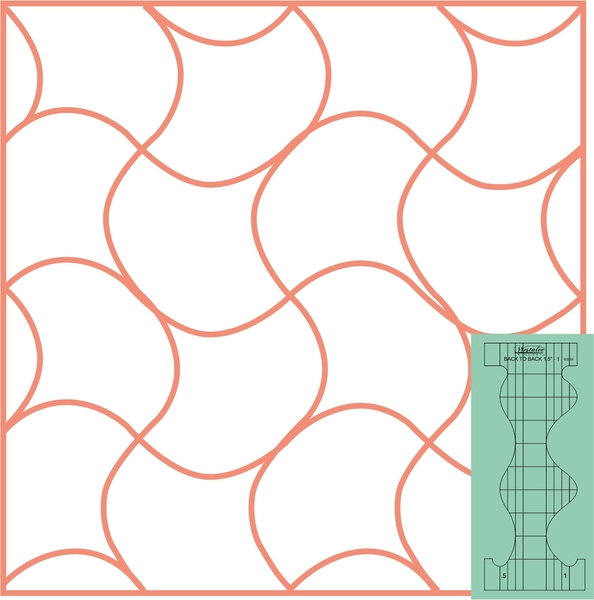
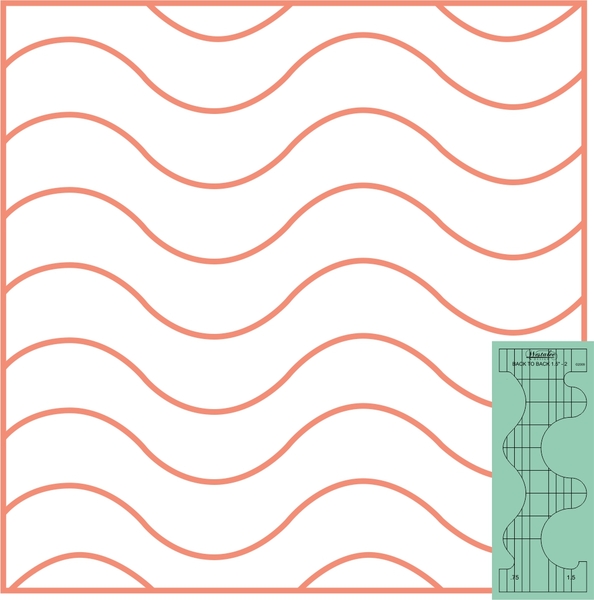
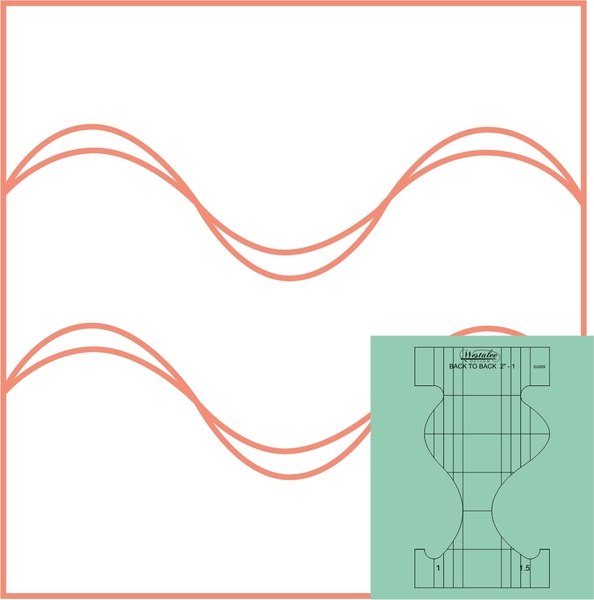
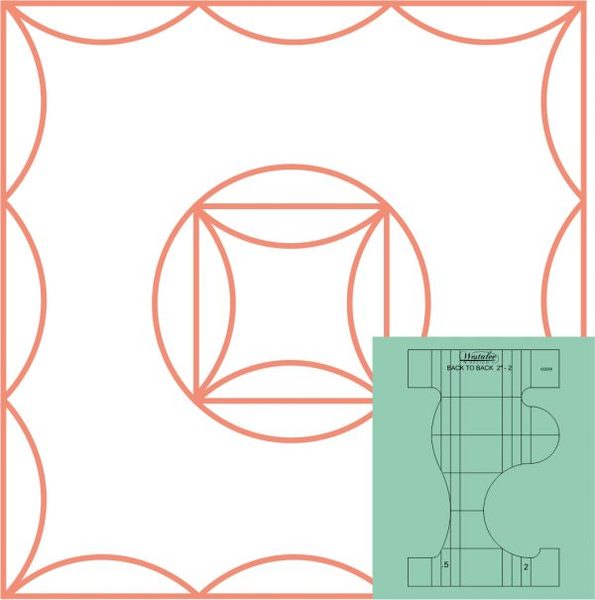
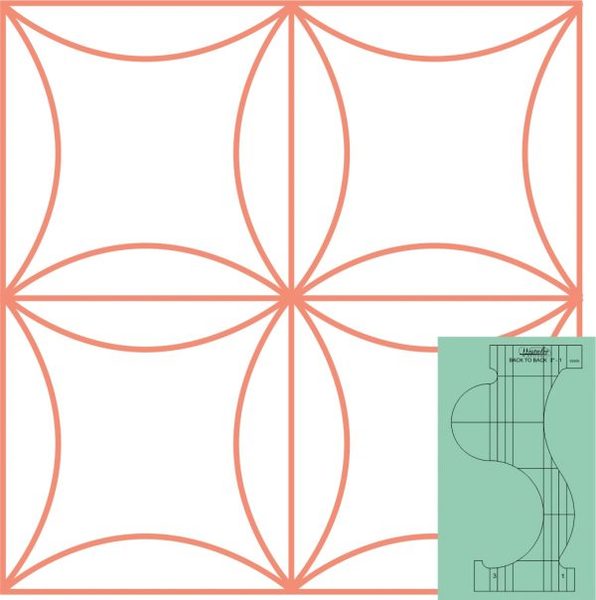
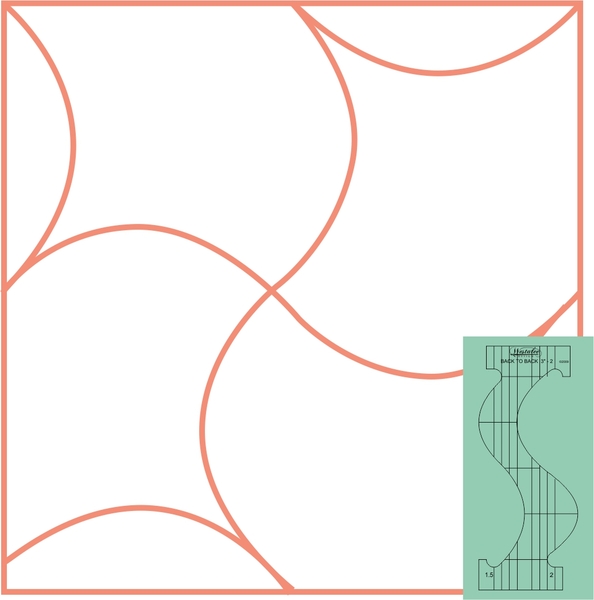
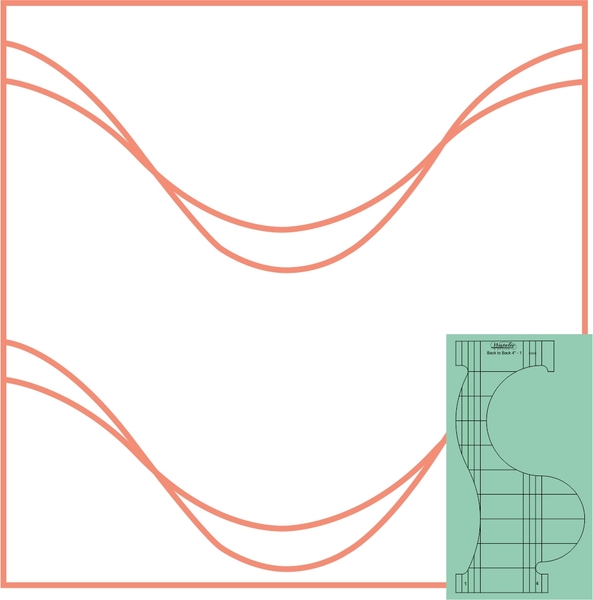
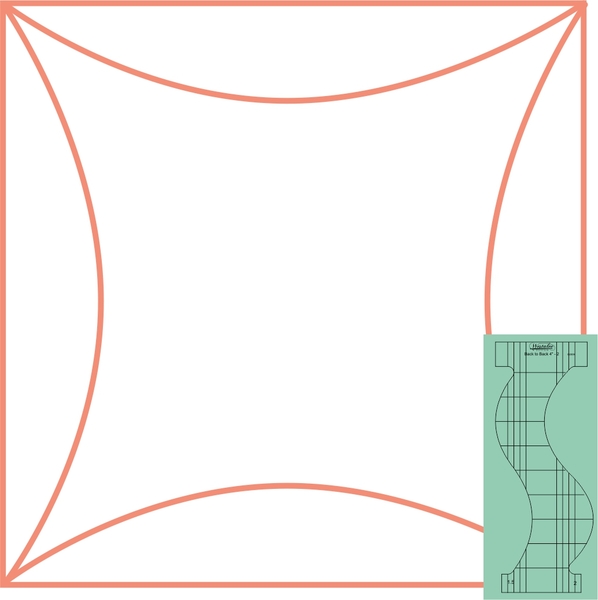
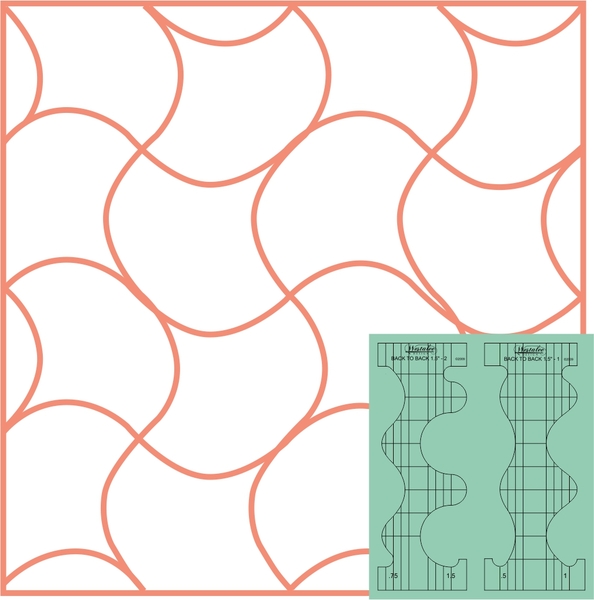
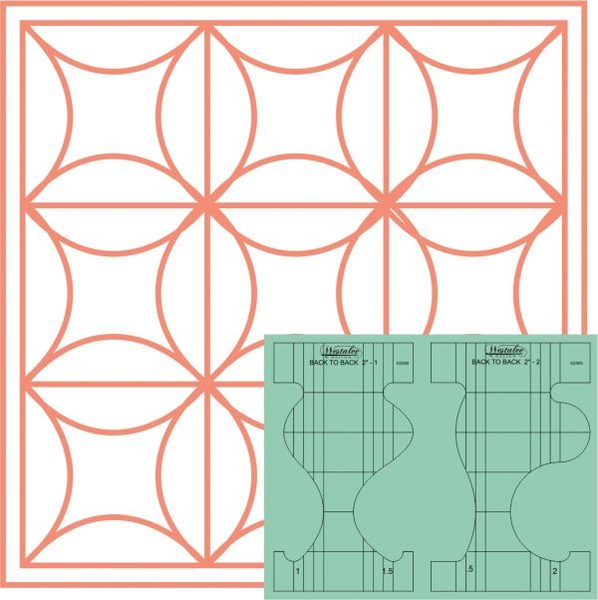
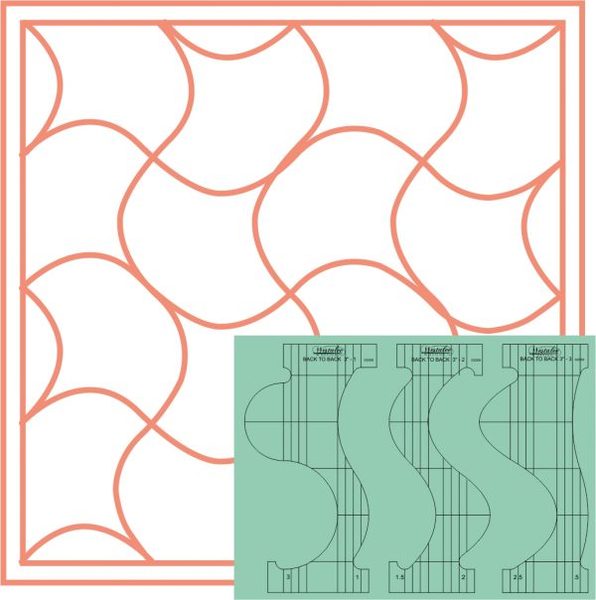
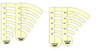
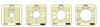
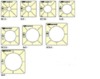
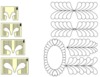
The Westalee Design Back to Back Templates series is 1 of our first Templates to use our Foot Rests. There are 12 Templates in the Back to Back Series, with a different curve on each side of the Template we have 24 variations. The Template Identification 1″- 1.5″ – 2″ – 2.5′ – 3″ – 4″ the measurement is of the width of the Back to Back Curve, the number eg. .5 – 1 at the base of the Template is the depth of the Curve. Each of the Templates in the Series has 1 width and 2 depths giving you more options. Quilt Curved Lines, Back to Back Curved Lines Melons or Orange Peel in blocks.
For even more Creativity Use more than 1 size.
Ruler foot is not included and must be purchased separately if you do not already own the foot
The Sew Steady Westalee Templates are custom made to order, and usually leave the warehouse in 5-7 business days after your order is placed
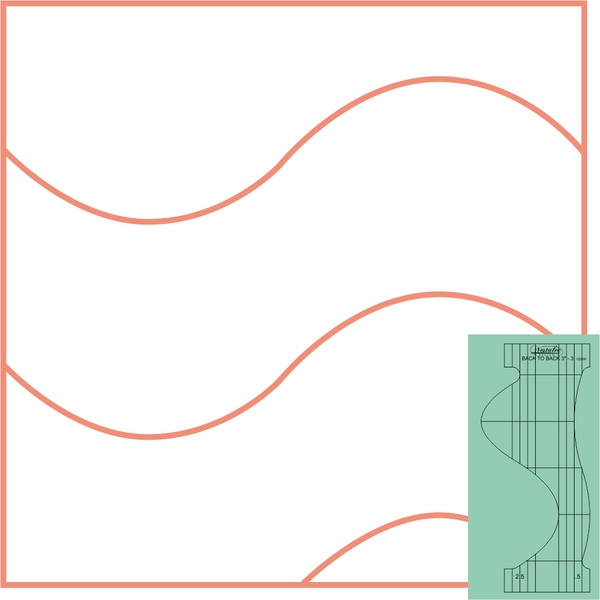
Quilting Wavy Borders with the Back to Back Template from Westalee Design
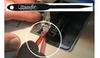
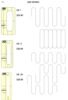
1) Place stable tape on the underside of your template at locations that would be pressure points when holding the template in place while sewing
2) Determine the desired placement of your template design within the block
3) Place the template at the beginning point of your desired design – make note of the markings on the template that you are using to create a consistent design
a. Make sure that your needle is in the middle of the foot to insure that you are sewing ¼ inch off the template edge
b. Place the ruler foot snugly against the template and pull your bobbin thread to the top
c. Begin sewing keeping the ruler foot touching the template, and tracing around the outside edge of the template
d. Once you are at the end of the template leave the needle down and move the template, line back up on the markings you selected and repeat this pattern until the end of the design, or the end of the block
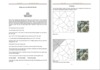
4) You may also use the dashed etched markings on the template to echo and / or offset your design (see A) by lining up the template on the stitch line you just made then use the selected etching on the template to create the echo or offset design.
 WT-B2B1: 1" x 1/2" design, 1" x 1" design
 WT-B2B1.5-1: 1 1/2" X 1/2" design, 1/2" x 1" design
 WT-B2B1.5-2: 1 1/2" x 3/4" design, 1" x 1 1/2" design
 WT-B2B2-1: 2" X 1" design, 1" 1 1/2" design
 WT-B2B2-2: 2" x 1/2" design, 2" x 2" design
 WT-B2B3-1: 3" x 1" design, 3" x 3" design
 WT-B2B3-2: 3" x 1 1/2" design, 3" x 2" design
 WT-B2B3-3: 3" x 1/2" design, 3" x 2 1/2" design
 WT-B2B4-1: 4" x 1" design, 4" x 4" design
 WT-B2B4-2: 4" x 1/2" design, 4" x 2" design
 WT-B2BS1.5: 1 1/2" x 1/2" and 1 1/2" x 1" designs, 1 1/2" x 3/4" and 1 1/2" x 1 1/2" designs
 WT-B2BS2: 2" x 1 1/2" and 2" x 2" designs, 2" x 1/2" and 2" x 1" designs
 WT-B2BS3: 3" x 1" and 3" x 3" designs, 3" x 1 1/2" and 3" x 2" designs, 3" x 2 1/2" and 3" x 1/2" designs
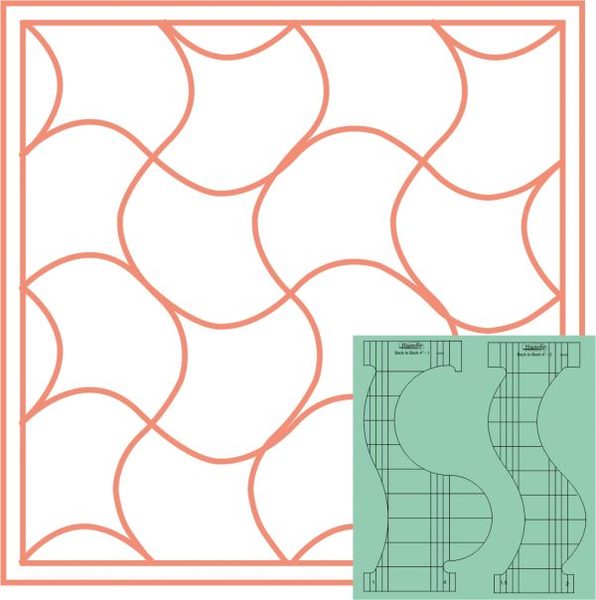 WT-B2BS4: 4" x 1" design, 4" x 4" design
Thanks. I'm enjoying the new quilting "toys". The videos are very helpful.

Recommended Accessories


Westalee WA-STIL Stilletto (+$3.99)


Other Items You May Be Interested In
-
Sew Steady Westalee WT-LW- Line Works Template Ruler Choose Size Options,
$24.99 Free Ground Shipping to the Contiguous USA -
Sew Steady Westalee Simple Ovals and Hexagons Template Ruler, Choose Size Options/Pricing via drop menu
-
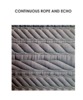
Sew Steady Westalee RopeEcho Continuous Rope and Echo Template Ruler Size Options from .75 to 5.5"
$21.99 -
Sew Steady Westalee WTLSET Between the Lines Set of 4
$49.99 -
Sew Steady Westalee Simple Circles Template Ruler, Choose Size Options
$15.99 -
Westalee WT-F Feather Template Ruler Choose One Size 2, 3, 4, 5"
$20.00 Free Ground Shipping to the Contiguous USA -

Handi Quilter HG00358 Straight Edge 1/4" Ruler Template 3x12" for Longarm Quilting Machines
$24.99 -

Handi Quilter HG00359 1/4" Thick Mini Ruler Template 2x6" for Ruler Foot Work on Longarm Quilting Machines
$15.99 -

Handi Quilter HG00419 Handi Versa Tool Ruler 1/4" Thick for Ruler Foot
$24.95 -

Handi Quilter HG00602 8x3" Mini Scallop Ruler 1/4" thick for ruler foot
$24.99 -

Handi Quilter HG00603 Ruler with 4-Mini Circles 1/2" 3/4" 1" & 1-1/2"
$29.99 -
Handi Quilter HG00604 Right Angle Ruler 1/4" Thick to Create Chevrons
$34.99 -
Handi Quilter HG00605 Swag Ruler Template Set of 4:, 4inx1.5in, 4inx3in, 4inx4.5in, 4inx6in
$49.99 Free Ground Shipping to the Contiguous USA -

Handi Quilter HG00608 1-2" Deep Wave Ruler A 12" Long, 1/4" Thick, for Hopping Foot
$49.99 Free Ground Shipping to the Contiguous USA -

Handi Quilter 3" & 6" Wave Ruler Template D for Free Motion Quilting and Ruler Foot
$49.95 Free Ground Shipping to the Contiguous USA -

Handi Quilter HG00612 Wave Ruler Template E for Wave Designs 3" and 6" Long, Both 1.75" Deep on Longarm Quilting Machines
$49.99 Free Ground Shipping to the Contiguous USA -

Handi Quilter HG00613 4" Wave Ruler F 1/4" Thick .75" & 1.5" Deep Waves
$24.99 -

Handi Quilter HG00615 Arc Ruler B Template, 4" 8" 12" for Longarm Machines
$39.99 Free Ground Shipping to the Contiguous USA -

Handi Quilter HG00619 Ruler Template C Oval Sizes 8x4" and 12x 6"
$49.99 Free Ground Shipping to the Contiguous USA -

Handi Quilter HG00620 Oval Ruler Template D for 4x2.5" and 10x5" Ovals
$29.99 Free Ground Shipping to the Contiguous USA -
Handi Quilter HG00623 Multi Clamshells 1.5" 2" 3" & 4" Ruler Templates
$29.99 Free Ground Shipping to the Contiguous USA
