

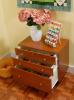
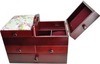
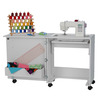
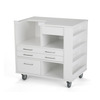
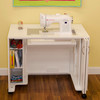
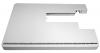
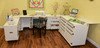
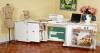
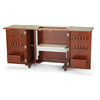
You’ll find plenty of space with 3 adjustable shelves on one side while the opposite side has one shelf dedicated to 18 thread spindles and 2 more shelves.
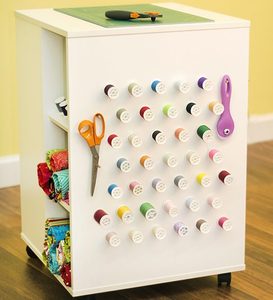
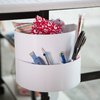
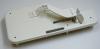
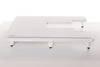
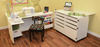
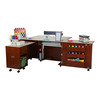
Spin your Cube around to reveal 42 removable thread and bobbin holders with varying lengths to hold thread, bobbins, scissors and any other craft accessory allowing you to customize to your needs.
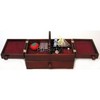
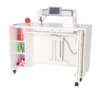
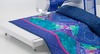
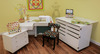
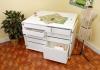
The last side of your Storage Cube features 2 rods for hanging and storing ribbon, yarn or embroidery interfacing. Plus behind the rods is 7” of space for books, fabric or baskets.ere to View Instructions for Adjusting Height on a Manual Platform Arrow Table(.PDF)
How to Choose a Sewing Cabinet
- US Warranty 3 Year Warranty
- Non-US Warranty: 30 days parts and labor
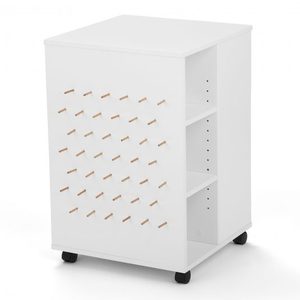 42 removable thread and bobbin holders with varying lengths to hold thread, bobbins, scissors and any other craft accessory allowing you to customize to your needs.
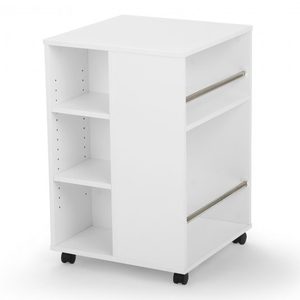 adjustable shelves on one side
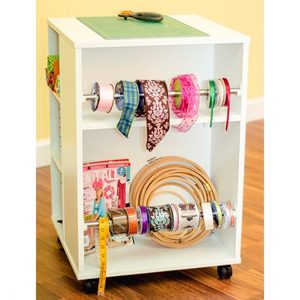
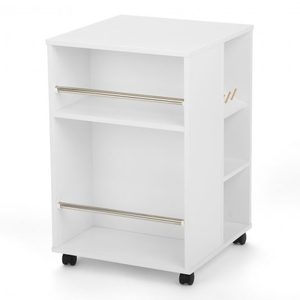 The last side of your Storage Cube features 2 rods for hanging and storing ribbon, yarn or embroidery interfacing. Plus behind the rods is 7” of space for books, fabric or baskets.
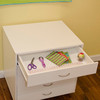
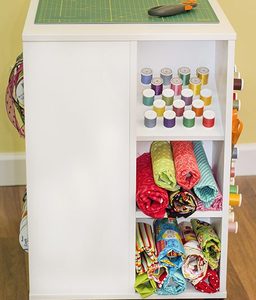 thread and fabric for display only, not included
 42 removable thread and bobbin holders with varying lengths to hold thread, bobbins, scissors and any other craft accessory allowing you to customize to your needs.
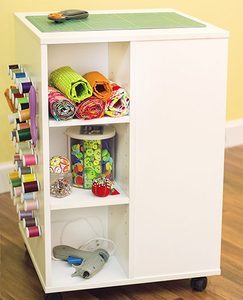 You’ll find plenty of space with adjustable shelves on one side
 The last side of your Storage Cube features 2 rods for hanging and storing ribbon, yarn or embroidery interfacing. Plus behind the rods is 7” of space for books, fabric or baskets.
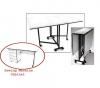
Yes, there is an eye-bolt underneath the bottom of the table that has a small nut attached to the bottom of it. This nut can be screwed in more to bring the level up, or unscrewed to bring it down. Some eye-bolts have 2 nuts on them or some just have one --along with a rubber stopper.
Hi from Bonnie in the upper part of Michigan…I received the Gidget ll table approximately two weeks ago. It arrived 24 hours after I ordered it. WOW! Great service. I also ordered the acrylic insert which arrived yesterday. The acrylic insert fits perfectly on the lip of the table and when I adjust the height of the machine it will be perfect there also. So ….so far all is ok. Now comes the part of adjusting the height of the machine to meet the top of the acrylic table….I watched the video on it several times and the person giving the demonstration said all you have to do is adjust the height by turning the wing nut on the large bolt. I have done this and the machine still needs to come up to be level with the cabinet table top. I have two friends that have this table and one of them ordered hers just recently from you. When I asked her about adjusting the machine she said she had trouble adjusting it too as did the other friend who ordered her last Fall from a different vender. When I called the friend that just ordered from you a couple of months ago, she said that she ended of having to take off a couple of the links from the chain.
Your video indicates that you do not have to do any of that and the ad for the Gidget ll says that no tools required to assemble. Can you help me with this. I do not want to do anything that I am not suppose. Thank you for your help. Bonnie G
Hello Bonnie, I am sorry that you are having difficulty adjusting the platform on your Gidget II table. Many people do have to shorten the right hand chain for standard sewing machines but we had to make the chain long enough for all the machines being put into the table. We recently filmed a video that shows exactly how to do that and have written some directions too. The attached help page tells how to determine how much you need to shorten. Please visit our web site www.arrowcabinets.com and select the Video tab, scroll down to Manual Platform Height Adjustment #1. The specific information starts at 2:22 showing removal of the screw with a ¼” hex socket (or needle nose pliers) and moving up 2 links to shorten the chain 1 inch. If you have other questions, please feel free to call our Customer Service line 800-533-7347.
Hello to Jo at Arrow Cabinets and John at All Brands, Thank you so much for such good customer service. I just wanted you to know that the video on the www.arrowcabinets.com did the trick! It was much more thorough than other videos I had seen. Seeing as my sewing machine is a new one I had to take out two lengths to make it fit. I needed the visual before I felt comfortable taking off the extra links. I did not want to make any mistake on it. Once I used your easy directions for getting to the site and I watching the video, it only took me about 15 to 20 minutes to do the job from gathering the tools to getting the machine fit into its spot. I wish that I had accessed your arrow video site right away instead of thinking I had enough information in order to install it. THANK YOU SO MUCH….Bonnie G.
Recommended Accessories

Other Items You May Be Interested In
-
Arrow Judy Compact Sewing Machine Cabinet Table on 6 Casters, 3 Position Hydraulic Lift, Ironing Board Extension, 63Lb, Choose 101 White or 105 Teak
$459.99 -
Kangaroo KMOD 2061, 3-Position Electric Lift Sewing Machine White Cabinet +Quilt Leaf Open: 45.5Wx39.5Dx30inH, Opening for Optional Insert 30.5x14.5in
$1,999.00 Free Ground Shipping to the Contiguous USA -

Arrow 5010 3-Drawer 90 Spool Thread Caddy, Cabinet Storage, 3 Drawer Chest Unit, White, Assembled
$99.99 -
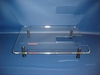
Arrow 611F Gidget Black Heavyweight Portable Folding Leg Work Table: Singer Featherweight 221K or 222K Flush Mount, no need for a cabinet insert
$269.99 Free Ground Shipping to the Contiguous USA -
Arrow Kangaroo 9301B Ava B #1 PR Embroidery Machine Cabinet White, 4 Drawer, for Brother/Babylock PRS100, PR1X, PR600's PR1000 PR1050, PR1055X
$1,499.99 -
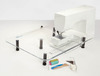
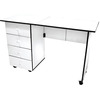
Arrow 98601 Gidget1 White Portable Folding Legs Sewing Craft Hobby Table, 40x20x28H with Smaller Opening 7-3/8 x 17-1/2in for your Machine and Insert*
$149.99 -
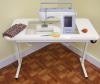
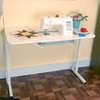
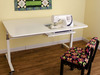
Arrow 98611 Gidget 2 II Folding Legs Sewing Machine Table 40x20x28in, White, 13-1/8” x 24-3/8” larger machine open, thicker top, transport wheels
$299.99 Free Ground Shipping to the Contiguous USA -
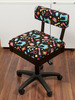
Arrow HCAT Cat's Meow Hydraulic Sewing Swivel, Chair Underseat Storage NEW for 2022 Black
$359.99 -
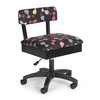
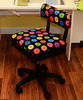
Arrow H6880 Hydraulic Swivel Chair, Underseat Storage, Alexander Henry “Sew Now, Sew Wow” Fabric
$359.99 -
Arrow Wood and Hydraulic Lift Sewing Swivel Chair, Under Seat Storage, 5 Casters, Riley Blake Notions Fabric on Black Background, for Workstations
$359.99 -
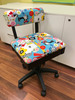
Arrow H8013 Wood Top Hydraulic Lift Sewing Swivel Chair, Under Seat Storage, 5Casters, Riley Blake Multi Color Bright Buttons Fabric, Black Background
$359.99 -
Arrow Modular 5 Drawer Sewing Notions, Craft and Fabric Supplies Storage Caddy Chest 29.5x23x30in Height, in White Only
$1,099.00 Free Ground Shipping to the Contiguous USA -
Kangaroo Mod Squad 2011 Sewing Cabinet
$1,199.00 Free Ground Shipping to the Contiguous USA -

Brother PRWT1 Wide Extension Table Top 30x15" Incl with PR1055 Optional for PR600 PR620 PR650 PR655 PR670 PR680 PR1060 Babylock Multi Needle Machines*
$846.99 Free Ground Shipping to the Contiguous USA -
Brother SATCD4500DP Extension Table 17x23 +Free Motion Grip Guide Hoop +USB Mouse +Designs CD for NV4000D, NV4500 Duetta, NV4750D Duetta 2, NV5000*
$169.99 -
Brother SAWT6200D Extension Quilting Wide Work Table 25x16in for V Series: XV8500 XV8550 VM6200D, VM5100 VM5200 VQ2400 BQ2450, BQ3050, Inc w/ VQ3000*
$219.99 Free Ground Shipping to the Contiguous USA -

AlphaSew ET-60 Universal Freearm Steady Sewing Machine Extension Table 18 X 24", One Size Fits Most Free Arm Portables
$89.99 Free Ground Shipping to the Contiguous USA -
Janome 860401005 Clothsetter Hoop Placement Extension Table MC11000 SE*
$190.00 Free Ground Shipping to the Contiguous USA -
Juki 81004558 Extension Table 12x24" G110, G120, G210, G220, HZL F300, F400, Included with F600*
$69.95 -
Kangaroo Cabinets Aussie II, Studio Set Ash White + Air Lift, Dingo Cutting Table, Mat, Chair
$4,379.96 Free Ground Shipping to the Contiguous USA -
Kangaroo Cabinets Wallaby II WS-White Ash Studio Set: Air Lift Platform, Dingo Cutting Table, Rotary Cutter Mat, Freearm Insert, Bonus Sewing Chair +*
$3,979.96 Free Ground Shipping to the Contiguous USA -
Kangaroo II Cabinets Studio Set WHITE + Joey Caddy, Dingo Cutting Table, Mat, Chair
$4,379.96 Free Ground Shipping to the Contiguous USA -

Kangaroo K8405 Wallaby II Sewing Cabinet Teak, 3Position EZ Air Lift Platform, Quilt Leaf, Serger Shelf, Locking Caster, Hydraulic or Electric Lift
$1,799.99 -
Kangaroo K9111 Tasmanian II Sewing Cabinet Craft Cutting Table 63in x 35.5in White, 28-38" Adjustable Height
$1,599.99 Free Ground Shipping to the Contiguous USA -
Kangaroo Kabinet K8611 Aussie II Sewing Machine Cabinet White Ash 31.5' Square Feet Surface Area, Hydraulic or Electric Lift
$2,199.99 Free Ground Shipping to the Contiguous USA -
Kangaroo Kabinets K8605 Aussie II Sewing Machine Cabinet Teak, 3 Position Air Lift Platform, 31.5' Surface, Hydraulic or Electric Lift
$2,199.99 Free Ground Shipping to the Contiguous USA -
Kangaroo Kabinets by Arrow K7911 Dingo II Sewing Storage Cabinet on Roller Caster Wheels, 9 Drawers -White Ash
$1,699.99 Free Ground Shipping to the Contiguous USA -
Kangaroo Kabinets by Arrow K82__ Bandicoot II Sewing Machine Cabinet, Choose Ash White Teak or Gray, 3 Position EZ Pneumatic Air Lift Machine Platform
$999.99 Free Ground Shipping to the Contiguous USA -
NH168 Sew Steady Extension Work Table 18X24in for Janome FM725 Needle Punch Felting Machine
$29.99 Free Ground Shipping to the Contiguous USA -
Sew Steady SST Portable Sewing Machine Flatbed Extension Table 11.5" up to 24" Wide by 15" up to 32" Deep for Freearm or Flatbed Machines, 6 Sizes
$89.99 -
Sew Steady J103GFM Sit Down Free Motion Quilting Extension Table 32x24" for Any Machine for free motion quilting
$289.99 Free Ground Shipping to the Contiguous USA -
Sew Steady SST-GFM Sit Down Free Motion Quilting Ext Table Giant 24inD x 32in Wide For End Facing Machines, Sewing Surface Sizes Longer Than 13in
$289.00 Free Ground Shipping to the Contiguous USA -

Sew Steady SST Wish Portable Sewing Machine Flatbed Ext Table Beveled Edges 3 Sides 2 Sizes +Notions Tray 9x14 +Polish Kit +Universal Circles
$299.99 Free Ground Shipping to the Contiguous USA -
Sullivans 12570 Cutting Craft Table 30x60" Plus 12575 Sewing Machine Cabinet 19x48"
$549.99 -
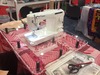
Sullivans 12575 Portable 4 Drawer Portable Sewing Machine Station Cabinet Desk 19x49in on 6 Casters, Folds to 19x22in RTA Ready to Assemble.
$299.99 -
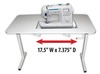
Sullivans 12889 Portable Folding Fordable Sewing Table 40x20x28.5"H Machine Opening 17.5x7.375" for Flatbed Position, Limit Insert Fitting Capability*
$199.99
