

Also Includes
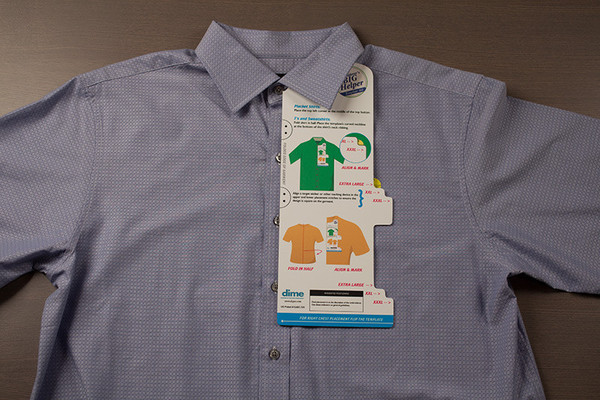
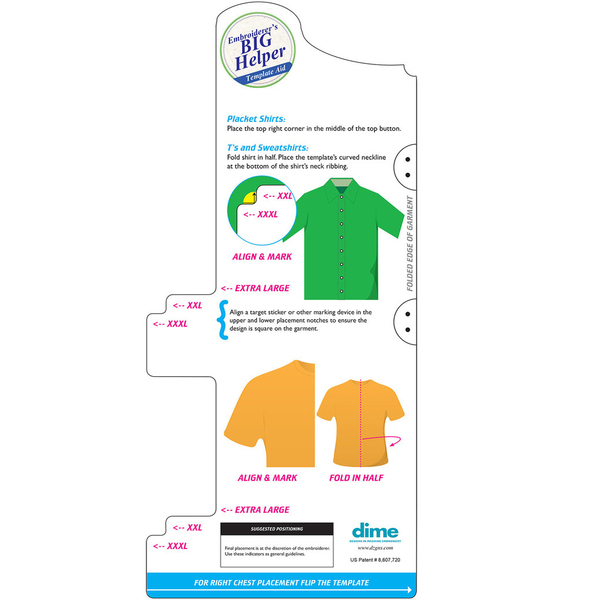
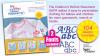
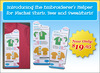
Take the guesswork out of positioning left and right chest embroidery on Extra Large to XXXL shirts. With easy placement instructions printed on the BIG Embroiderer's Helper, industry standards are right at your fingertips. Use your own discretion for final placement.
- T-shirts and Sweatshirts:
For left chest embroidery, simply flip the template.
- Placket Shirts:
Place the top left or right corner in the middle of the top button.
Place a target sticker or mark the upper and lower placement notches to make to easy to keep the design straight in the hoop.
- No more guesswork!
Design placement on left and right chest embroidery is accurate every time!
- Quick & Easy!
Simply select the garment size and place a Target Sticker along the alignment marks.
- Consistent and Accurate Results Every Time!
Stitch a stack of shirts quickly and easily!
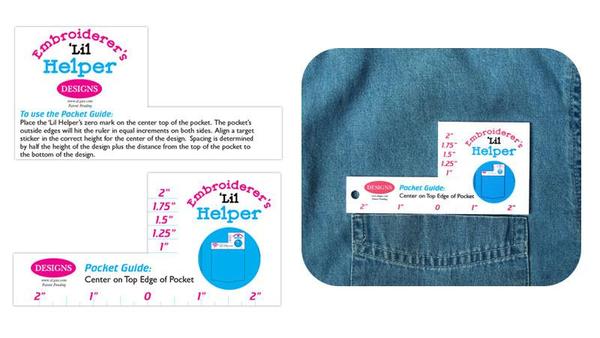
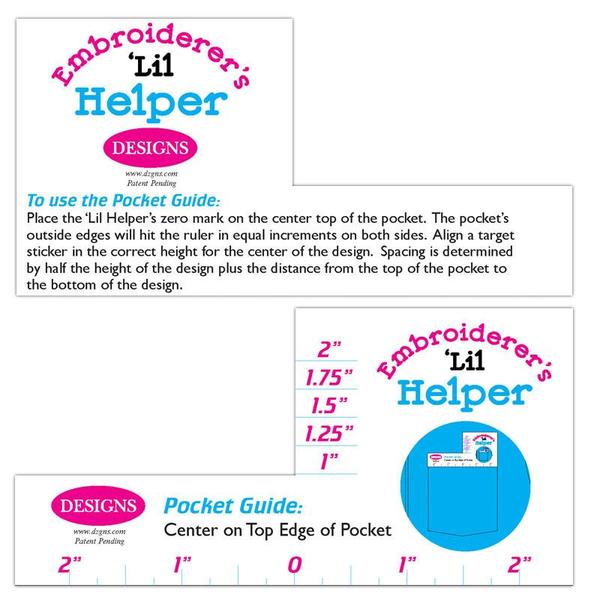
Little Helper Align Placement Ruler:
This clever little tool delivers big results for left chest pocket embroidery
This is a fast and simple tool for positioning embroidery designs above pockets. Place the ‘Lil Helper’s zero mark on the center top of the pocket. The pocket’s outside edges will hit the ruler in equal increments on both sides. Align a target sticker with the correct height marking for the center of the design. Determine the design’s center by adding half the design’s height plus the distance from the top of the pocket to the bottom of the design.
Design placement on garments just go easier! Order the Embroiderer's Helper and the Embroiderer's 'Lil Helper.
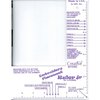
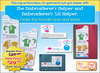
The Embroiderer's Helper is an easy solution for positioning left and right chest embroidery designs on tees, sweatshirts, and placket shirts. No more guesswork or misaligned designs! Plus, use the Embroiderer's 'Lil Helper for design placement above pockets with confidence!
The Embroiderer's Helper:
Design Placement is Easy!
The Embroiderer's Helper is an easy solution for positioning left and right chest embroidery designs on tees, sweatshirts, and placket shirts. No more guesswork or misaligned designs! Compatible for shirt sizes from Small to Extra Large.
Ideal for Placket Shirts
Place the top left or right corner in the middle of the top button. Place a target sticker or mark the upper and lower placement notches to make it easy to keep the design straight in the hoop.
Align the curved button notch on the Embroiderer's Helper with the top button. Place a target sticker or other marking device in the notch that corresponds with the shirt size.
Ideal for T's and Sweatshirts
Fold the shirt in half. Align the template's curved neckline at the bottom of the shirt's neck ribbing.
To mark the center of the design, place a target sticker or other marking device in the upper notch that corresponds with the shirt size.
If desired, place a second target sticker or other marking device in the next set of notches. Placing a target sticker in both notches ensures the garment stays square while hooping.
The upper Target Sticker marks the center of the embroidery design. The lower Target Sticker can be used to ensure the shirt stays straight during hooping. Use one or both locations, whichever is most helpful to you.

Recommended Accessories

Other Items You May Be Interested In
-
Brother SA207 Embroidery Drop Light Laser Foot with LED Pin Pointer Marker for Needle Placement NQ3500D NQ3600D BQ3500 NQ1600E NQ1700 NQ1400E, BP1400E
$142.99 Free Ground Shipping to the Contiguous USA -
Creative Notions CNEPR1 Embroider Buddy Adult Template Placement Ruler Tool, Position Design on Garments, Center Mark, Industry Standard, Replaces ABC
$29.99 -
Creative Notions CNEPRJR1 ABC Embroiderers Little Buddy Template Placement Ruler Tool JR
$29.99 -
DIME EH0001 Embroiders Helper Placement Ruler, L or R Chest Placement
$24.95 -
DIME EH0003 Embroiderers Helper and Little Helper Embroidery Design Placement Rulers, Bundle & Save
$29.99 -
DIME EH0004 Embroiderers Big Helper Placement Template Aid, Sizes XL to XXXL for Left and Right Chest Embroidery
$19.95 -

DIME EMBHELPER2 Embroiderers Little Helper Left Pocket Align Placement Ruler
$14.99 -
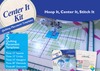
DIME PTQT015 Center It! Kit - Quilting Templates 15pk: 3ea of 12" Squares, 12" Circles, 12" Hexagons, 45° Diamonds, 60° Diamonds
$39.99 -

DIME TSP0100 Target Stickers 250 Pack for Perfect Embroidery Placement
$19.99 -

Janome 856402003 Clothsetter Hoop Placement, MC200E Embroidery Machine
$29.99 Free Ground Shipping to the Contiguous USA -
ViviLux VLLAS01 300pc SewThru Alignment Stickers for 3-in-1 Rechargeable Laser System
$19.99
