

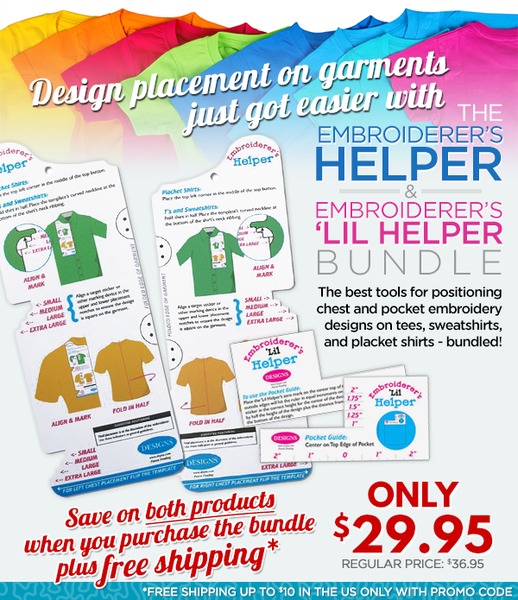
Design placement on garments just go easier!
Order the Embroiderer's Helper and the Embroiderer's 'Lil Helper.
The Embroiderer's Helper is an easy solution for positioning left and right chest embroidery designs on tees, sweatshirts, and placket shirts. No more guesswork or misaligned designs! Plus, use the Embroiderer's 'Lil Helper for design placement above pockets with confidence!
The Embroiderer's Helper
- Design Placement is Easy!
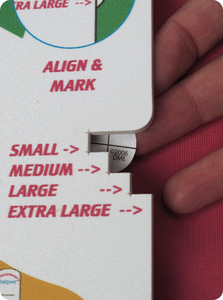
The Embroiderer's Helper is an easy solution for positioning left and right chest embroidery designs on tees, sweatshirts, and placket shirts. No more guesswork or misaligned designs! Compatible for shirt sizes from Small to Extra Large.
-
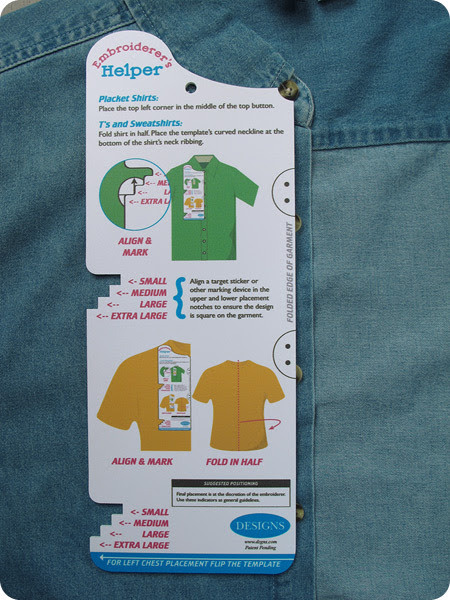
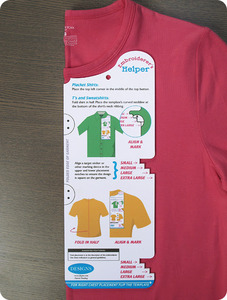
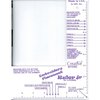
Ideal for Placket Shirts
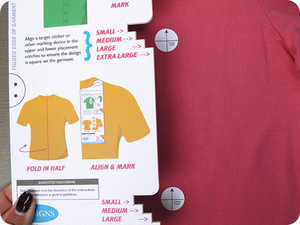
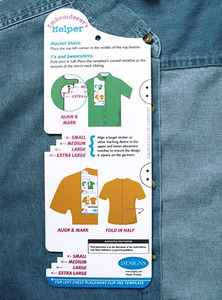
Place the top left or right corner in the middle of the top button. Place a target sticker or mark the upper and lower placement notches to make it easy to keep the design straight in the hoop.
Align the curved button notch on the Embroiderer's Helper with the top button. Place a target sticker or other marking device in the notch that corresponds with the shirt size.
-
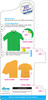
Ideal for T's and Sweatshirts
Fold the shirt in half. Align the template's curved neckline at the bottom of the shirt's neck ribbing.
To mark the center of the design, place a target sticker or other marking device in the upper notch that corresponds with the shirt size.
If desired, place a second target sticker or other marking device in the next set of notches. Placing a target sticker in both notches ensures the garment stays square while hooping.
The upper Target Sticker marks the center of the embroidery design. The lower Target Sticker can be used to ensure the shirt stays straight during hooping. Use one or both locations, whichever is most helpful to you.
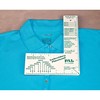
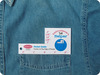
The Embroiderer's 'Lil Helper
This clever little tool delivers big results for left chest pocket embroidery
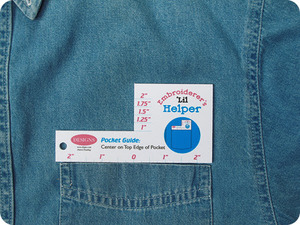
This is a fast and simple tool for positioning embroidery designs above pockets.
Place the 'Lil Helper's zero mark on the center top of the pocket. The pocket's outside edges will hit the ruler in equal increments on both sides. Align a target sticker with the correct height marking for the center of the design. Determine the design's center by adding half the design's height plus the distance from the top of the pocket to the bottom of the design.
- US Warranty 30 days replacement if defective.
- Non-US Warranty: 30 days parts and labor
 With the Embroiderer's Helper Bundle you get two tools for design placement that no embroiderer should be without! No more guesswork of misaligned designs.
The Embroiderer's Helper Bundle Includes:
Embroiderer's Helper - for positioning left and right chest embroidery designs on tees, sweatshirts, and placket shirts
Embroiderer's 'Lil Helper - for design placement above pockets.
With the Embroiderer's Helper Bundle you get two tools for design placement that no embroiderer should be without! No more guesswork of misaligned designs.
The Embroiderer's Helper Bundle Includes:
Embroiderer's Helper - for positioning left and right chest embroidery designs on tees, sweatshirts, and placket shirts
Embroiderer's 'Lil Helper - for design placement above pockets.
 Design Placement is Easy!
The Embroiderer's Helper is an easy solution for positioning left and right chest embroidery designs on tees, sweatshirts, and placket shirts. No more guesswork or misaligned designs! Compatible for shirt sizes from Small to Extra Large.
Ideal for Placket Shirts, T's & Sweatshirts!
Ideal for Placket Shirts:
Place the top left or right corner in the middle of the top button. Place a target sticker or mark the upper and lower placement notches to make it easy to keep the design straight in the hoop.
Align the curved button notch on the Embroiderer's Helper with the top button. Place a target sticker or other marking device in the notch that corresponds with the shirt size.
Design Placement is Easy!
The Embroiderer's Helper is an easy solution for positioning left and right chest embroidery designs on tees, sweatshirts, and placket shirts. No more guesswork or misaligned designs! Compatible for shirt sizes from Small to Extra Large.
Ideal for Placket Shirts, T's & Sweatshirts!
Ideal for Placket Shirts:
Place the top left or right corner in the middle of the top button. Place a target sticker or mark the upper and lower placement notches to make it easy to keep the design straight in the hoop.
Align the curved button notch on the Embroiderer's Helper with the top button. Place a target sticker or other marking device in the notch that corresponds with the shirt size.
 Ideal for T's and Sweatshirts.
Fold the shirt in half. Align the template's curved neckline at the bottom of the shirt's neck ribbing.
Ideal for T's and Sweatshirts.
Fold the shirt in half. Align the template's curved neckline at the bottom of the shirt's neck ribbing.
 To mark the center of the design, place a target sticker or other marking device in the upper notch that corresponds with the shirt size.
 If desired, place a second target sticker or other marking device in the next set of notches. Placing a target sticker in both notches ensures the garment stays square while hooping.
 The upper Target Sticker marks the center of the embroidery design. The lower Target Sticker can be used to ensure the shirt stays straight during hooping. Use one or both locations, whichever is most helpful to you.
 The Embroiderer's 'Lil Helper.
This clever little tool delivers big results for left chest pocket embroidery
This is a fast and simple tool for positioning embroidery designs above pockets. Place the 'Lil Helper's zero mark on the center top of the pocket. The pocket's outside edges will hit the ruler in equal increments on both sides. Align a target sticker with the correct height marking for the center of the design. Determine the design's center by adding half the design's height plus the distance from the top of the pocket to the bottom of the design
The Embroiderer's 'Lil Helper.
This clever little tool delivers big results for left chest pocket embroidery
This is a fast and simple tool for positioning embroidery designs above pockets. Place the 'Lil Helper's zero mark on the center top of the pocket. The pocket's outside edges will hit the ruler in equal increments on both sides. Align a target sticker with the correct height marking for the center of the design. Determine the design's center by adding half the design's height plus the distance from the top of the pocket to the bottom of the design
 The Embroiderer's Helper
Design Placement is Easy!
The Embroiderer's Helper is an easy solution for positioning left and right chest embroidery designs on tees, sweatshirts, and placket shirts. No more guesswork or misaligned designs! Compatible for shirt sizes from Small to Extra Large.
Ideal for Placket Shirts, T's & Sweatshirts!
The Embroiderer's Helper
Design Placement is Easy!
The Embroiderer's Helper is an easy solution for positioning left and right chest embroidery designs on tees, sweatshirts, and placket shirts. No more guesswork or misaligned designs! Compatible for shirt sizes from Small to Extra Large.
Ideal for Placket Shirts, T's & Sweatshirts!
Recommended Accessories

Other Items You May Be Interested In
-
Brother SAEPS2 Snowman Embroidery Position Placement 502 Markers (63 Stickers x 8 Sheets) for XV NV PR +Babylock Models, with Needle Camera
$19.99 -
Creative Notions CNEPRJR1 ABC Embroiderers Little Buddy Template Placement Ruler Tool JR
$29.99 -
Creative Notions CNEPR1 Embroider Buddy Adult Template Placement Ruler Tool, Position Design on Garments, Center Mark, Industry Standard, Replaces ABC
$29.99 -
DIME CD00100 Embroider It Yourself Scrumptious Sweats CD Video
$39.99 Free Ground Shipping to the Contiguous USA -
DIME EH0001 Embroiders Helper Placement Ruler, L or R Chest Placement
$24.95 -
DIME EH0004 Embroiderers Big Helper Placement Template Aid, Sizes XL to XXXL for Left and Right Chest Embroidery
$19.95 -
DIME EMBHELPER2 Embroiderers Little Helper Left Pocket Align Placement Ruler
$12.99 -
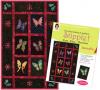
DIME STP0050 Designs in Machine Embroidery 1 Step Quilting & Applique Stipple! 7 Butterflies & 2 Flower Pattern Quilt Blocks -Download
$29.99 -

DIME TSP0100 Target Stickers 250 Pack for Perfect Embroidery Placement
$19.99 -
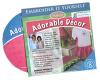
Designs In Machine Embroidery Adorable Décor for Children Designs Includes 9 celestial designs
$39.99 Free Ground Shipping to the Contiguous USA -
DIME Designs in Machine Embroidery 1 Step Quilting & Applique Stipple! Aqua Flame - 8 Designs, 12 Blocks, 2 Borders, 1 Square cornerstone
$29.99 Free Ground Shipping to the Contiguous USA -
DIME Designs in Machine Embroidery 1 Step Quilting & Applique Stipple! Autumn Leaves - Download
$29.99 -
DIME Designs in Machine Embroidery Stipple! Geometrics 1 Step Quilting & Applique CD
$29.99 Free Ground Shipping to the Contiguous USA -
Janome 856402003 Clothsetter Hoop Placement, MC200E Embroidery Machine
$29.99 Free Ground Shipping to the Contiguous USA -
DIME PPKC0010 Designs In Machine Embroidery The Children’s Perfect Placement Kit For Embroidery, 16 Templates +30 Stickers +104 Designs
$39.99 Free Ground Shipping to the Contiguous USA -
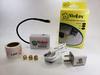
ViviLux VLLSR01 3in1 USB Recharge Red Laser 1mm Wide Straight Stitch Lit Line Sewing Guide, Embroidery Hoop Crosshair+, Needle Position Placement Dot
$59.99 Free Ground Shipping to the Contiguous USA -
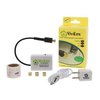
ViviLux VLLSR02 3in1 Recharge Green Laser Straight Stitch Sewing Seam Guide Attachment, 1mmW Lighted Line, Crosshair+ and Dot for Embroidery Placement
$69.99 Free Ground Shipping to the Contiguous USA
