

Enter your email address to download your free trial of PEDesign 11 software
30 Day Trial Version of PEDesign 10 Still Available Here
Special Facts about PE-DESIGN 11
PE-DESIGN 11 is a feature-packed software that offers you so much for your sewing, embroidery, quilting and crafting projects. As a matter of fact, if you have former models of the ScanNCut Home and Hobby Cutting Machines, PE-DESIGN 11 will help you convert the PHX embroidery file format from the Luminaire to FCM for ScanNCut use. PE-DESIGN 11 also offers Wireless LAN Connectivity, exclusive to the Luminaire Innov-ís XP1, which allows a person to transfer designs wirelessly back and forth from your PC to their machine!
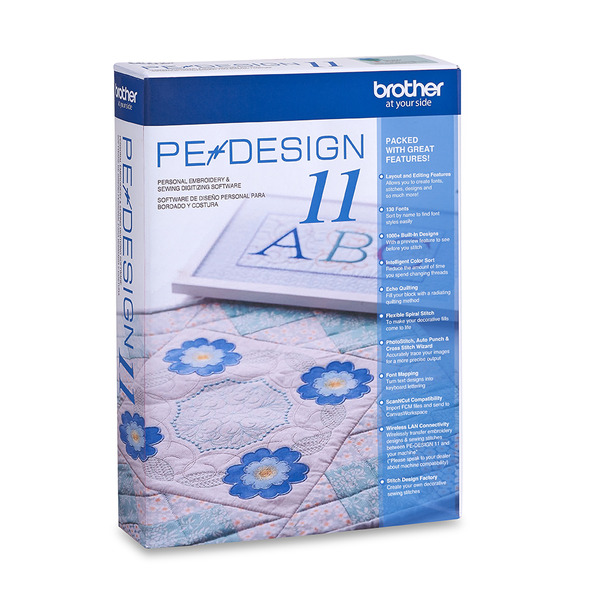
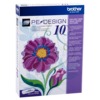
PE-DESIGN 11
Packed with powerful and time-saving features, this software is for both the casual hobbyist or the home-based business entrepreneur. Imagine the ability to create your own fonts, stitches and designs once to use many times on hats, pillows, shirts and more. Help reduce the amount of time spent changing threads by using the Intelligent Color Sort feature that will stitch the areas that share one color in groups. Best yet, if you own the Luminaire XP1, enjoy Wireless LAN Connectivity to transfer your embroidery designs and sewing stitches wirelessly.
We have packed this software with so many time-saving features that will help you create more in less time. Imagine the capability to create your own fonts, stitches and designs - just once - to use many times on hats, pillows, shirts, and other fabrics. Reduce the amount of time spent changing threads by using the Intelligent Color Sort feature, which will stitch those areas that share one color in groups.
New PEDesign 11 Update 11.21
PE-DESIGN 10 - Firmware Update to Version 10.21 at https://support.brother.com/g/b/countrytop.aspx?c=us&lang=en
We would like to inform you we have released a software update version 11.21 for PE-DESIGN11 on Brother Solutions Center. There are many enhanced features listed below:
- Layout & Editing
Improved functionality of editing an embroidery pattern for region sewing when Spiral Stitch is selected as a sew type.
Improved functionality of importing a vector image data with Scalable Vector Graphics (.svg) file format.
Improved functionality of importing a vector image data with Windows Metafile (.wmf) file format.
- Design Center
Improved functionality of opening a .pem file.
- Design Database
Improved the functionality when importing the embroidery pattern into Layout & Editing.
PEDesign 10 Update
PE-DESIGN 10 - Firmware Update to Version 10.21
PE-DESIGN® 10
New, convenient USB-style software key
130 built-in fonts, over 1000 built-in designs
View design thumbnails in Windows® Explorer
View names of built-in fonts
Enhanced PhotoStitch™ masks and color settings
Enhanced density setting for 3D and puffy foam
Intelligent color sort to reduce thread changes
New chain stitch and net fill stitch
Improved Stitch to Block now keeps sewing attribute
PE Design 11 video library
Learn to Wireless Transfer from PE Design 11 and ScanNCut (.PDF)
- US Warranty 30 days replacement if defective.
- Non-US Warranty: 30 days parts and labor
Watch to learn more about the new, convenient USB-style software key, new chain stitch and net fill stitch and intelligent color sort to reduce thread changes. With more than 1000 built-in designs and 130 built-in fonts, as well as enhanced PhotoStitch™ masks and color settings and enhanced density setting for 3D and puffy foam, it's easier than ever to bring your design vision to life.
*PEDesign 10 new features list from Cindy Hogan
- USB style Dongle with installation program on USB device.
- New opening screen wizard
- Fabric and hoop selector
- Streamlined platform (3 tabs instead of 5)
- Displays embroidery designs as thumbnails (pes data) – show view icon options
- 120 Fonts + 10 micro fonts, fonts have been re-digitized, more characters and symbols have been added to some of the fonts and the character spacing has been adjusted
- Font Filter
- Names of Fonts and recommended min size added to built in fonts
- New Stitch Types – explain that gapping can result or lines can peek out.
- Optimize Sewing Order Command – Color Sorts and changes entry and exit points to closest connection
- Matrix copy
- Embroidered Patch Wizard
- Cutwork Wizard available for all, but cutting function only available if PR hoop is selected
- Enhanced Applique wizard – can do multiple items on the screen, can do lettering without converting to outline all in one click, can do pre-digitized designs
- Guideline function has been added
- Hide objects not stitched in the Sewing order window
- Hide items on screen to assist in editing – Show Stitched Objects
- Ghost image when using the split stitch function
- Color list can be set to display Color Changes or Total colors
- Import patterns docked on the Integrated Sewing Attributes Screen
- New pattern categories
- Left click and hold on a pattern and a dotted line will appear in the design window to show size
- Smart color sort button
- Block punch tool can be edited with outline tool functions including remove overlap, Merge, set hole sewing, create offset lines, applique wizard, create floral lines, etc.
- All fills available for manual punch
- Convert to Outline for Pre-digitized patterns
- Split at point
- Connect points
- Split Outline tool
- Paste Attributes command
- EMF and SVG files can be digitized with the Import from Vector file
- Patterns can be imported from Design Center into layout and editing as outline format for advanced editing
- More right mouse click menu options
- Guidelines added for alignment
- Enhanced photo stitch
- More designs
- New 9 ½ x 14 in hoop – for The Dream Machine
- Measure tool has been improved – left click to start, left click to end. Look at measurement at bottom of menu – gives length height and angle of area measured
- Resizing has been improved doesn't tend to change the stitch type.
- Import color charts
- Moved Stitch view icons to bottom of screen
- Double the density for puffy foam
- Edit points available for circles and squares.
Legal Disclaimers:
*Choosing a stitch width of 100mm may affect stitch quality.
†Please speak to your dealer about machine compatibility.
^Images are for illustrative purposes only. The Flip-Pal™ mobile scanner mark and logo are the trademarks of Couragent, Inc. All other trademarks referenced herein are the property of their respective owners. Flip-Pal™ mobile scanner is a Couragent, Inc. product and Brother International Corporation makes no representations or warranties regarding such product. Couragent, Inc. is not a participant or sponsor of this promotion. For more information regarding the Flip-Pal™ mobile scanner, visit http://www.flip-pal.com.
#Certain pre-load licensed images are for personal use only.
All trademarks and registered trademarks referenced herein are the property of their respective companies.
©2018 Brother International Corporation.
Pe Design 11: New one click features by Cindy Hogan, Brother Educator:
Brother PE-DESIGN 11 Update software version 11.10
This software update provides the following changes.
PE-DESIGN 11 Version 11.10
[ Layout & Editing ]
Ÿ The following new embroidery frame setting is available in the Design Settings dialog box.
(* Availability depends on the embroidery machine model.)
272 mm x 272 mm / 10-5/8" x 10-5/8"
Ÿ Improved functionality of saving an embroidery data (.pes) in a format for a previous version.
Ÿ Improved connectivity with the machine via the wireless network.
Ÿ Improved functionality of transferring the data to a machine via wireless network.
Ÿ Improved functionality of creating embroidery pattern for region sewing when Satin Stitch, Fill Stitch or Programmable Fill Stitch is specified as the sew type.
Ÿ Improved functionality of creating embroidery pattern for line sewing when Chain Stitch is specified for the line sew type.
[ Design Center ]
Ÿ The following new embroidery frame setting is available in the Design Page Settings dialog box.
(* Availability depends on the embroidery machine model.)
272 mm x 272 mm / 10-5/8" x 10-5/8"
[ Design Database ]
Ÿ Improved the functionality of deleting data when multiple files are selected.
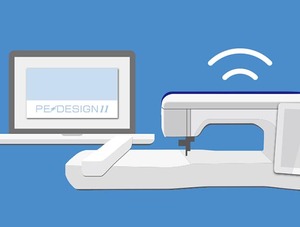 Exclusive Wireless LAN for Luminaire XP1
Wirelessly transfer embroidery designs and sewing stitches between
PE-DESIGN 11 and the Luminaire XP1.+
Exclusive Wireless LAN for Luminaire XP1
Wirelessly transfer embroidery designs and sewing stitches between
PE-DESIGN 11 and the Luminaire XP1.+
 Using the Large Luminaire XP1 Hoop
Large Split Pattern functionality is enhanced using the Snowman Positioning Marker. Create large split designs using the large 10 5/8" x 16" hoop of the Luminaire XP1.
Using the Large Luminaire XP1 Hoop
Large Split Pattern functionality is enhanced using the Snowman Positioning Marker. Create large split designs using the large 10 5/8" x 16" hoop of the Luminaire XP1.
 Create and Be Creative.
Let your imagination soar with the ability to create your own decorative sewing stitches up to 100mm wide* by using the Stitch Design Factory and create your own fonts with the Font Mapping Tool that will let you use them later as built-in lettering.
Create and Be Creative.
Let your imagination soar with the ability to create your own decorative sewing stitches up to 100mm wide* by using the Stitch Design Factory and create your own fonts with the Font Mapping Tool that will let you use them later as built-in lettering.
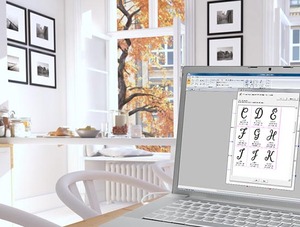
 Save Time Searching
Having the ability to choose your own built-in fonts and designs in less time will help you start your projects sooner. Using the font filter will help you narrow down your choices from the 130 fonts built into PE-DESIGN 11. Choosing from over 1,000 built-in designs is now easier with the design preview that lets you see your choice before you stitch.
Save Time Searching
Having the ability to choose your own built-in fonts and designs in less time will help you start your projects sooner. Using the font filter will help you narrow down your choices from the 130 fonts built into PE-DESIGN 11. Choosing from over 1,000 built-in designs is now easier with the design preview that lets you see your choice before you stitch.
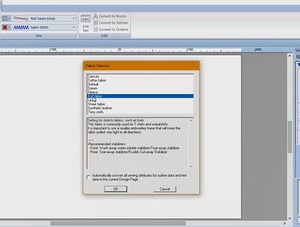 Power in Automation.
How much time do you spend trying to figure out what type of stitch you need for your fabric or the time it takes to change threads and match color segments? PE-DESIGN 11 has a Fabric Selector that will automatically adjust the sewing attributes for your embroidery based on your fabric selection. The Intelligent Color Sort function will group stitches that share the same colors so you can reduce the time spent changing threads.
Power in Automation.
How much time do you spend trying to figure out what type of stitch you need for your fabric or the time it takes to change threads and match color segments? PE-DESIGN 11 has a Fabric Selector that will automatically adjust the sewing attributes for your embroidery based on your fabric selection. The Intelligent Color Sort function will group stitches that share the same colors so you can reduce the time spent changing threads.
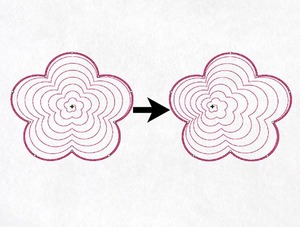 Flexibility and Movement
Round and Flexible Spiral Stitches add motion and dimension to your embroidery shapes. Stitches can be set to follow the shape of your embroidery, or stand out to give you a three-dimensional effect.
Flexibility and Movement
Round and Flexible Spiral Stitches add motion and dimension to your embroidery shapes. Stitches can be set to follow the shape of your embroidery, or stand out to give you a three-dimensional effect.
 Transform Photos Into Embroidery with PhotoStitch
Create embroideries from photos with the PhotoStitch feature. Transform your photos into works of art to be framed, put on tote bags, tapestries and so much more. The PhotoStitch, Auto Punch, and Cross Stitch Wizards have enhanced tracing capabilities for a more accurate output.
Transform Photos Into Embroidery with PhotoStitch
Create embroideries from photos with the PhotoStitch feature. Transform your photos into works of art to be framed, put on tote bags, tapestries and so much more. The PhotoStitch, Auto Punch, and Cross Stitch Wizards have enhanced tracing capabilities for a more accurate output.
 ScanNCut Compatible.
Import FCM files to create embroidery designs. Create FCM files to send to CanvasWorkspace or directly to a wirelessly enabled ScanNCut Home and Hobby Cutting Machine.
ScanNCut Compatible.
Import FCM files to create embroidery designs. Create FCM files to send to CanvasWorkspace or directly to a wirelessly enabled ScanNCut Home and Hobby Cutting Machine.
 PE-DESIGN 11
We have packed this software with so many time-saving features that will help you create more in less time. Imagine the capability to create your own fonts, stitches and designs - just once - to use many times on hats, pillows, shirts, and other fabrics. Reduce the amount of time spent changing threads by using the Intelligent Color Sort feature, which will stitch those areas that share one color in groups.
PE-DESIGN 11
We have packed this software with so many time-saving features that will help you create more in less time. Imagine the capability to create your own fonts, stitches and designs - just once - to use many times on hats, pillows, shirts, and other fabrics. Reduce the amount of time spent changing threads by using the Intelligent Color Sort feature, which will stitch those areas that share one color in groups.
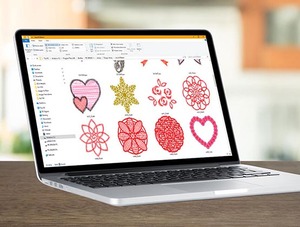
 Add More to Your Quilting Projects.
PE-DESIGN 11 will help you create custom stitches and provides more decorative fills to help you do more with your quilts.
Add More to Your Quilting Projects.
PE-DESIGN 11 will help you create custom stitches and provides more decorative fills to help you do more with your quilts.
 Create and Be Creative
Let your imagination soar with the ability to create your own decorative sewing stitches up to 100mm wide* by using the Stitch Design Factory and create your own fonts with the Font Mapping Tool that will let you use them later as built-in lettering.
Create and Be Creative
Let your imagination soar with the ability to create your own decorative sewing stitches up to 100mm wide* by using the Stitch Design Factory and create your own fonts with the Font Mapping Tool that will let you use them later as built-in lettering.
 Save Time Searching.
Having the ability to choose your own built-in fonts and designs in less time will help you start your projects sooner. Using the font filter will help you narrow down your choices from the 130 fonts built into PE-DESIGN 11. Choosing from over 1,000 built-in designs is now easier with the design preview that lets you see your choice before you stitch.
Save Time Searching.
Having the ability to choose your own built-in fonts and designs in less time will help you start your projects sooner. Using the font filter will help you narrow down your choices from the 130 fonts built into PE-DESIGN 11. Choosing from over 1,000 built-in designs is now easier with the design preview that lets you see your choice before you stitch.
SNC SDX330D and SDX325 come with a My Connection button that will talk to XP2 Luminaire machines, but not the PR machines. Any of the SNC machines will cut the HTV. Becky Thompson of Power Tools with Thread.
All SDX machines can communicate wirelessly with PE-DESIGN 11 from the ScanNCut tab. You can Import and Export fcm files. At this time the only machines that communicate wirelessly with the SDX325 and SDX330D is the Luminaire XP1orXP2 through My Connection. My Connection is only on these 2 ScanNCut models. My Connection is activated on the Luminaire with a code that comes with the SDX325 and SDX330D. Cindy Hogan www.cynthiasembroidery.com
Hi John,If the only issue she is having is the hoop size, she can create her own hoop using the Edit User Hoop function in the Design Settings menu.First step change her system unit of measure to metric. Next, click on Design Settings, Choose Edit User Hoop.For the 9.5x9.5 hoop type in 240mm x 240mm, name the hoop and then click Add Hoop.For the 9.4x 14 hoop, type in 240 x 360mm, name the hoop and then click Add Hoop.Click OK.The hoop will be listed underneath a black line below the built in hoops. There is one other reason to upgrade to Version 11. Her XJ saves out as a PHX. Neither NEXT or 10 will allow her to import any designs she saves off the machine. Hope this information is helpful, Cindy Hogan
Recommended Accessories


Brother SAVRPED10 PEDesign to v10 Embroidery Software Upgrade Only from v5-9.0
Brother PEDesign Next (Babylock Palette) v9 Embroidery Digitizing Software


Other Items You May Be Interested In
-
Brother BE1 BE Embroidery Studio Software
-

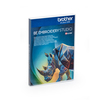
Brother PEDESIGN 11 Full Version Software Package +Durkee STURDYPED8 X14" Sturdi Frame Split Design Hoop for PRS100 Persona and Babylock Alliance BNAL
Free Ground Shipping to the Contiguous USA Retail -
Brother PEDESIGN11 Full Version Software +Durkee STURDYPED12x14" SturdiFrame Split Design Hoop for PR600 PR620 PR650 PR655 PR670 PR1000 PR1050 PR1055
$1,599.99 Free Ground Shipping to the Contiguous USA Retail -
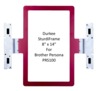
Brother SASTURDY8X14 8" x 14" DURKEE Split Design Hoop Frame for PRS100 Persona and Babylock Alliance BNAL requires PEDesign11 w/Split Design Software
$199.95 Free Ground Shipping to the Contiguous USA -

Brother SASTURDY12 X14" DURKEE Sturdi Split Design Hoop Frame for 6 & 10 Needle PR600 PR620 PR650 PR655 PR670 PR1000 PR1050 PR1050X needs PE Design 11
$249.95 -
Brother PE-DESIGN10 PE Design Palette Full Version v10 Embroidery Digitizing Software with Patch, Applique, Cutwork Wizard (See Trial Version*)
$1,399.99 Free Ground Shipping to the Contiguous USA -
Brother PE-Design Next (Babylock Palette) v9 Embroidery Design and Digitizing Software
Free Ground Shipping to the Contiguous USA -
Brother PRCW1 4 Fabric Cutting Needles +Cutwork Software +Firmware UPG Upgrade for PR650, PR655E & PR1000/E, NOT for Newer Models PR1050/55, PR670/680
$499.00 Free Ground Shipping to the Contiguous USA -
Brother SARES Apple Macintosh MacBroidery Lettering Monogram Software *6 Extras $20 Values! Reduced $50 More. Will not be updated for High Sierra.
$399.99 -
Cynthia Cindy Hogan "Digitizing Sew Easy" Book for Brother PE Design & Babylock Palette 7.0. Instruction, Techniques Workbook, 545 Pages, Screen Shots
$29.99 Free Ground Shipping to the Contiguous USA -
Cynthia Hogan DSEV8 Digitizing Sew Easy Book Brother PE Design 8.0
$69.99 Free Ground Shipping to the Contiguous USA -

Cynthias Embroidery Brother BES Lettering's Sew Easy Original 311 Page Book with 10 Projects by Cindy Hogan
$69.99 -

Embroidery Office D50 Design Max Basic Digitizing Software, Complete Group of Tools to Create Embroidery Designs
Free Ground Shipping to the Contiguous USA -

Floriani Total Control F-TCU FTC-U Embroidery Digitizing Software
$1,899.00 Free Ground Shipping to the Contiguous USA -
Electric Quilt ASTITCH EQ Stitch Embroidery Quilting Applique Redwork Digitizing Software DVD, Plug-In for EQ7, Video, 6 Lessons, 500 Built In Designs
$249.95 Free Ground Shipping to the Contiguous USA -
Bernina 033881.71.00 Designer Plus 7 Embroidery Digitizing Software for Windows 7
Free Ground Shipping to the Contiguous USA
